Isla de los Monos (Monkey Island)

IMG_0843
IMG_0854
IMG_0796

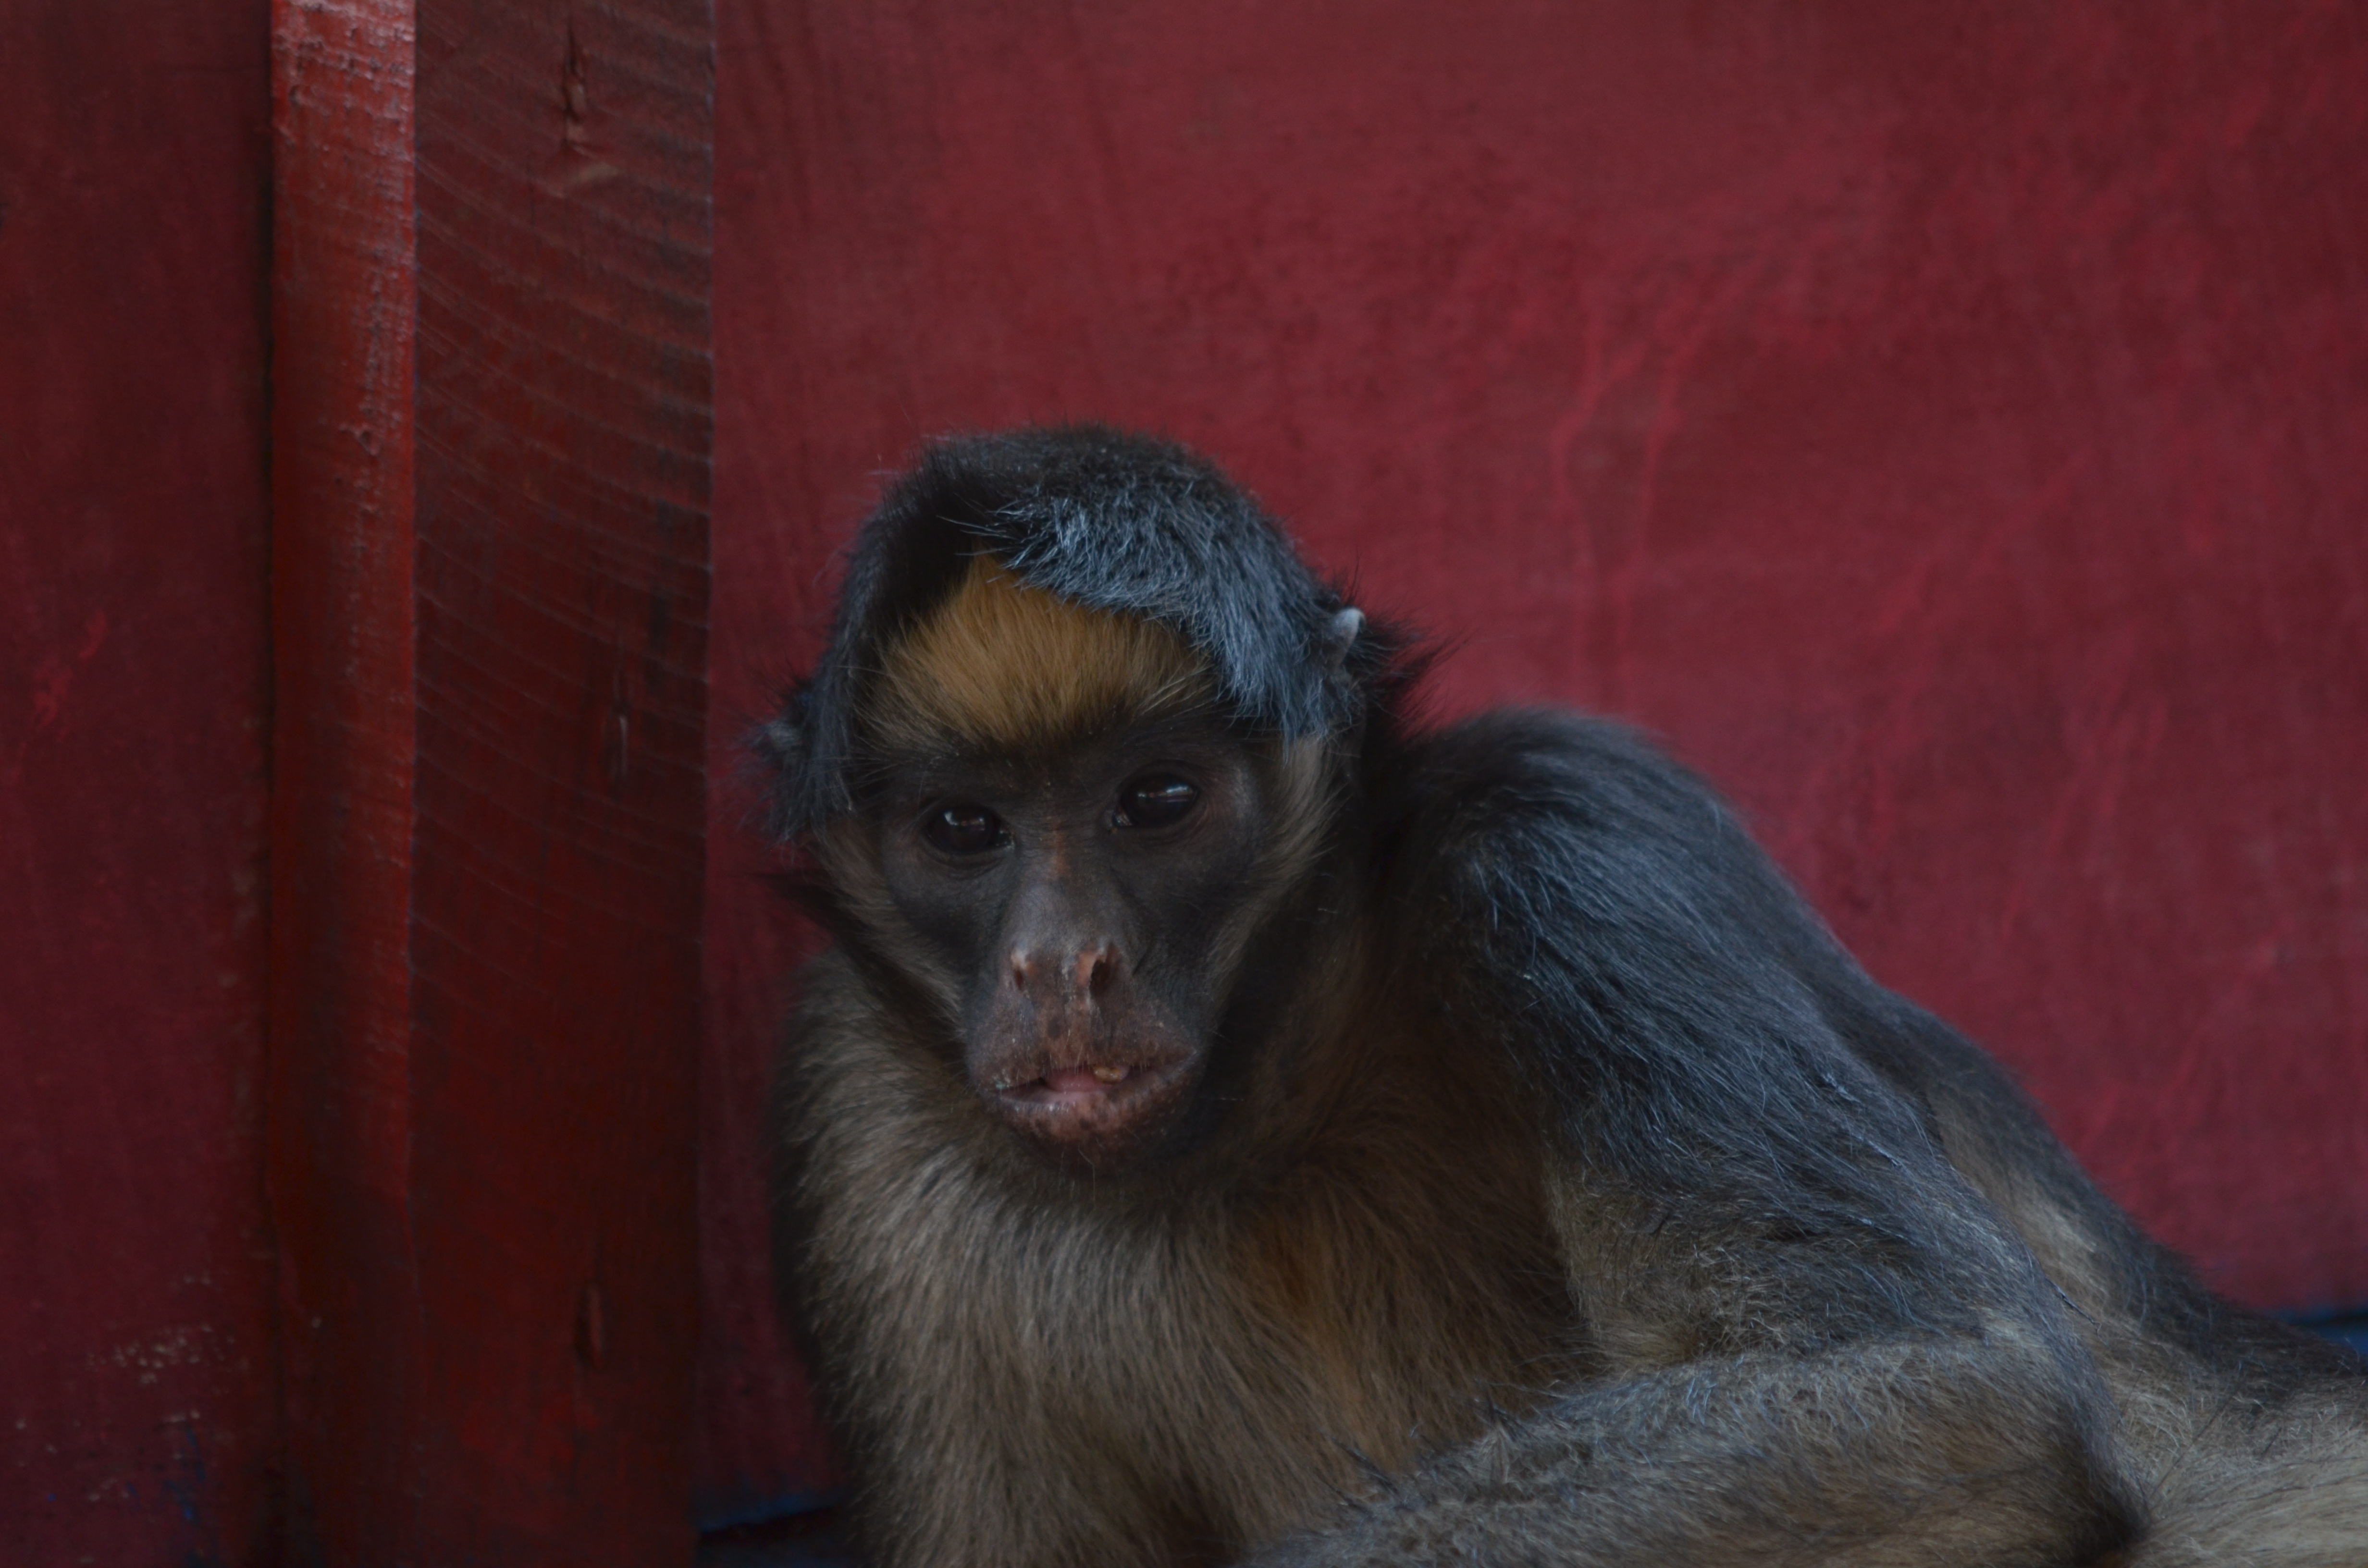
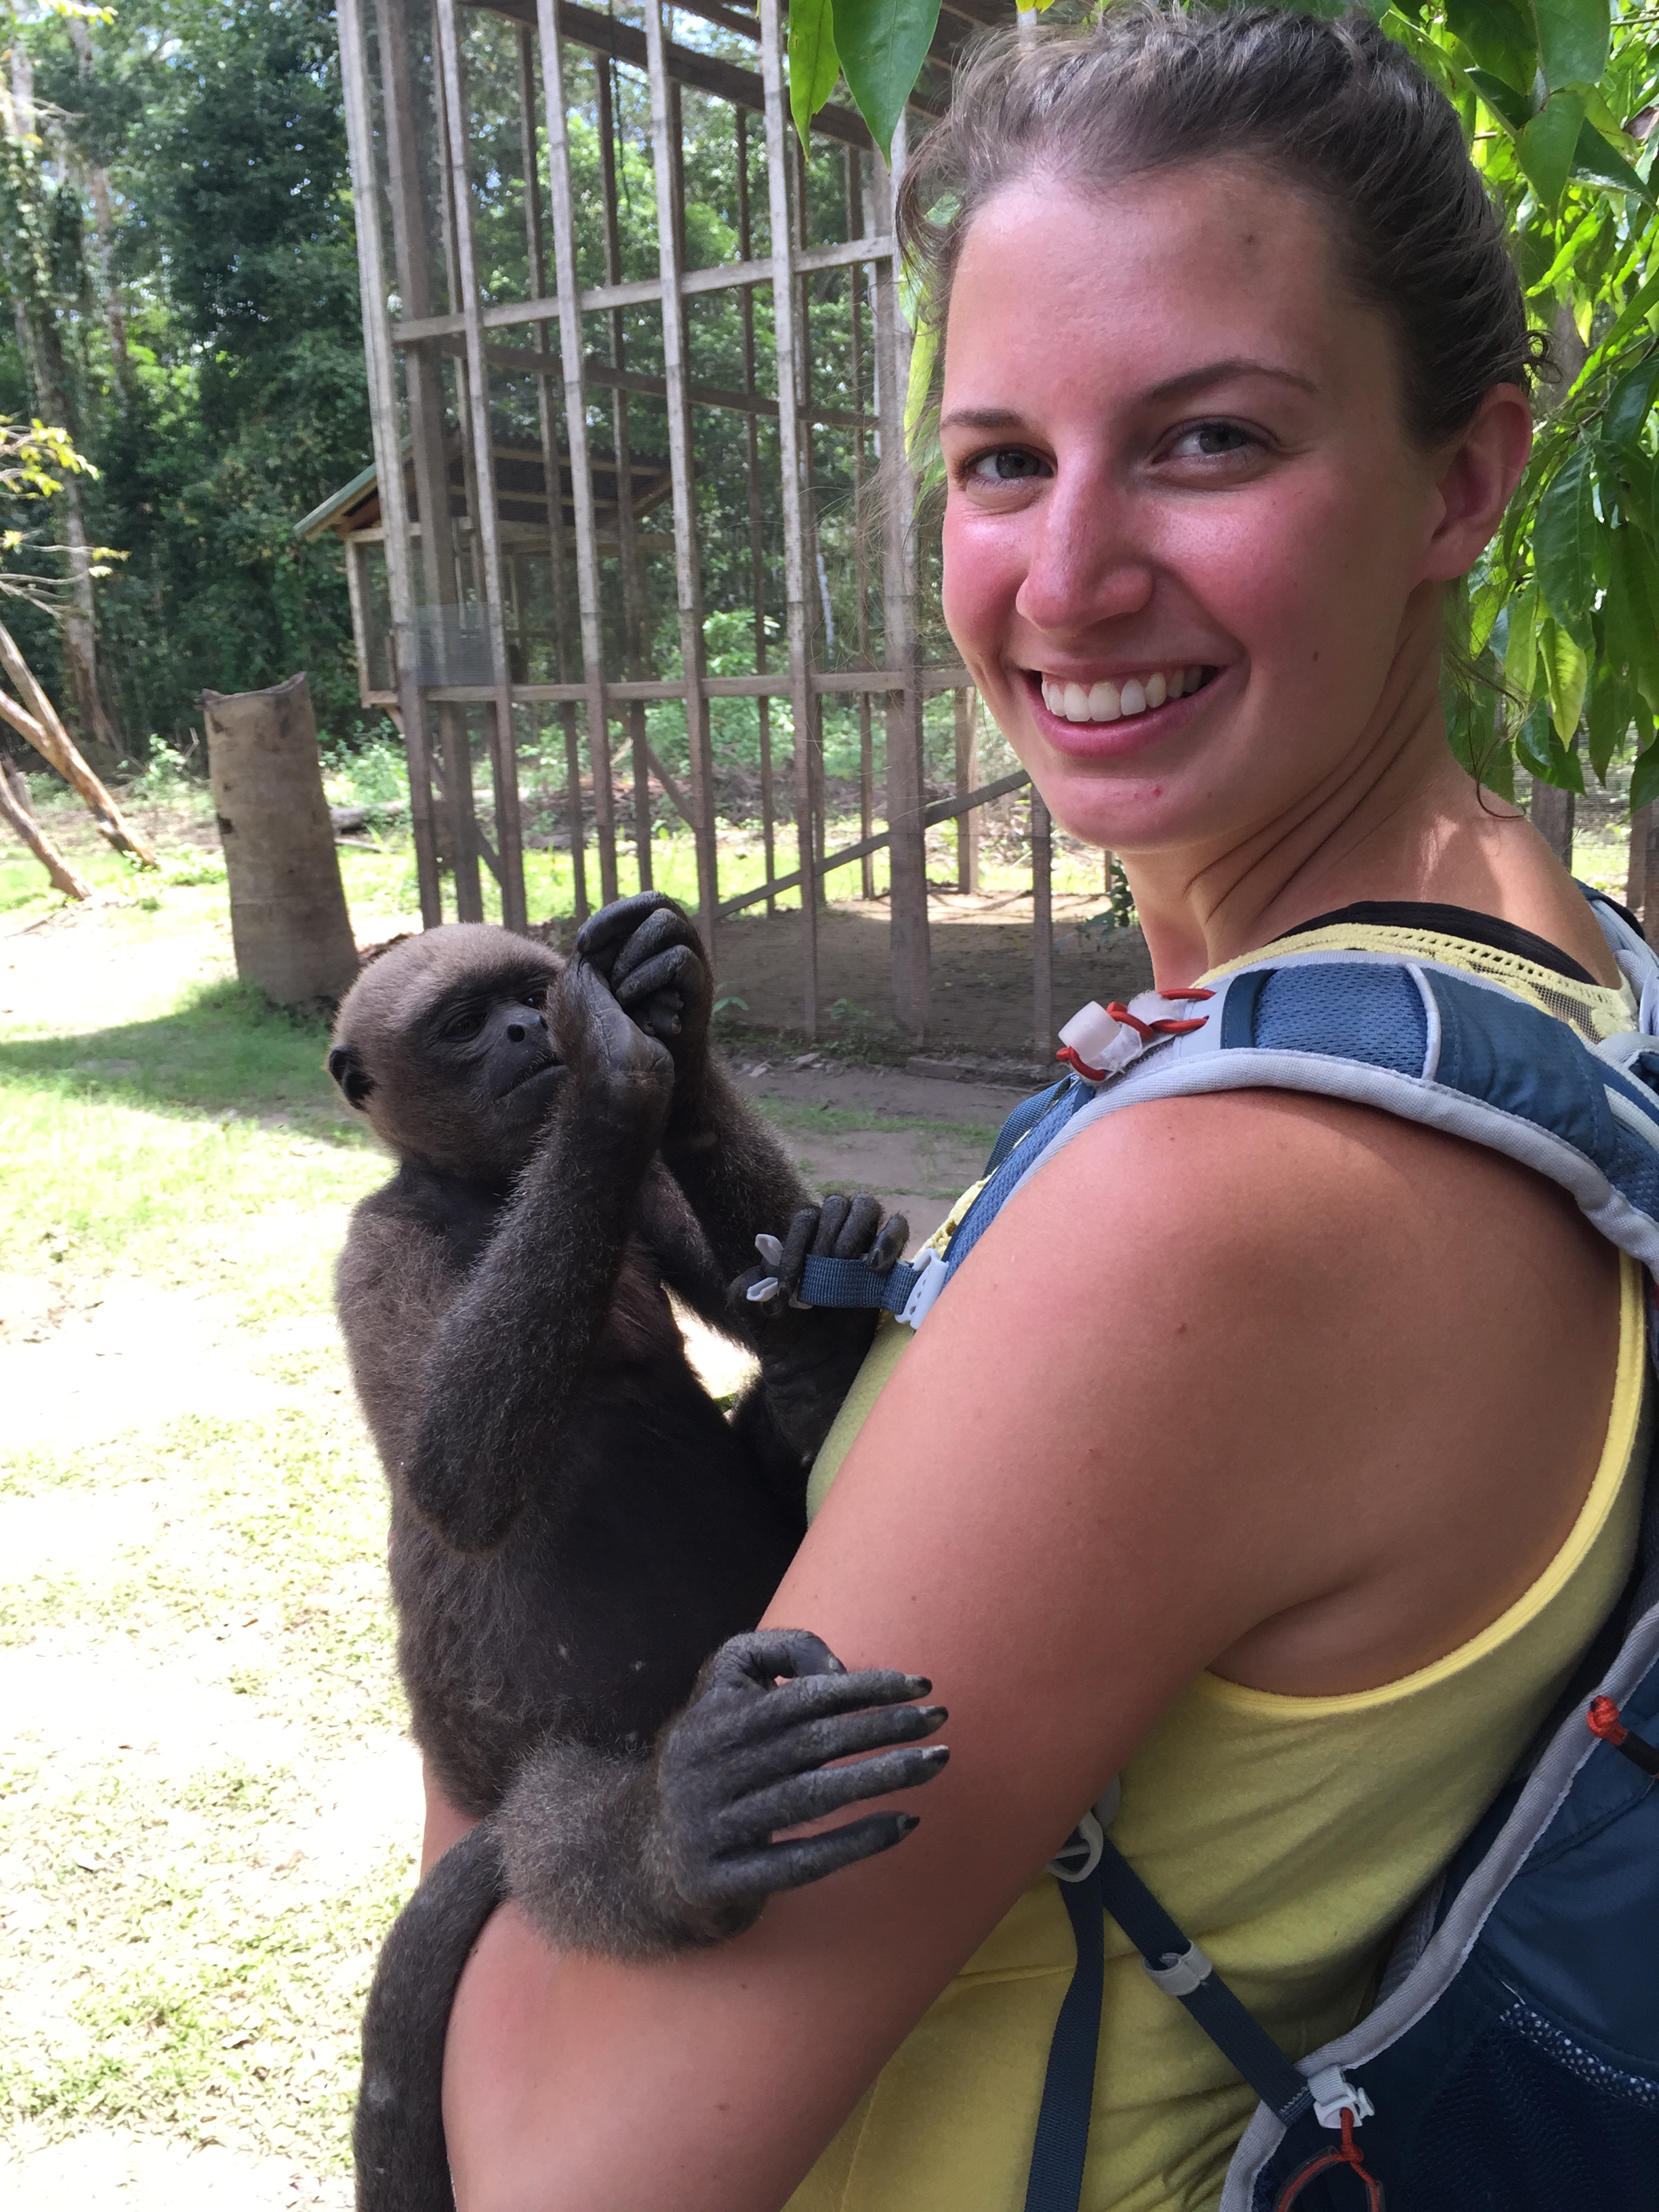
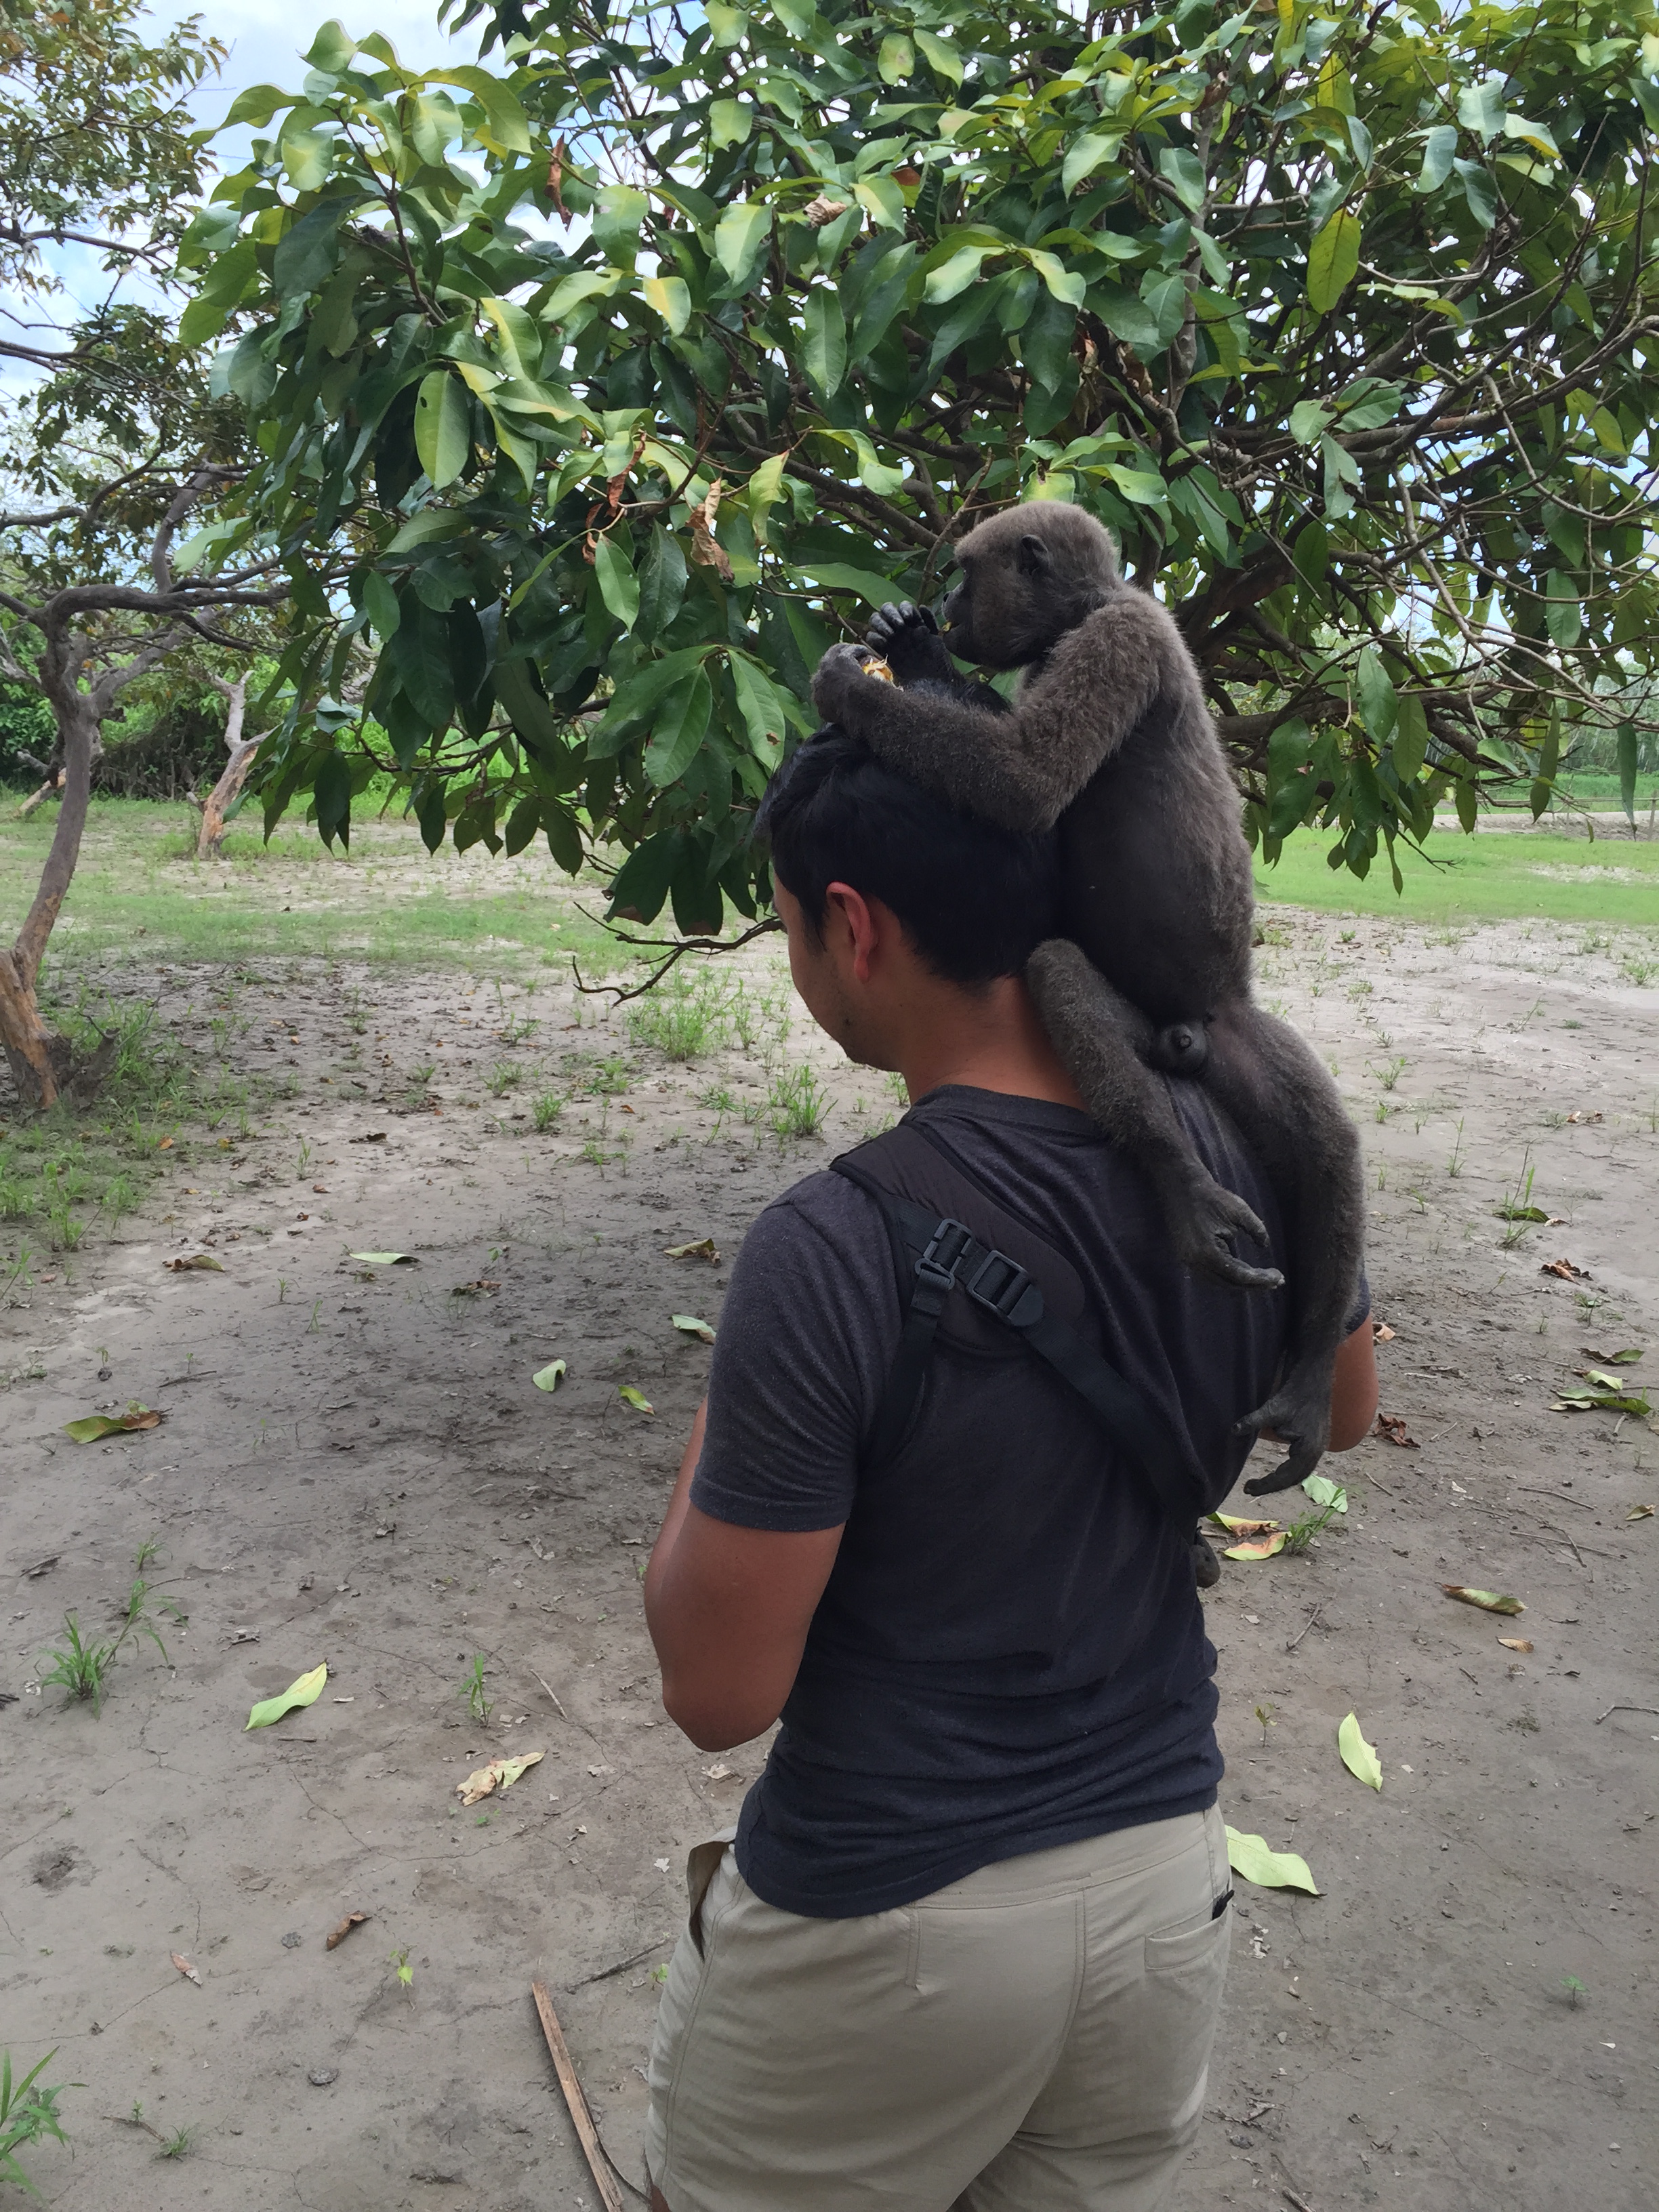
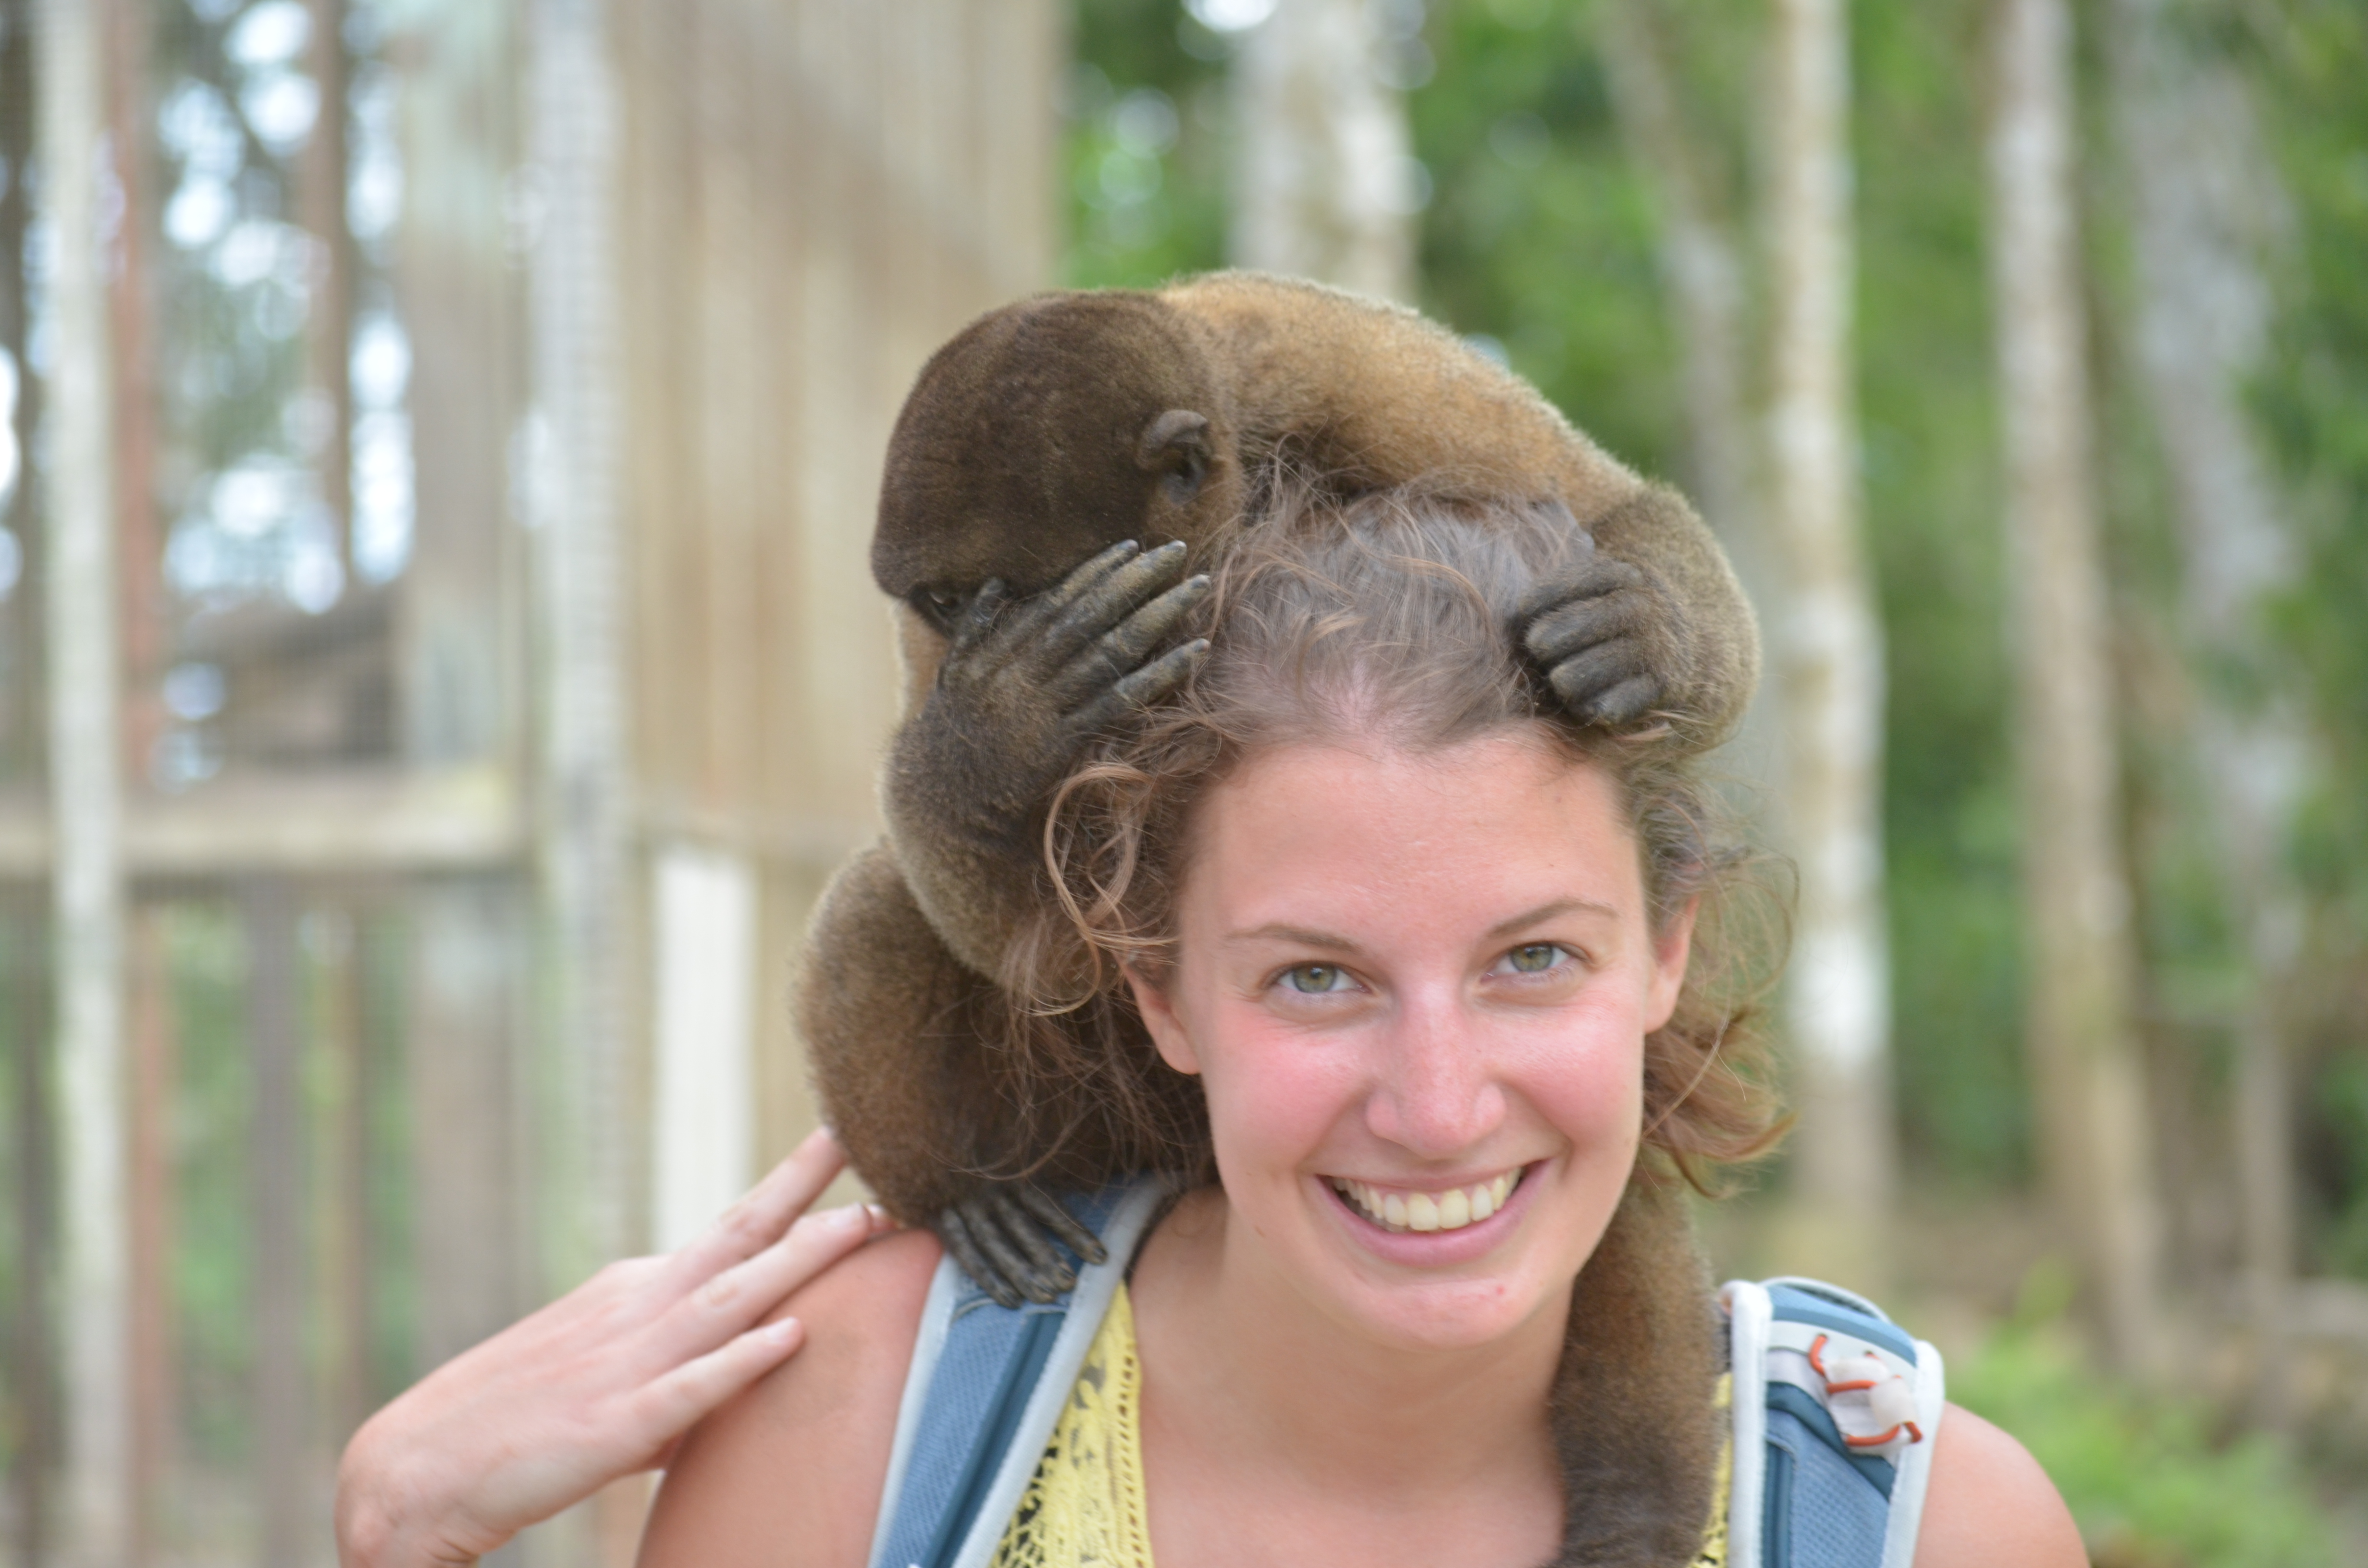
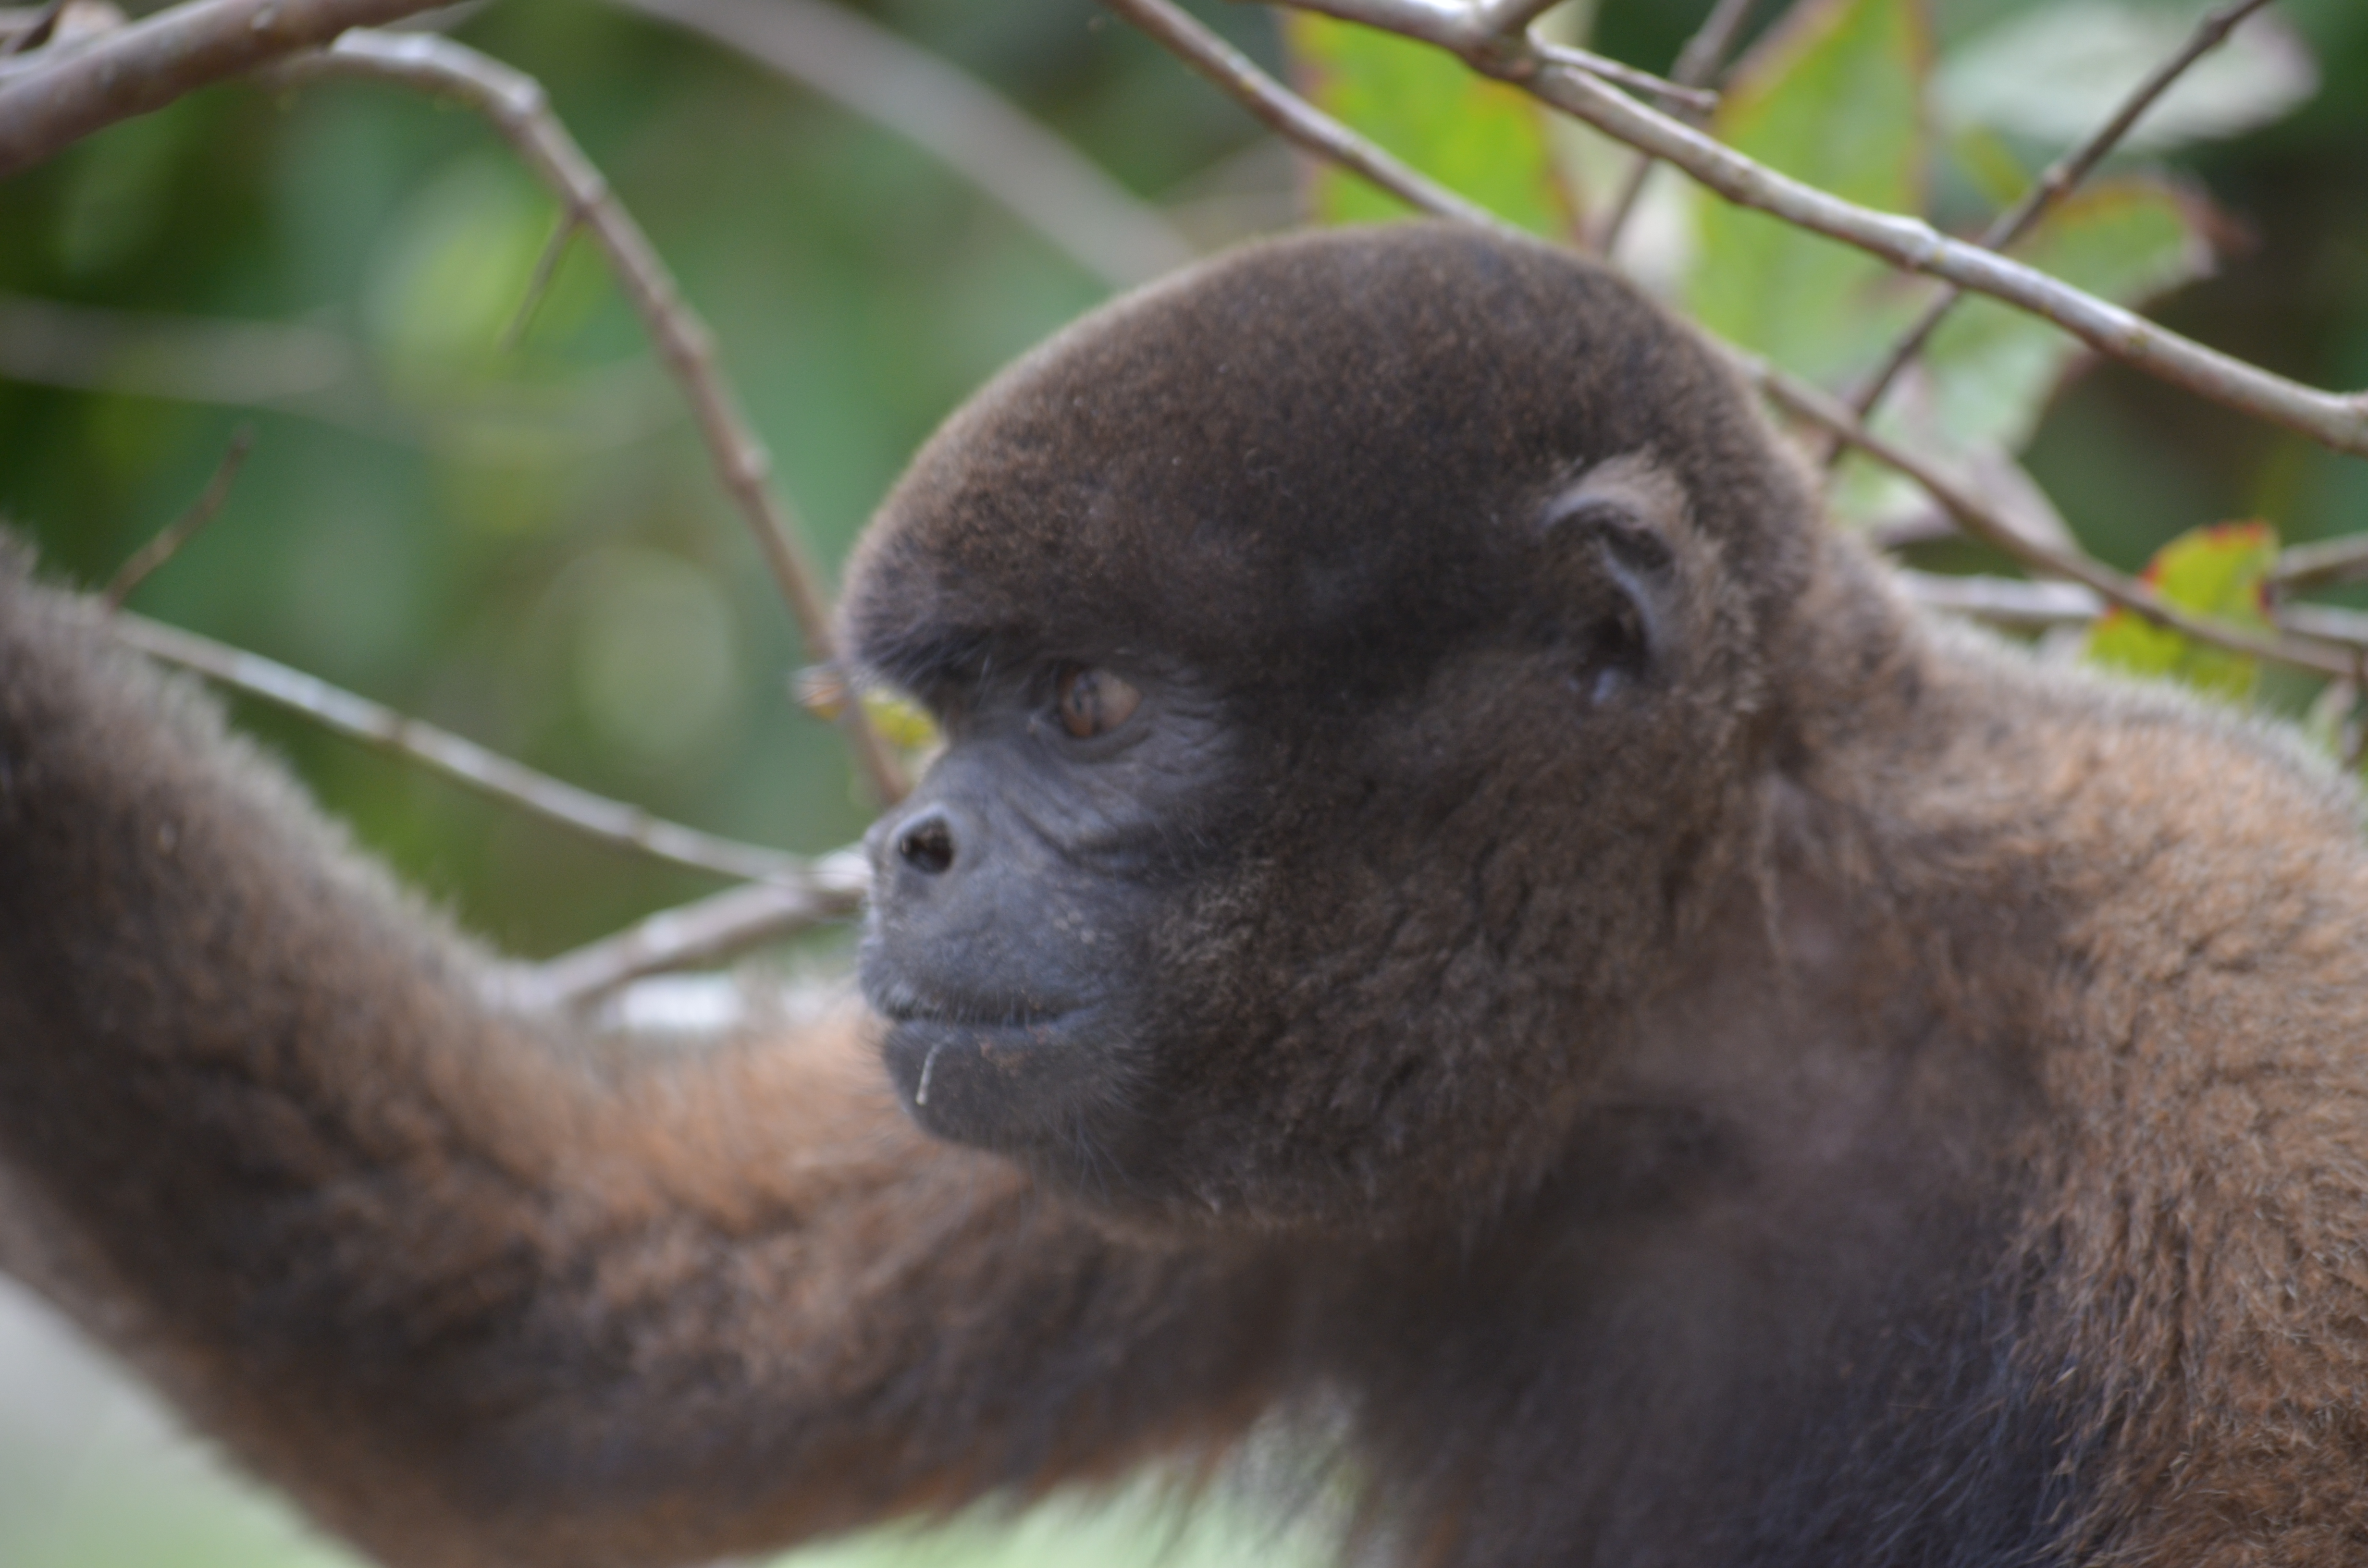
This by far topped our list as one of our most favorite aspects of our Peru trip! Who doesn’t want to go to an island dedicated entirely to rehabilitating monkeys and the monkeys love nothing more than climbing all over the guests? Isla de los Monos (Monkey Island) provided just that.

DSC_0301
DSC_0315
DSC_0336
DSC_0340
DSC_0319

First of I should begin by saying there are now two Monkey Islands near Iquitos. One of them is them is great and the other is awful. So make sure you’re getting to the right one. The correct one is about 45 minutes away via boat while the bad one is only about 10-15. So if you get there really fast you’ll know you’re at the wrong one. The close one used to be called Las Boas and they do not take good care of the animals there, many of the animals have been bought or hunted illegally and end up with lots of issues of being sick and dying. Please avoid this one! Tourists are often tricked into going here because they aren’t aware of the difference so be sure to educate yourself before traveling.

DSC_0320
DSC_0323
DSC_0326
DSC_0329
DSC_0356
DSC_0370
IMG_0822

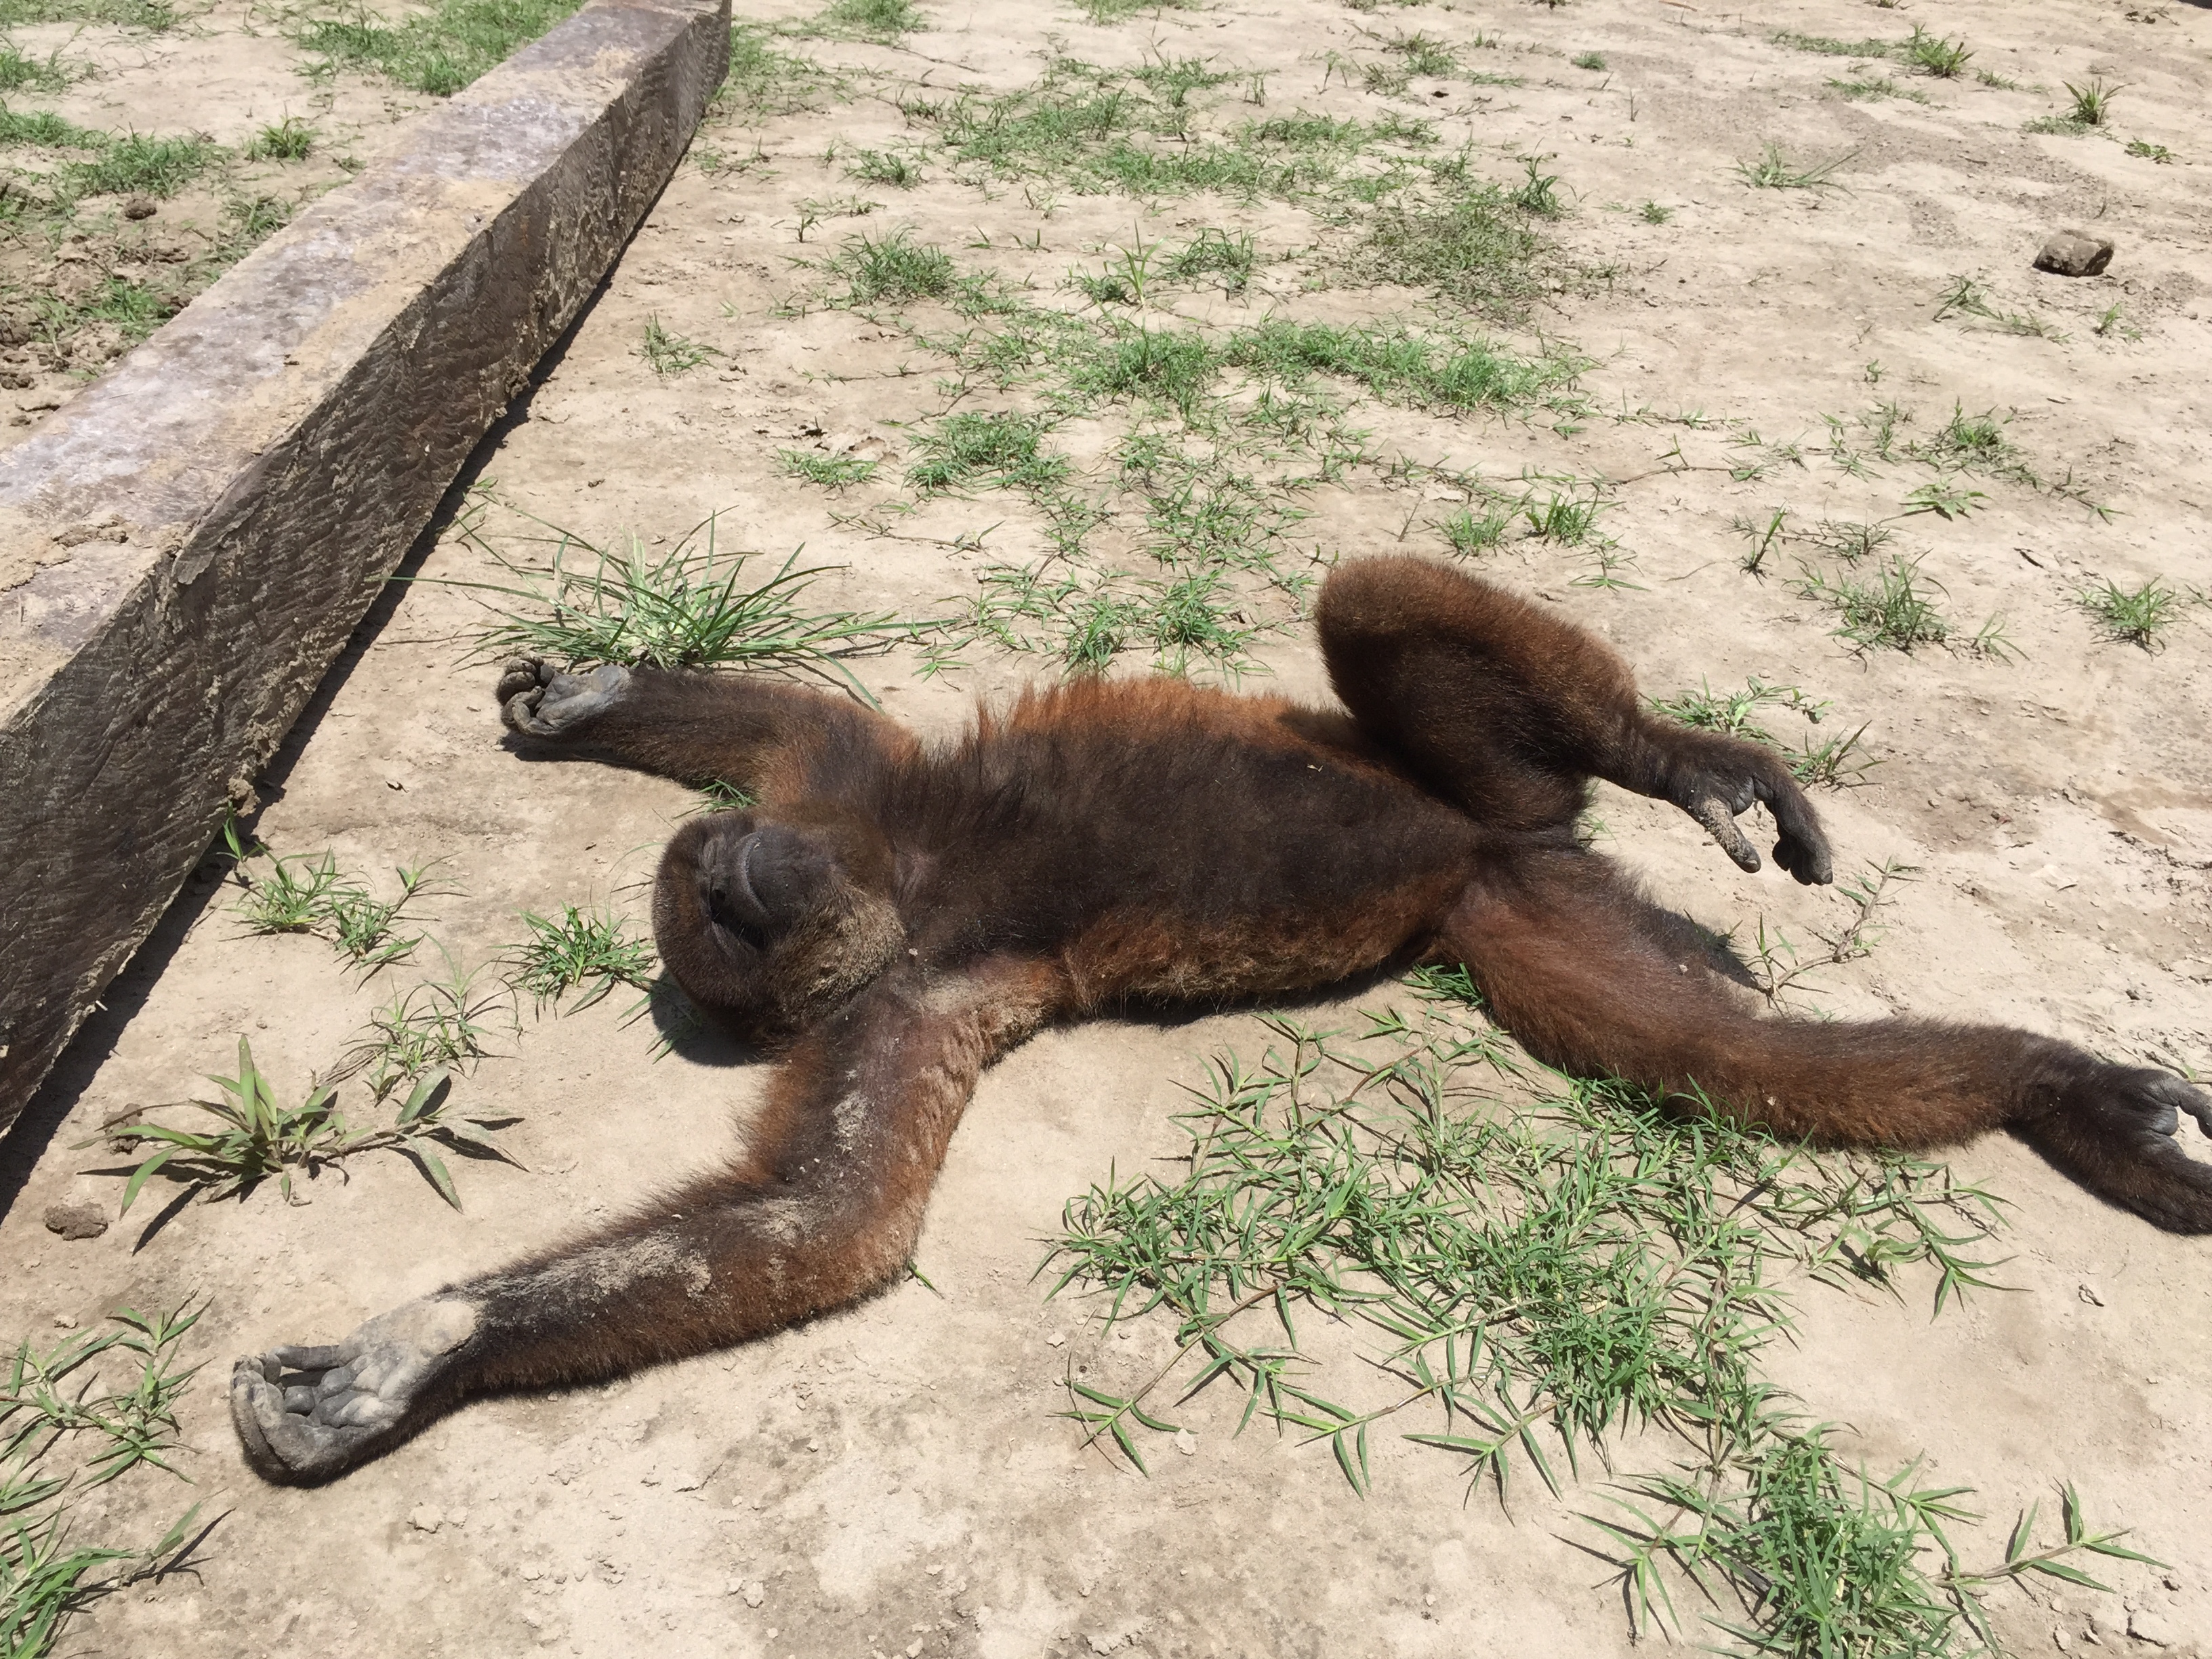
The best time to visit the monkeys is in the morning as by around lunch time the sun really starts beating down and the monkeys try to hide more to avoid the heat. You can visit the website here for more information.

IMG_0830
IMG_0835
IMG_0853
DSC_0349

Before you begin your trip, be sure to contact Gilberto (the manager) at Monkey Island if you are planning to take public transport to get there. The stop for the collectivo boats is on the opposite side of the river as the island and you’ll need him to meet you there with a boat to take you across the river. Just plan to call in the morning before you leave or the evening before. Here are the phone numbers on their website to try, you may have to try a couple times before you get an answer:

Office Number: (51 – 65) 235887

Cell phone numbers:      (51) 965 841 808 /                   (51) 965 841 807 /                        (51) 987 610 985

To get to the real Isla de los Monos you’ll need to take a taxi to Puerto de Productores (Producers Port). Do NOT go to Port Bella Vista-Nanay which is where the other Monkey Island is. It looks very sketchy but go through the little market area and out the back towards the river. Walk down all the stairs and ask/look for a collective boat going to Mazan. This boat takes 45 minutes and is 15 soles per person. However, a word of caution, be prepared to wait until the boat is completely full of passengers. That means if you’re among the first to board you may have a long wait ahead of you- we had to wait 45 minutes alone just for the boat to fill up! In retrospect we may have just rented a boat privately that would take us there directly. However, I’m not sure how much that would cost. You could ask at your hotel or possibly at the port itself. If you do hire your own boat, be sure to specify which Monkey Island you want to go to and mention Gilberto’s name, the manager of the real Monkey Island.

isla de los monos

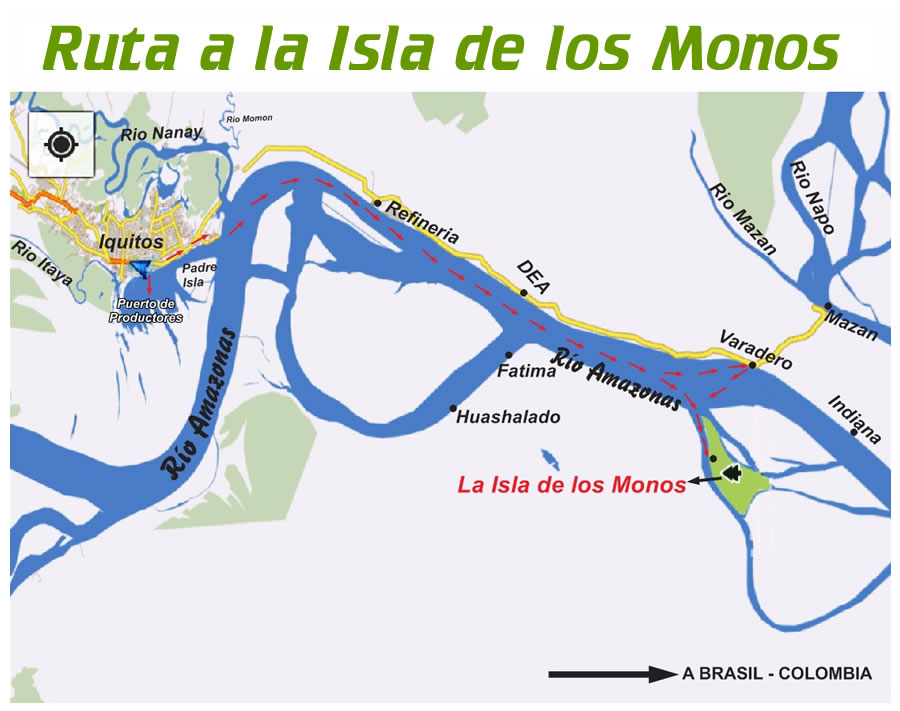
Once you’re on the boat make sure to get off at the Mazan stop- this was the first stop for us and you can ask the other passengers around you if it’s Mazan. If you called ahead, there should be a boat waiting for you there already that has the Monkey Island sign in orange on top of it. Climb on board and set out for another 15-20 minutes to cross the river. The cost for this round trip service is 20 soles.

IMG_0829
IMG_0798
DSC_0312
DSC_0332

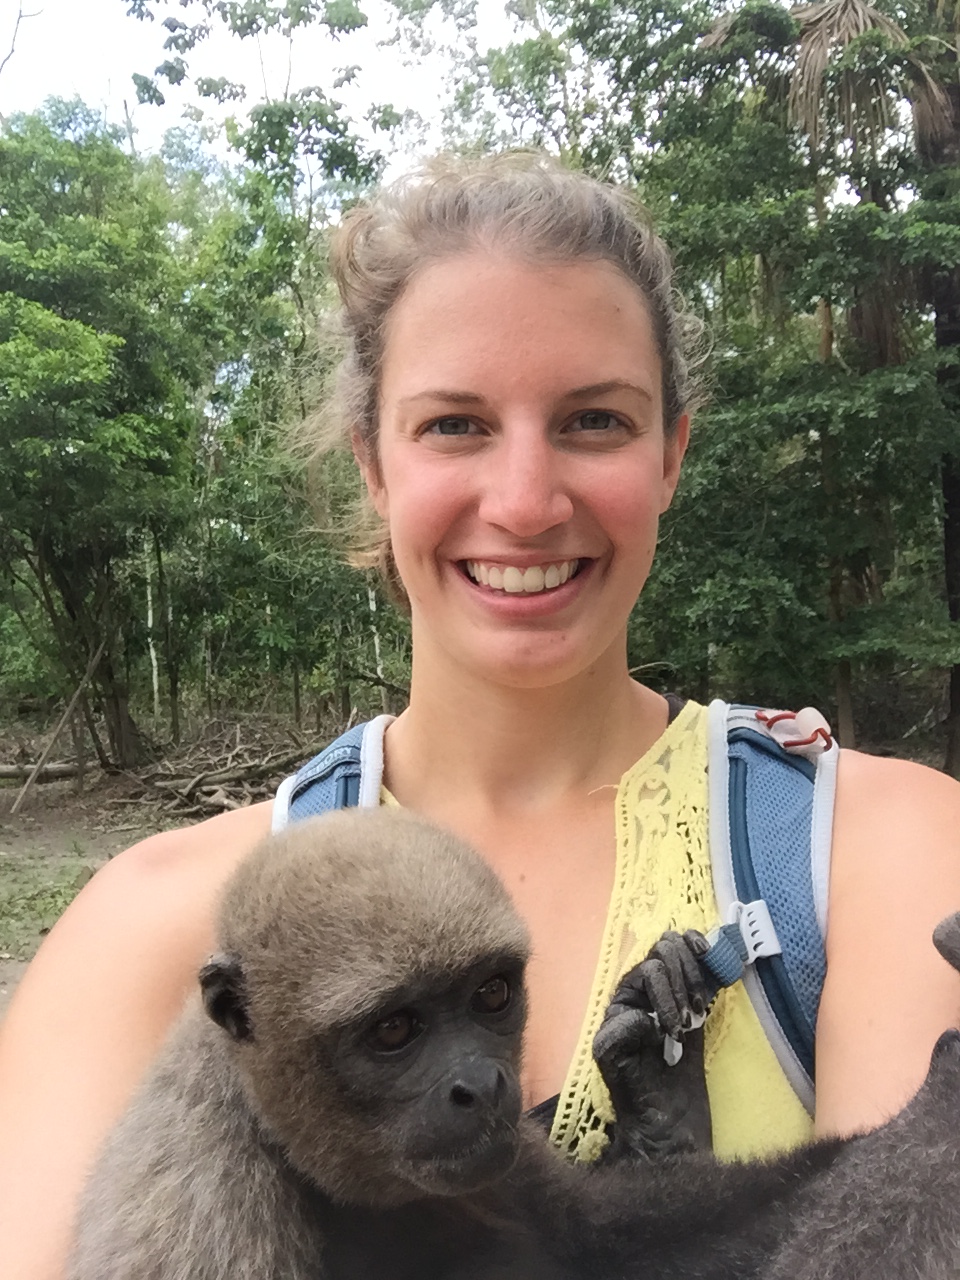
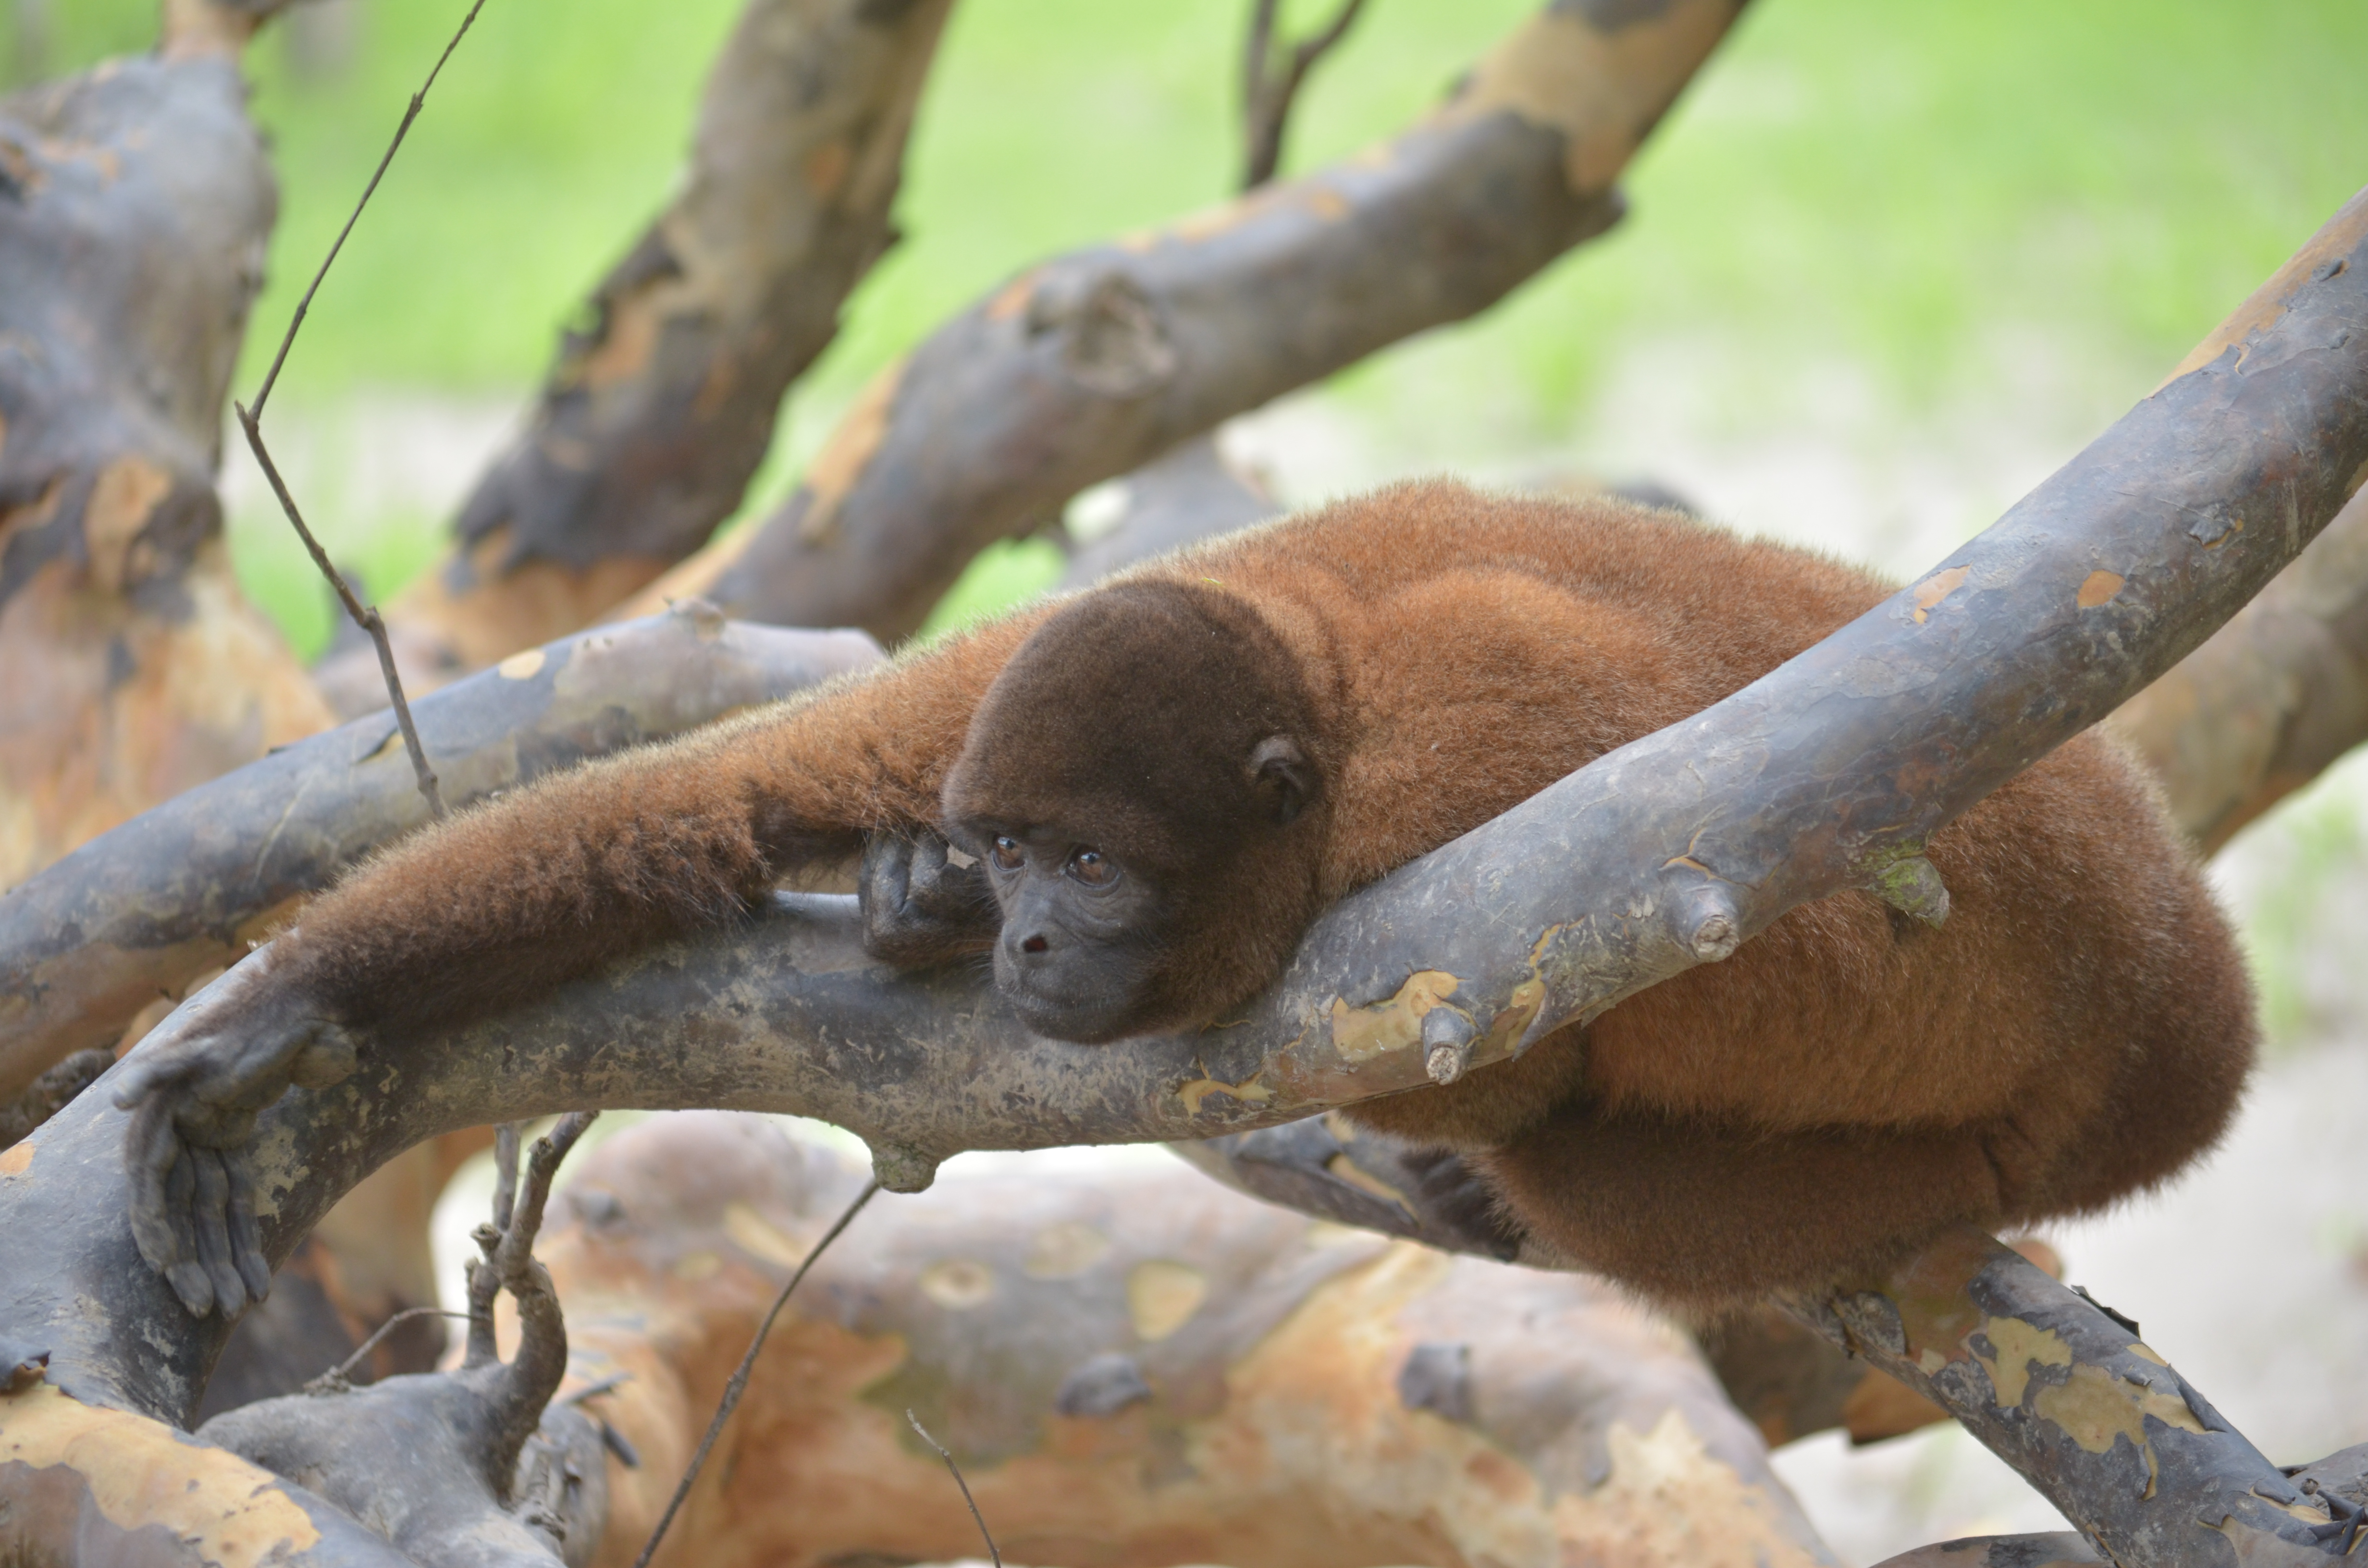
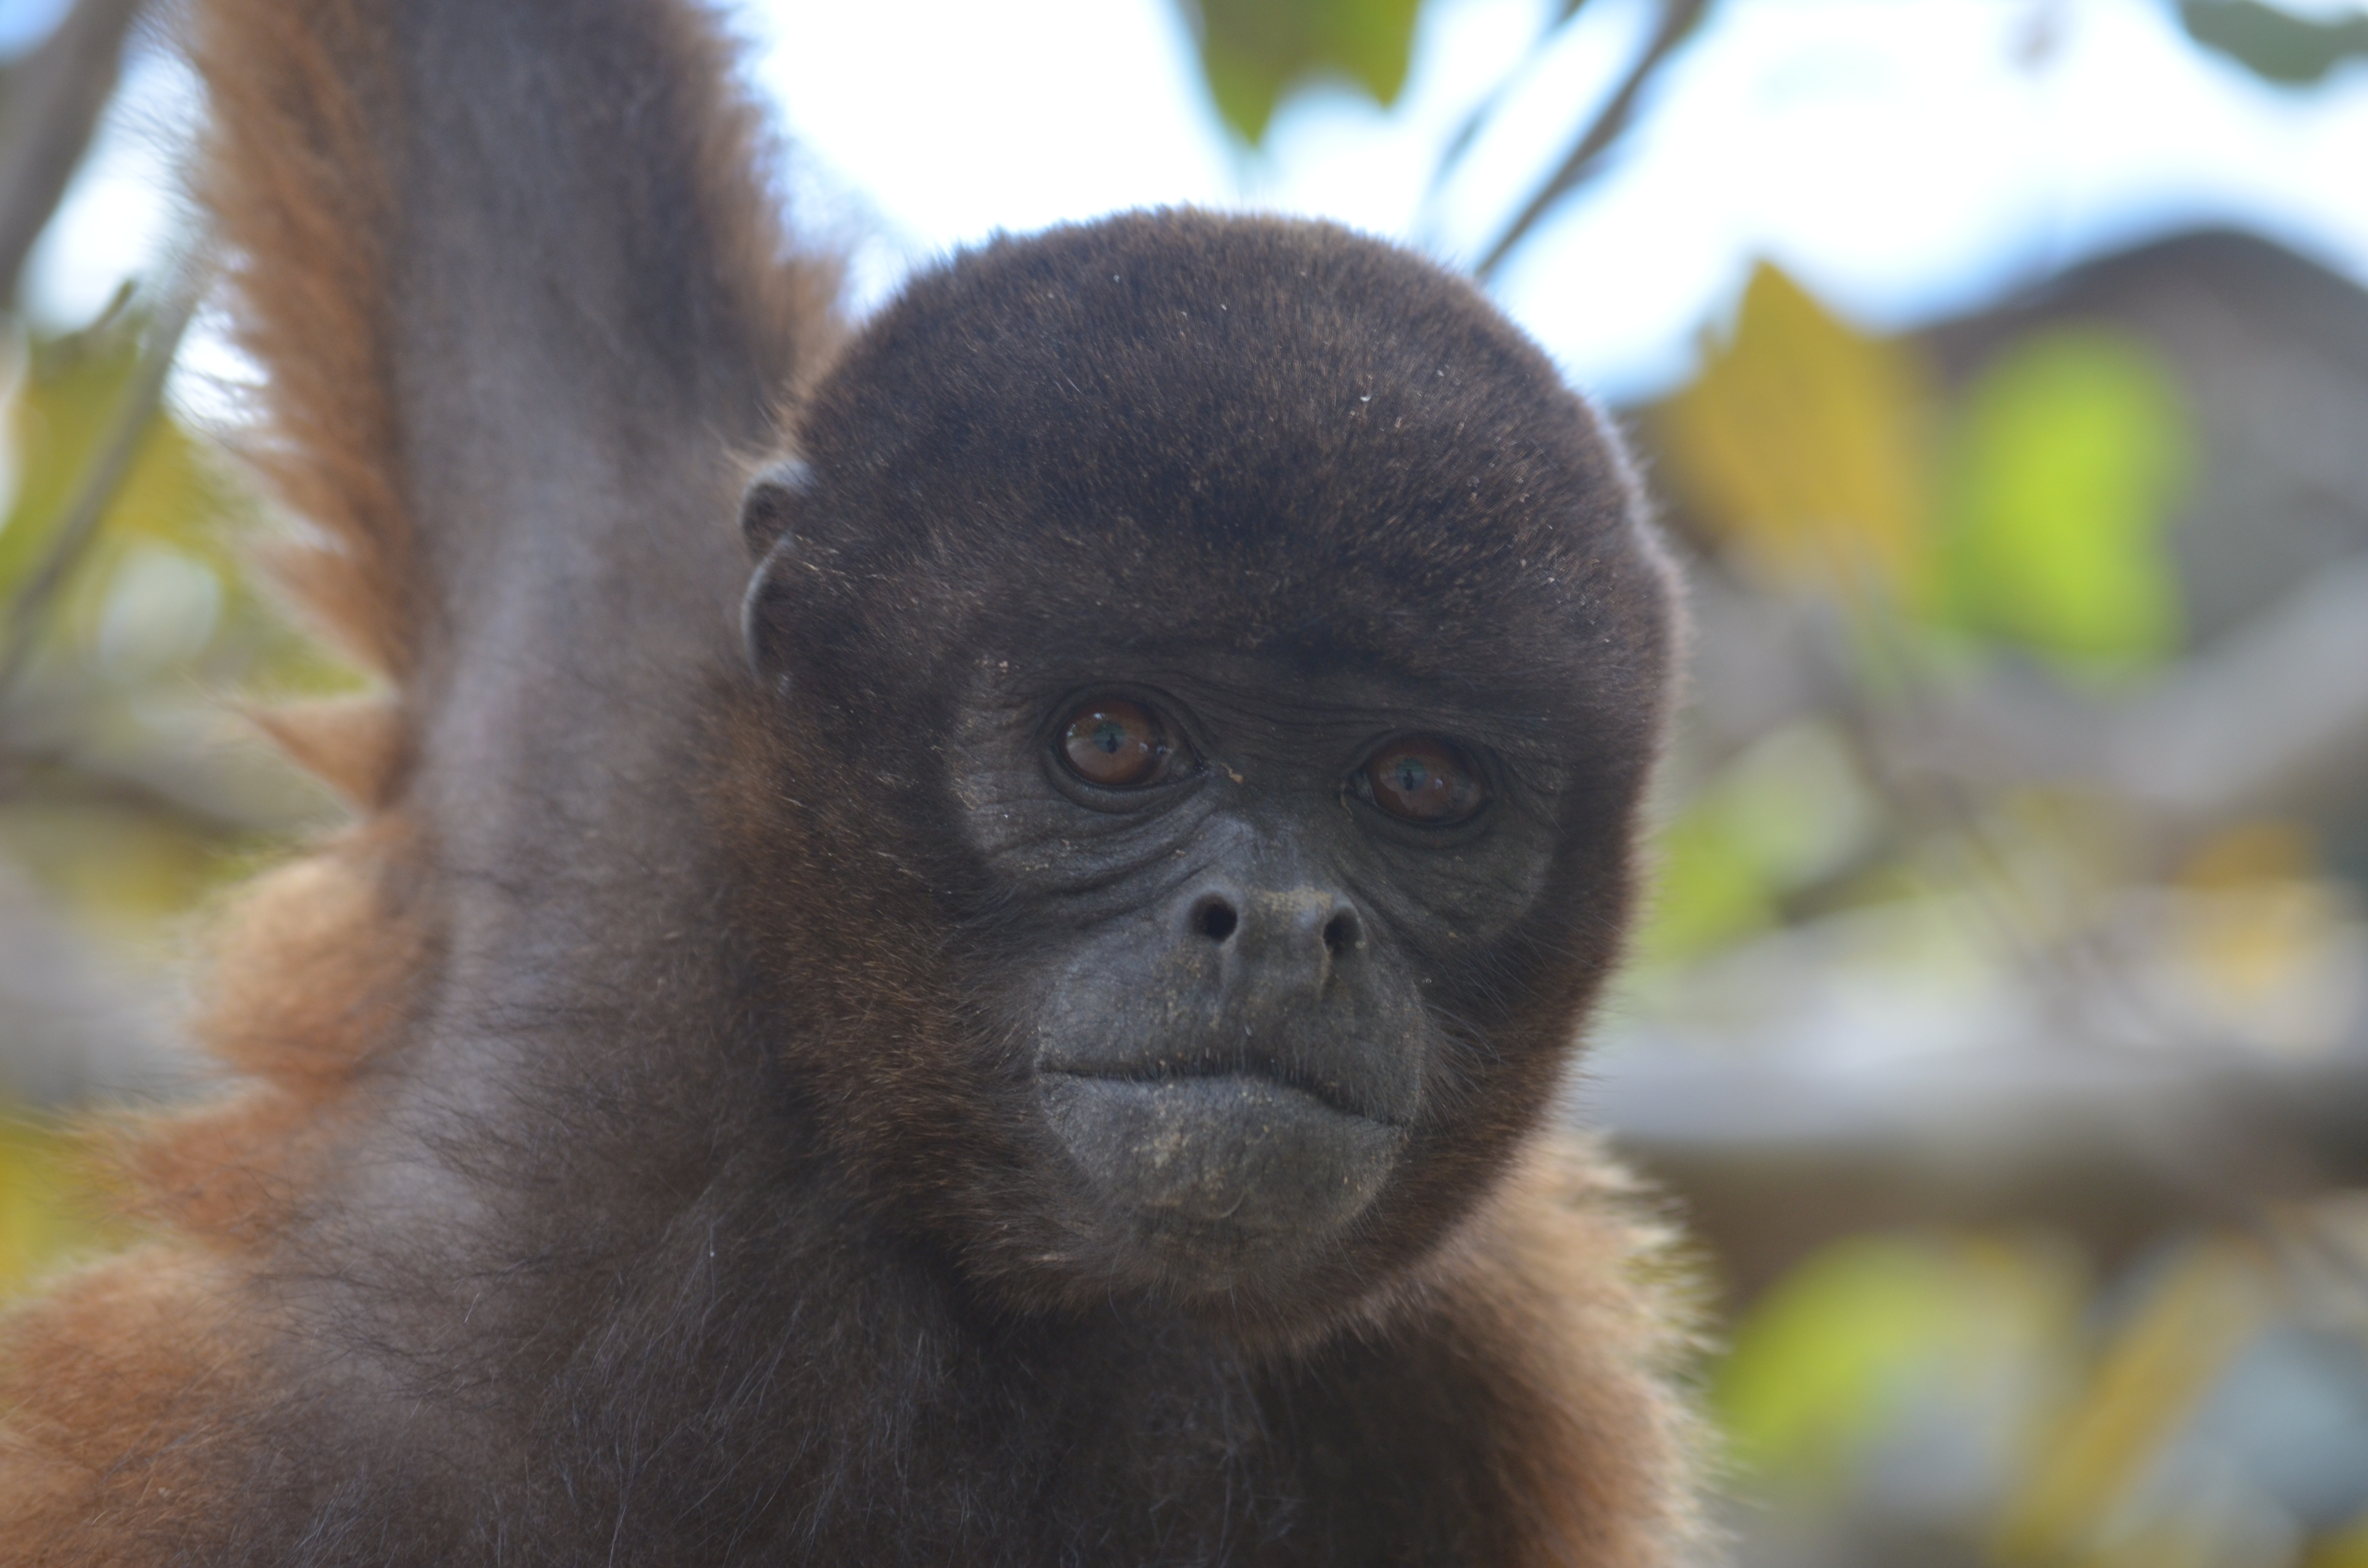
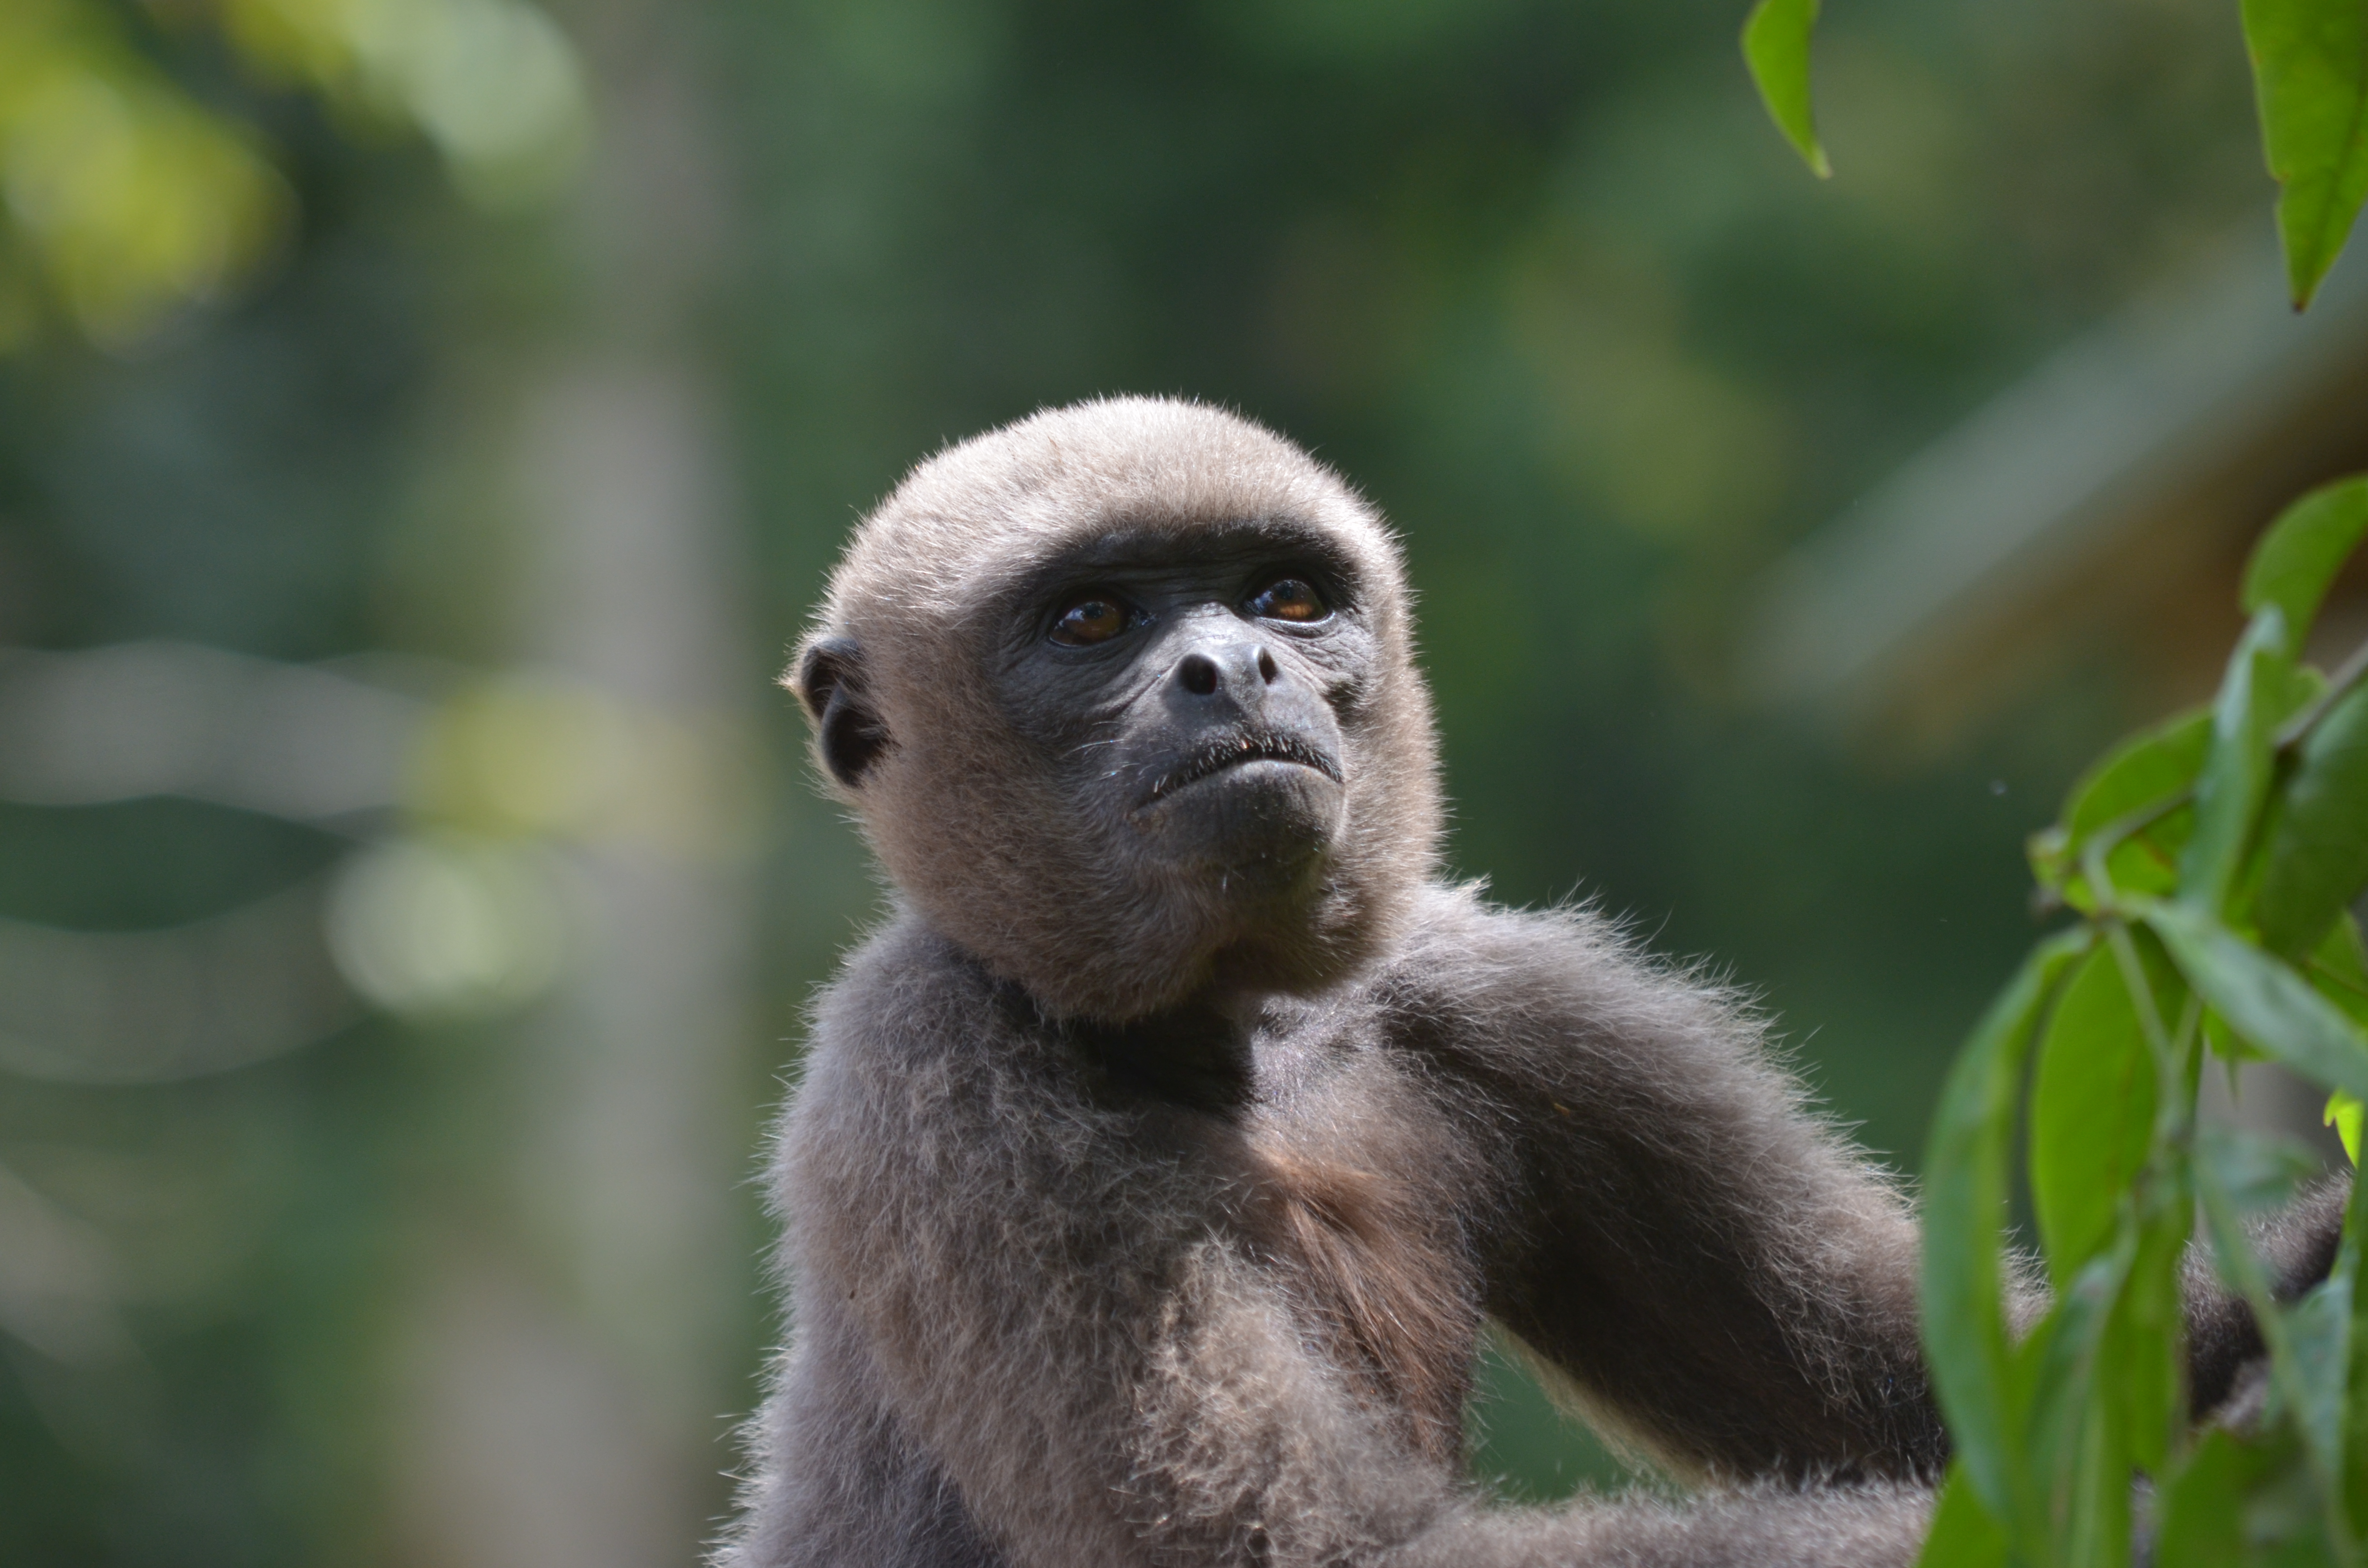
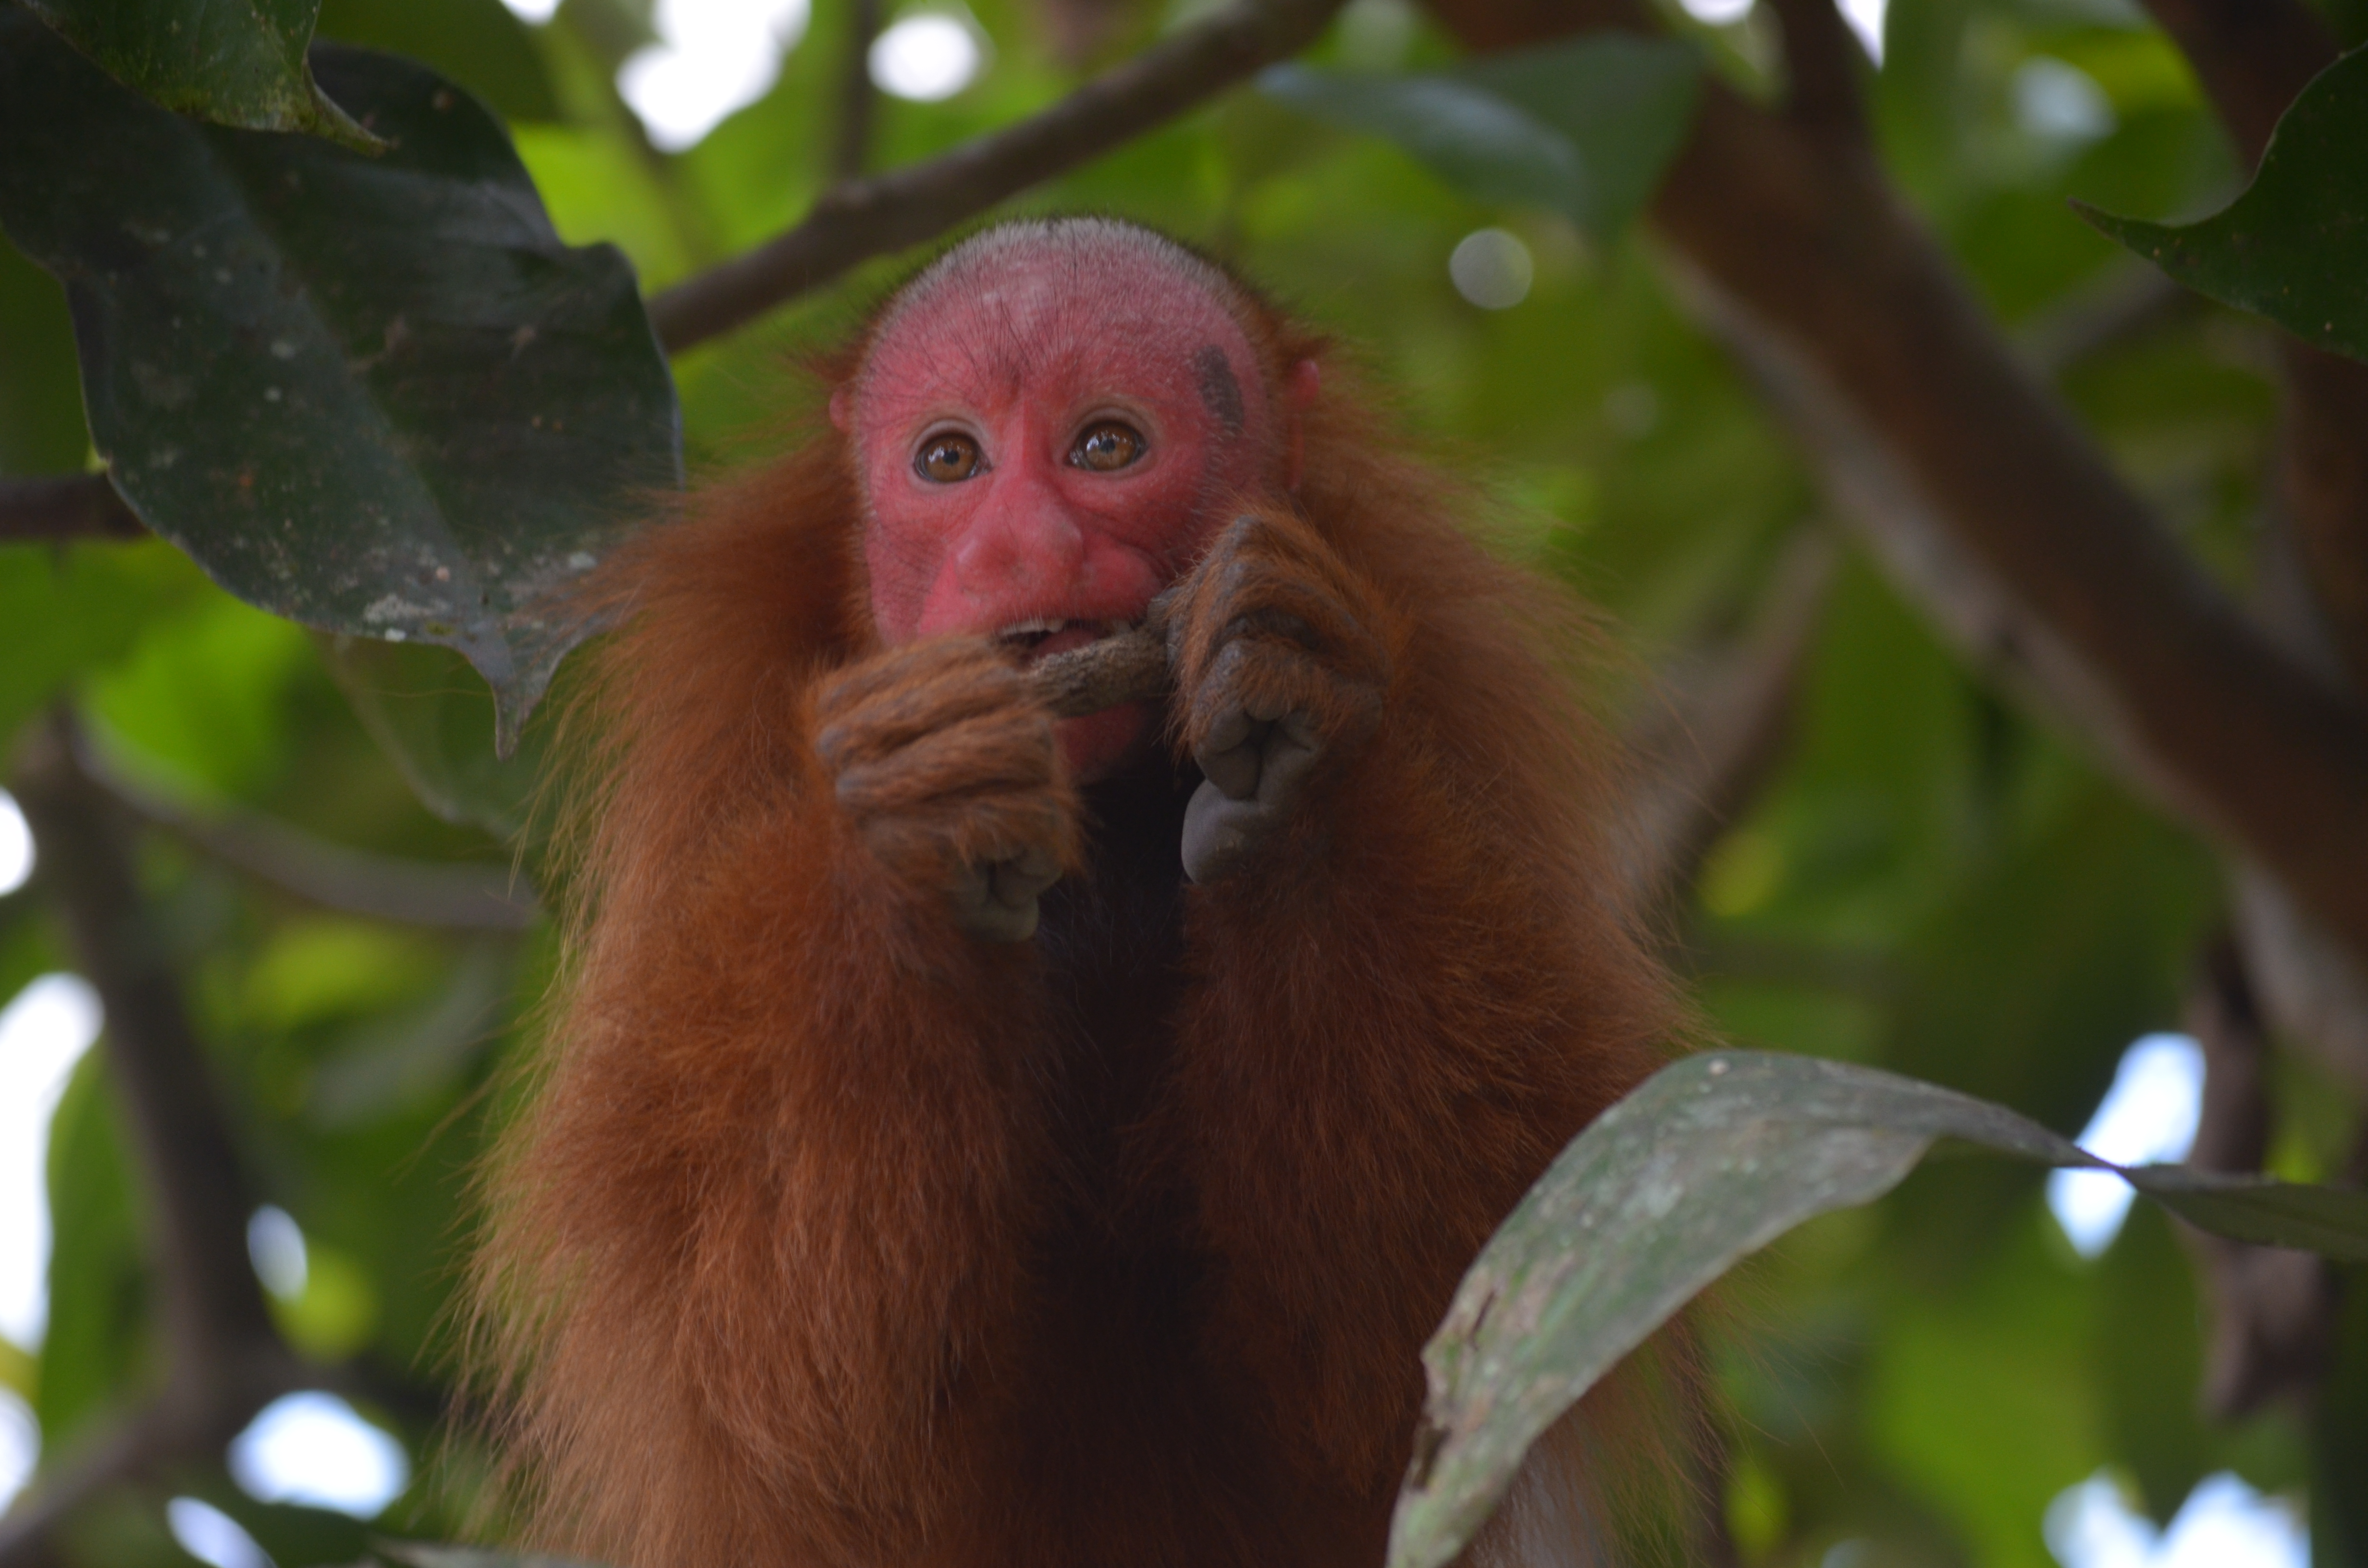
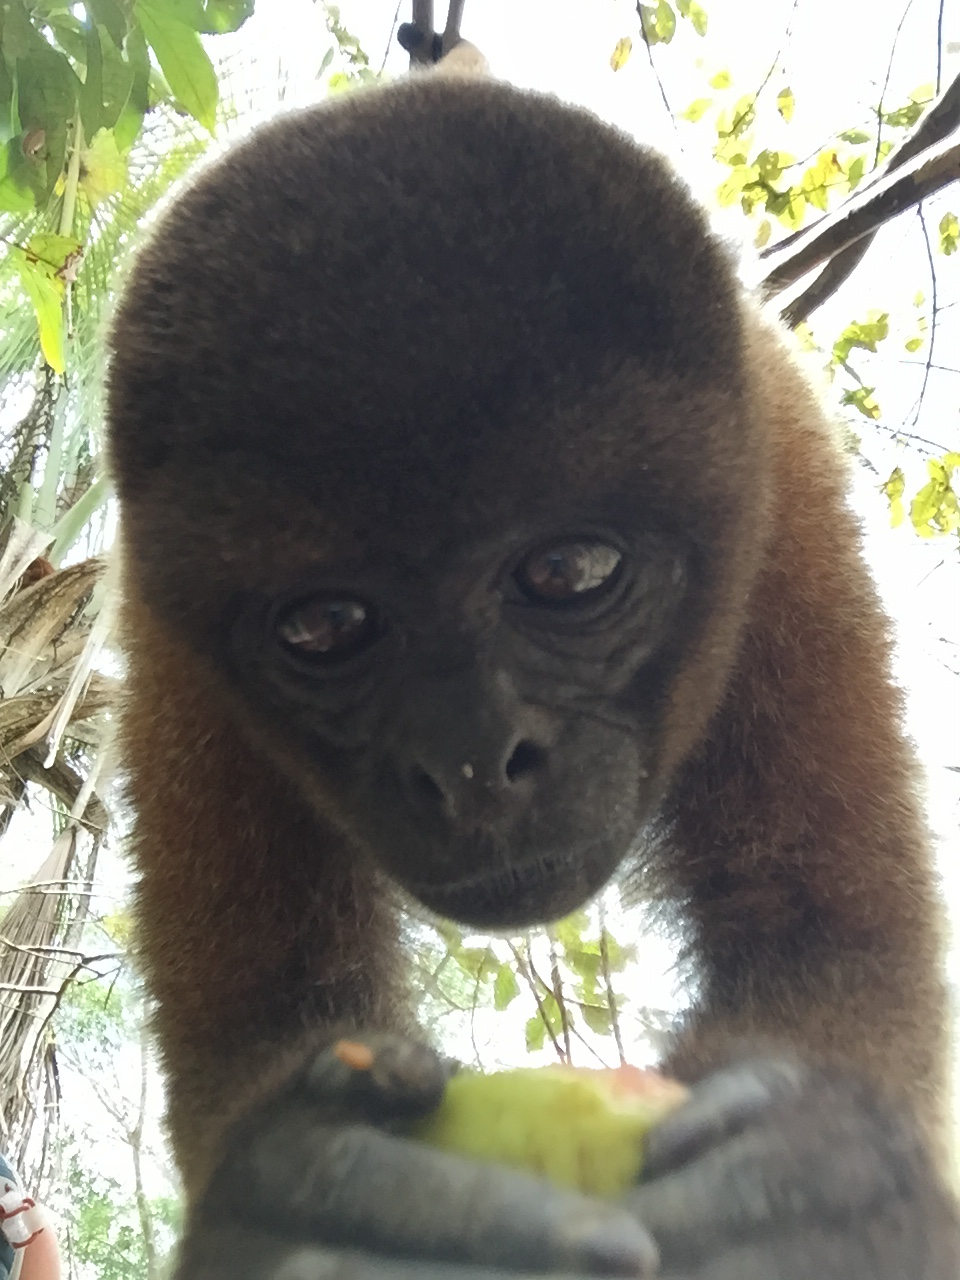
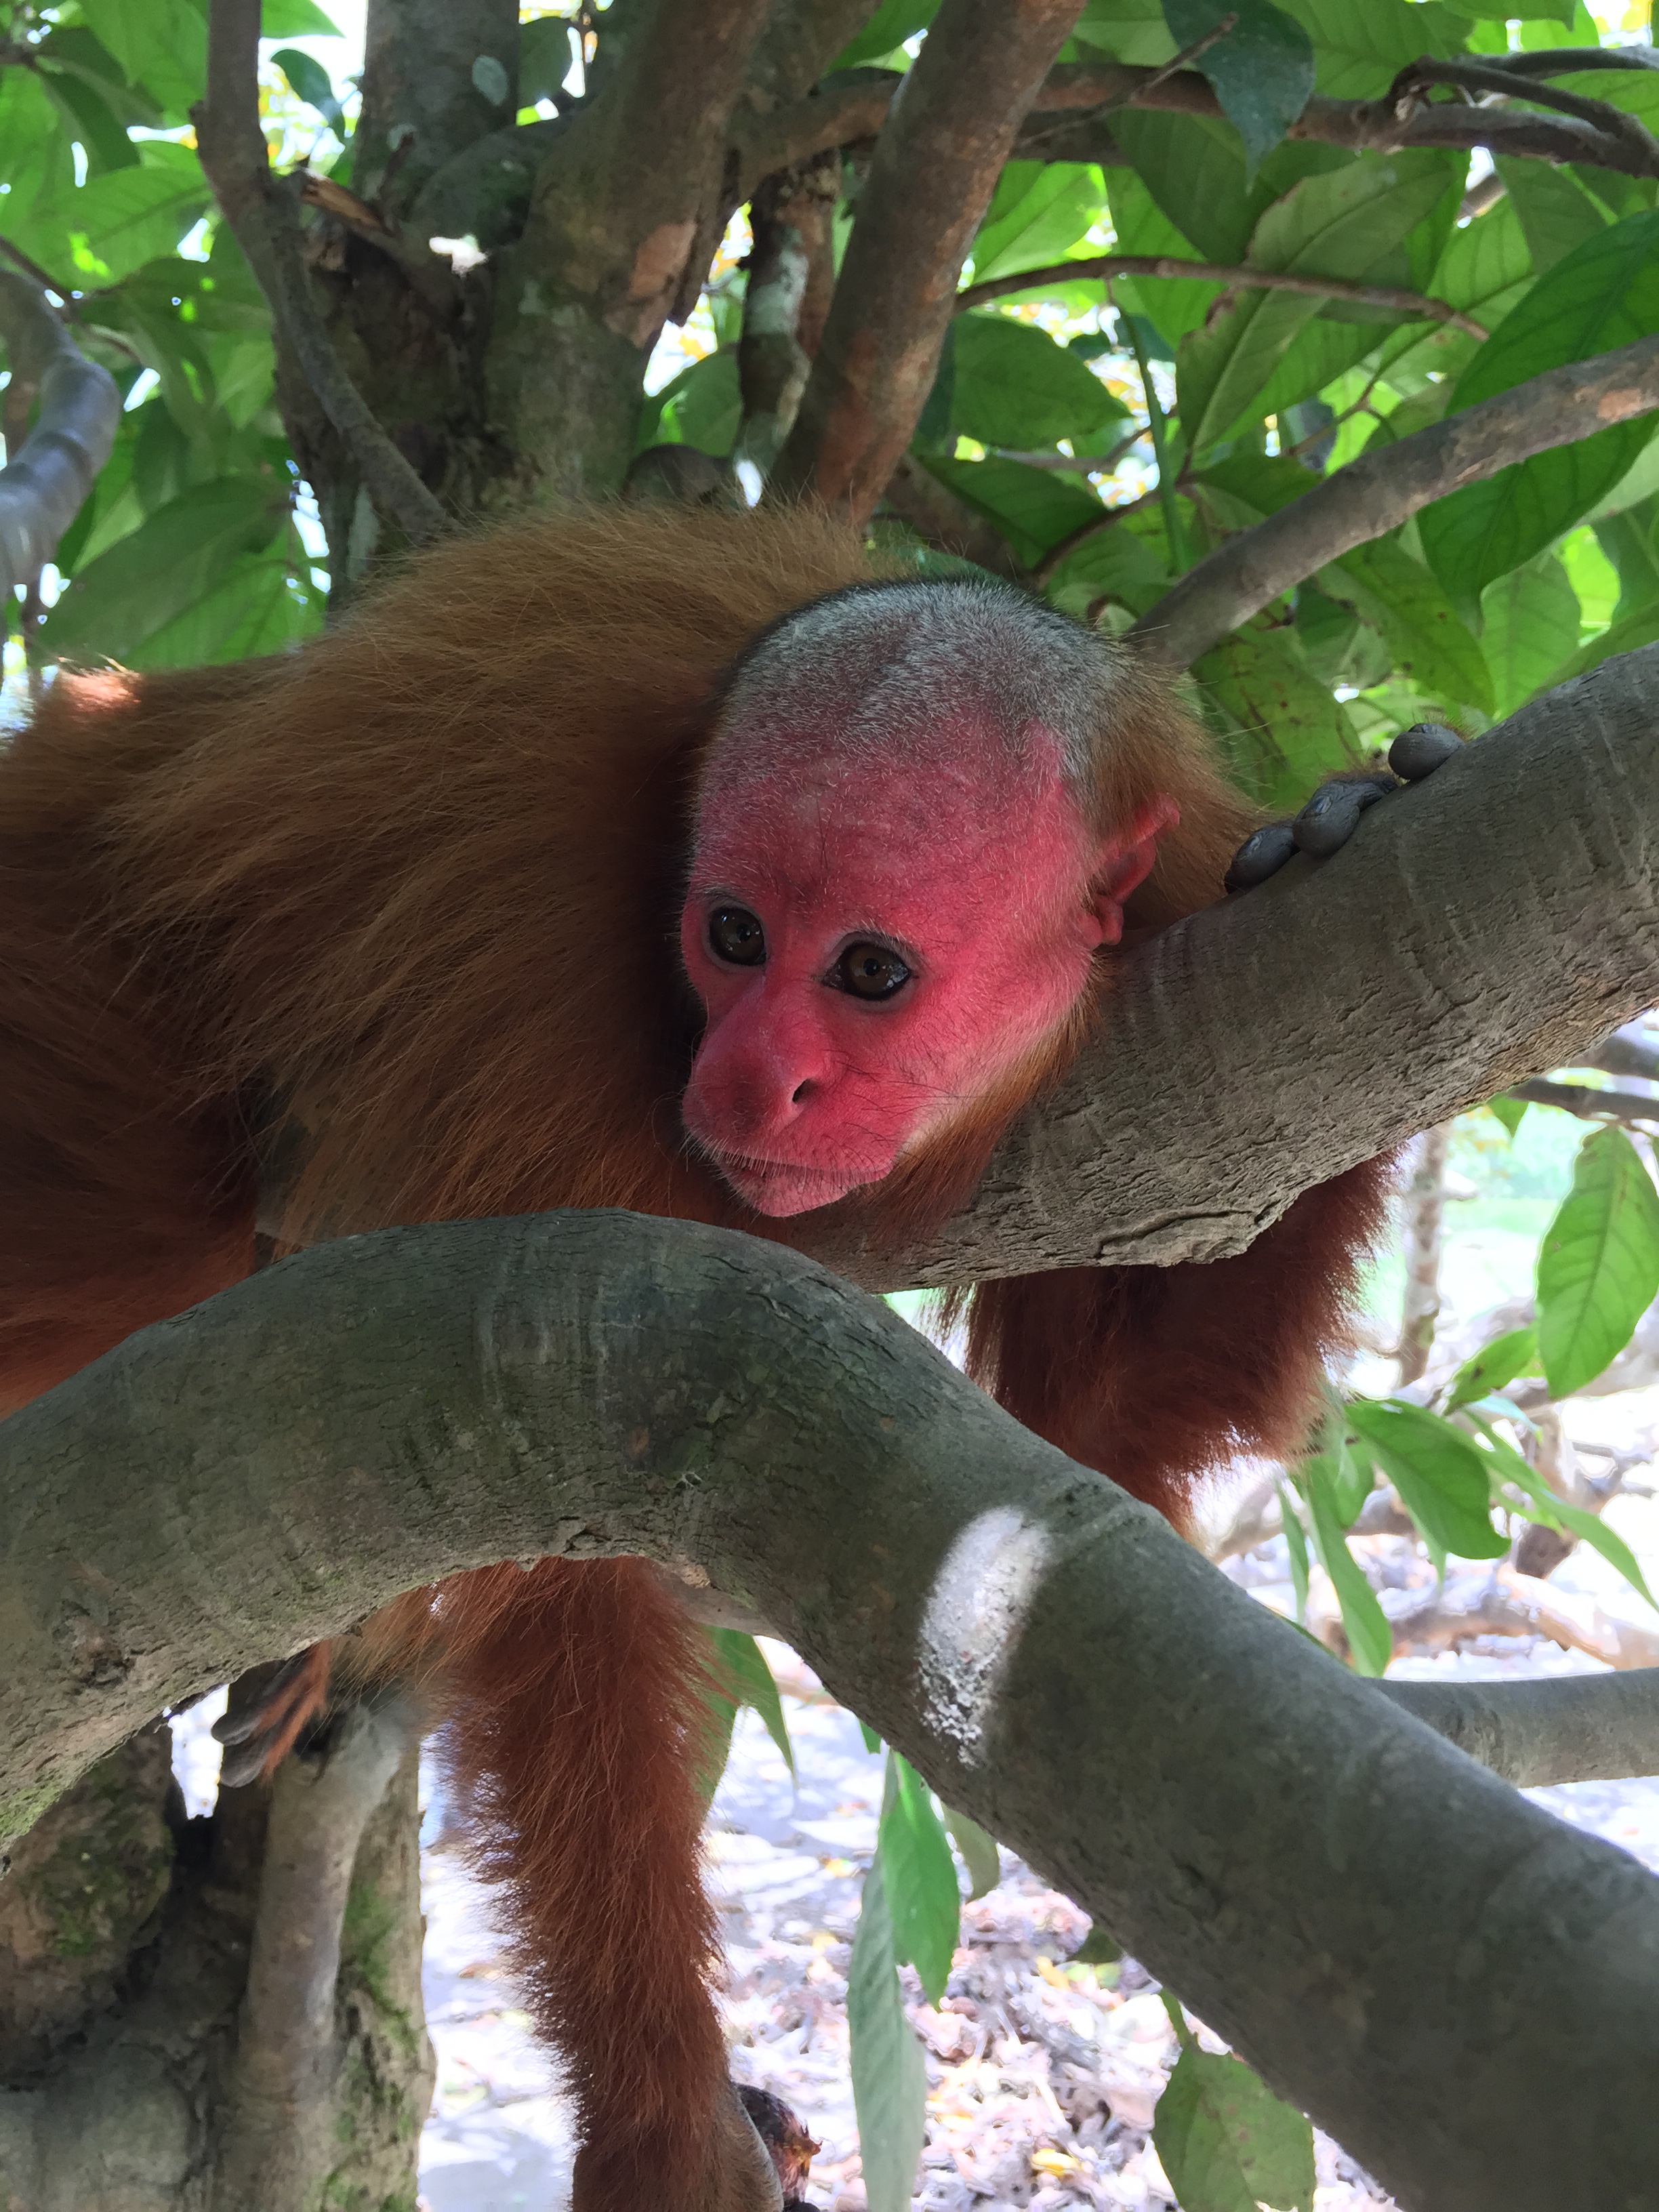
Entrance cost to Island is 20 soles per person (Around $7). You’re free to give additional donations as well if you’d like. One of their employees will walk with you around the island to offer explanations of some of the different monkeys and their stories. But for the most part you can go wherever and stay as long as you’d like. When we showed up in the late morning there we had almost the whole place to ourselves with maybe only 4 other tourists there. When we were getting ready to leave about 8 more showed up. So really it’s not crowded and the monkeys are a ton of fun.

DSC_0335
DSC_0333

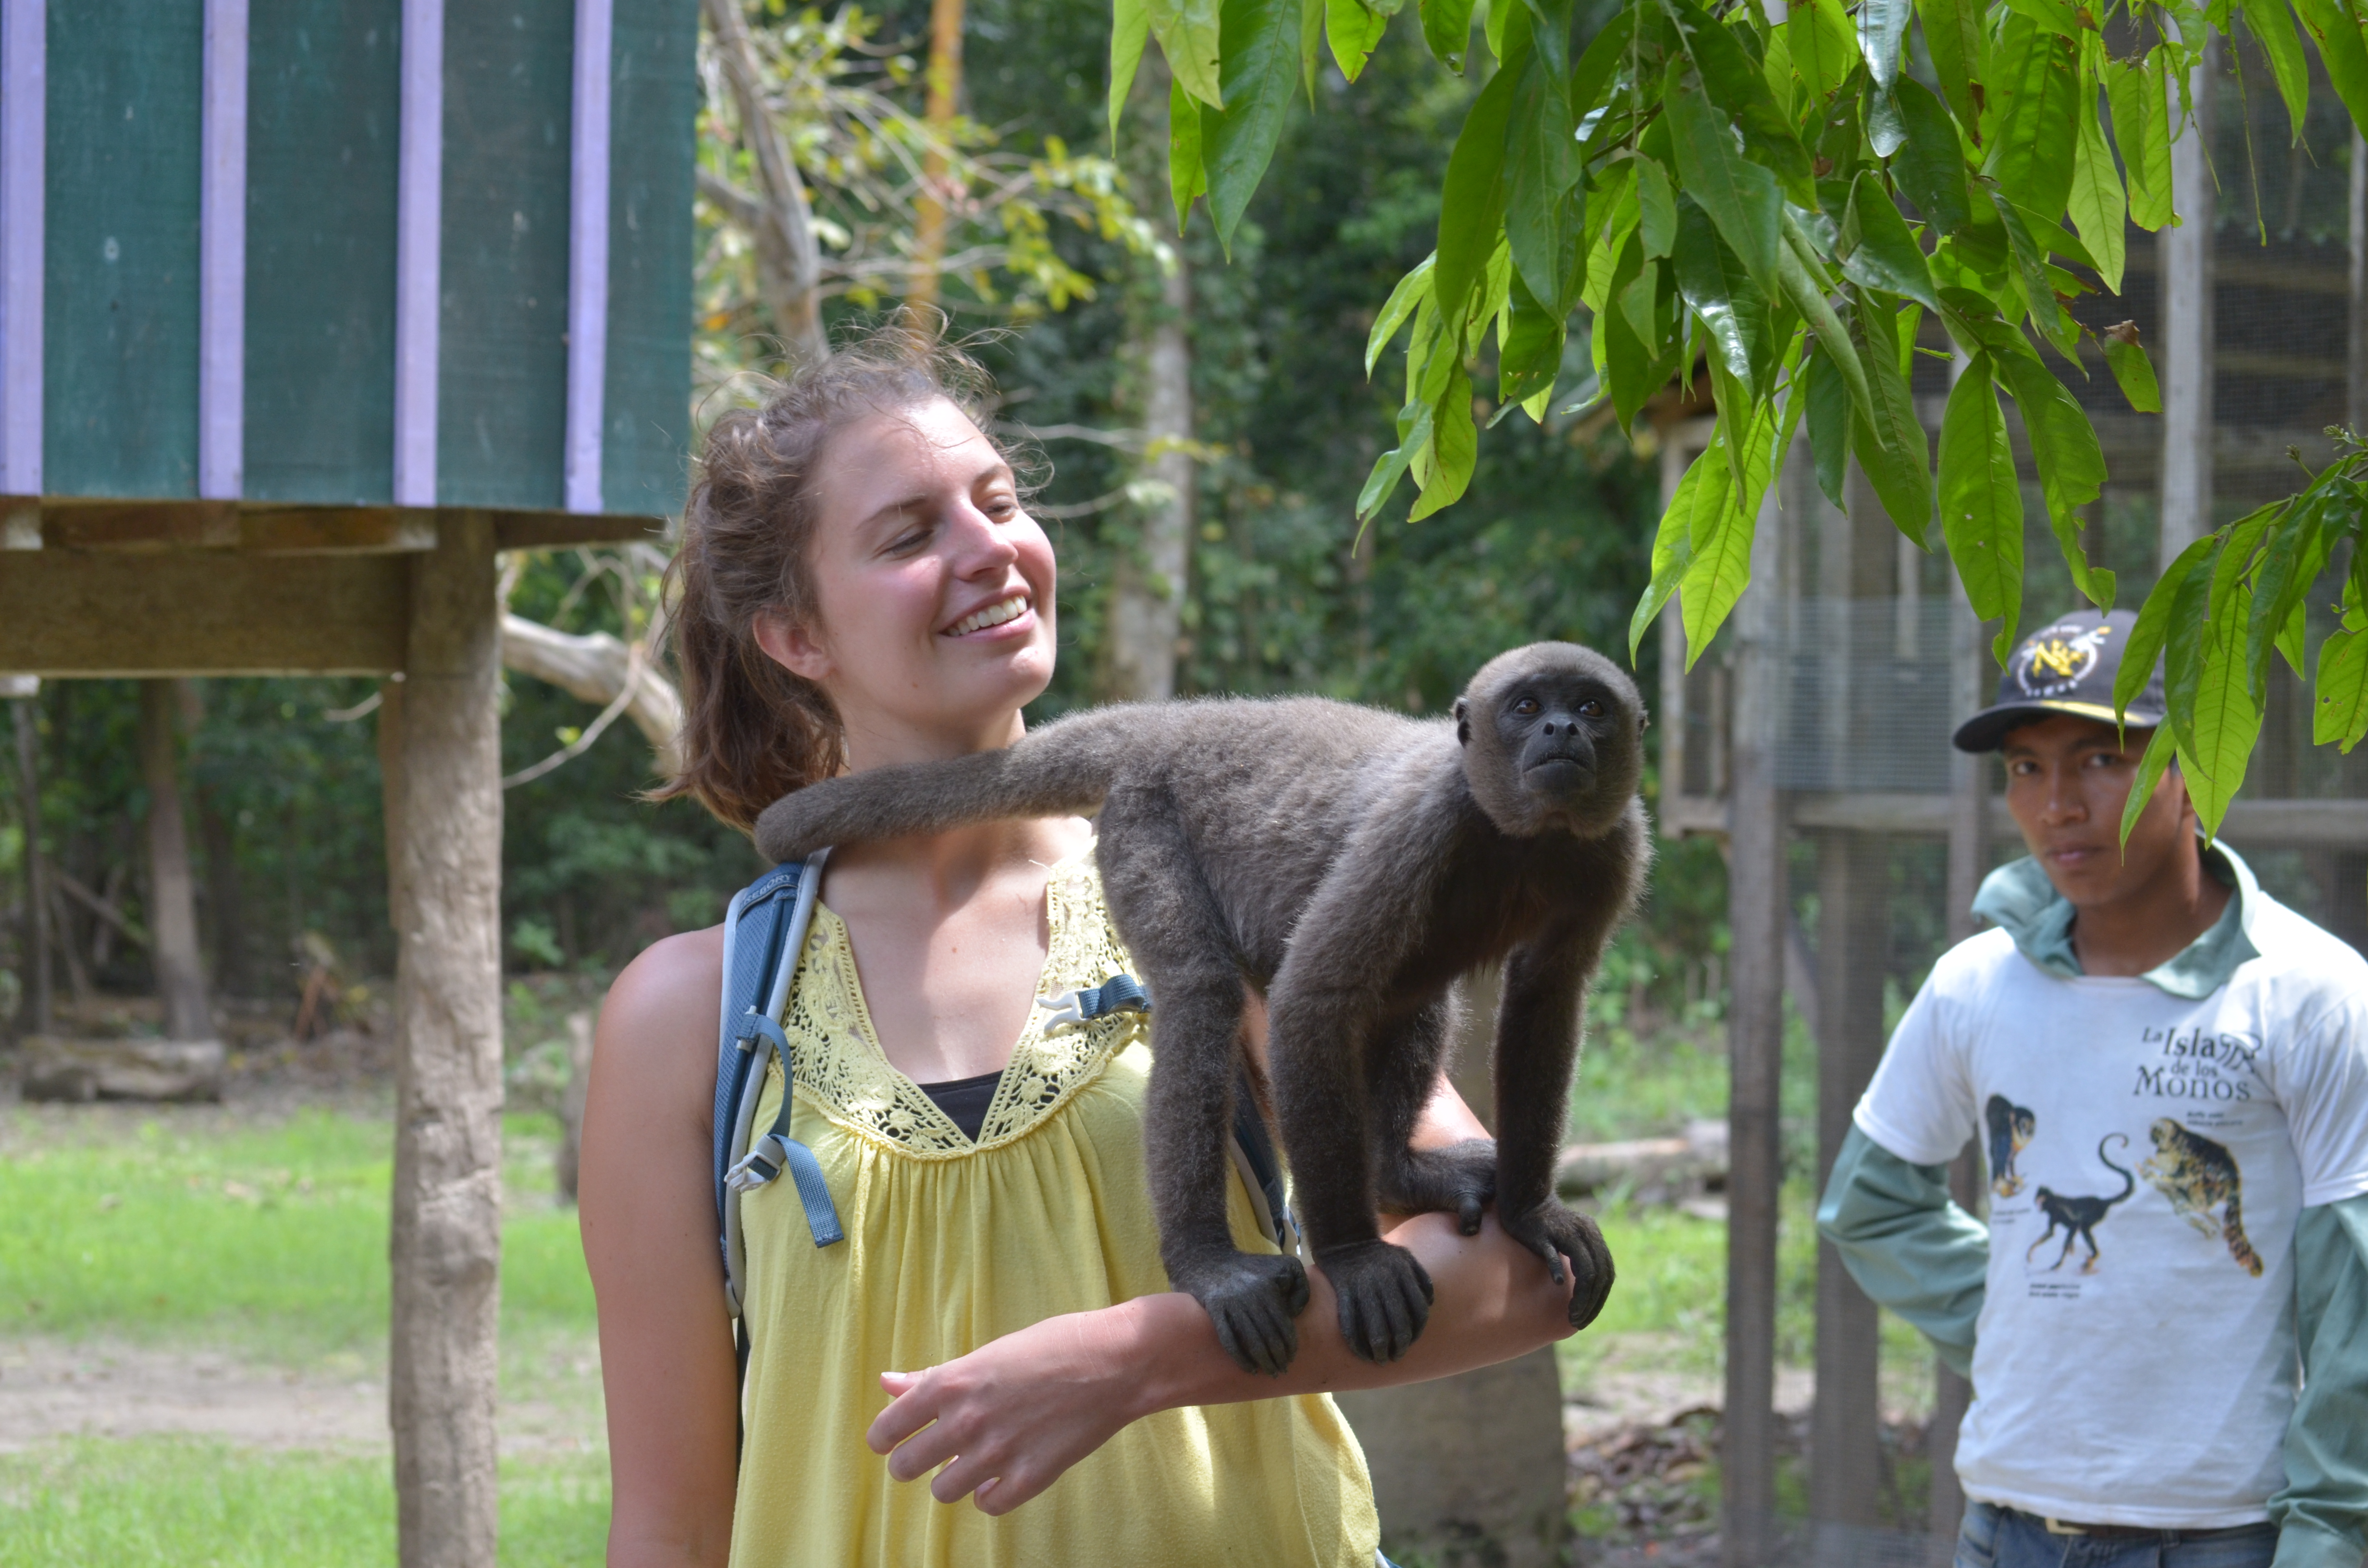
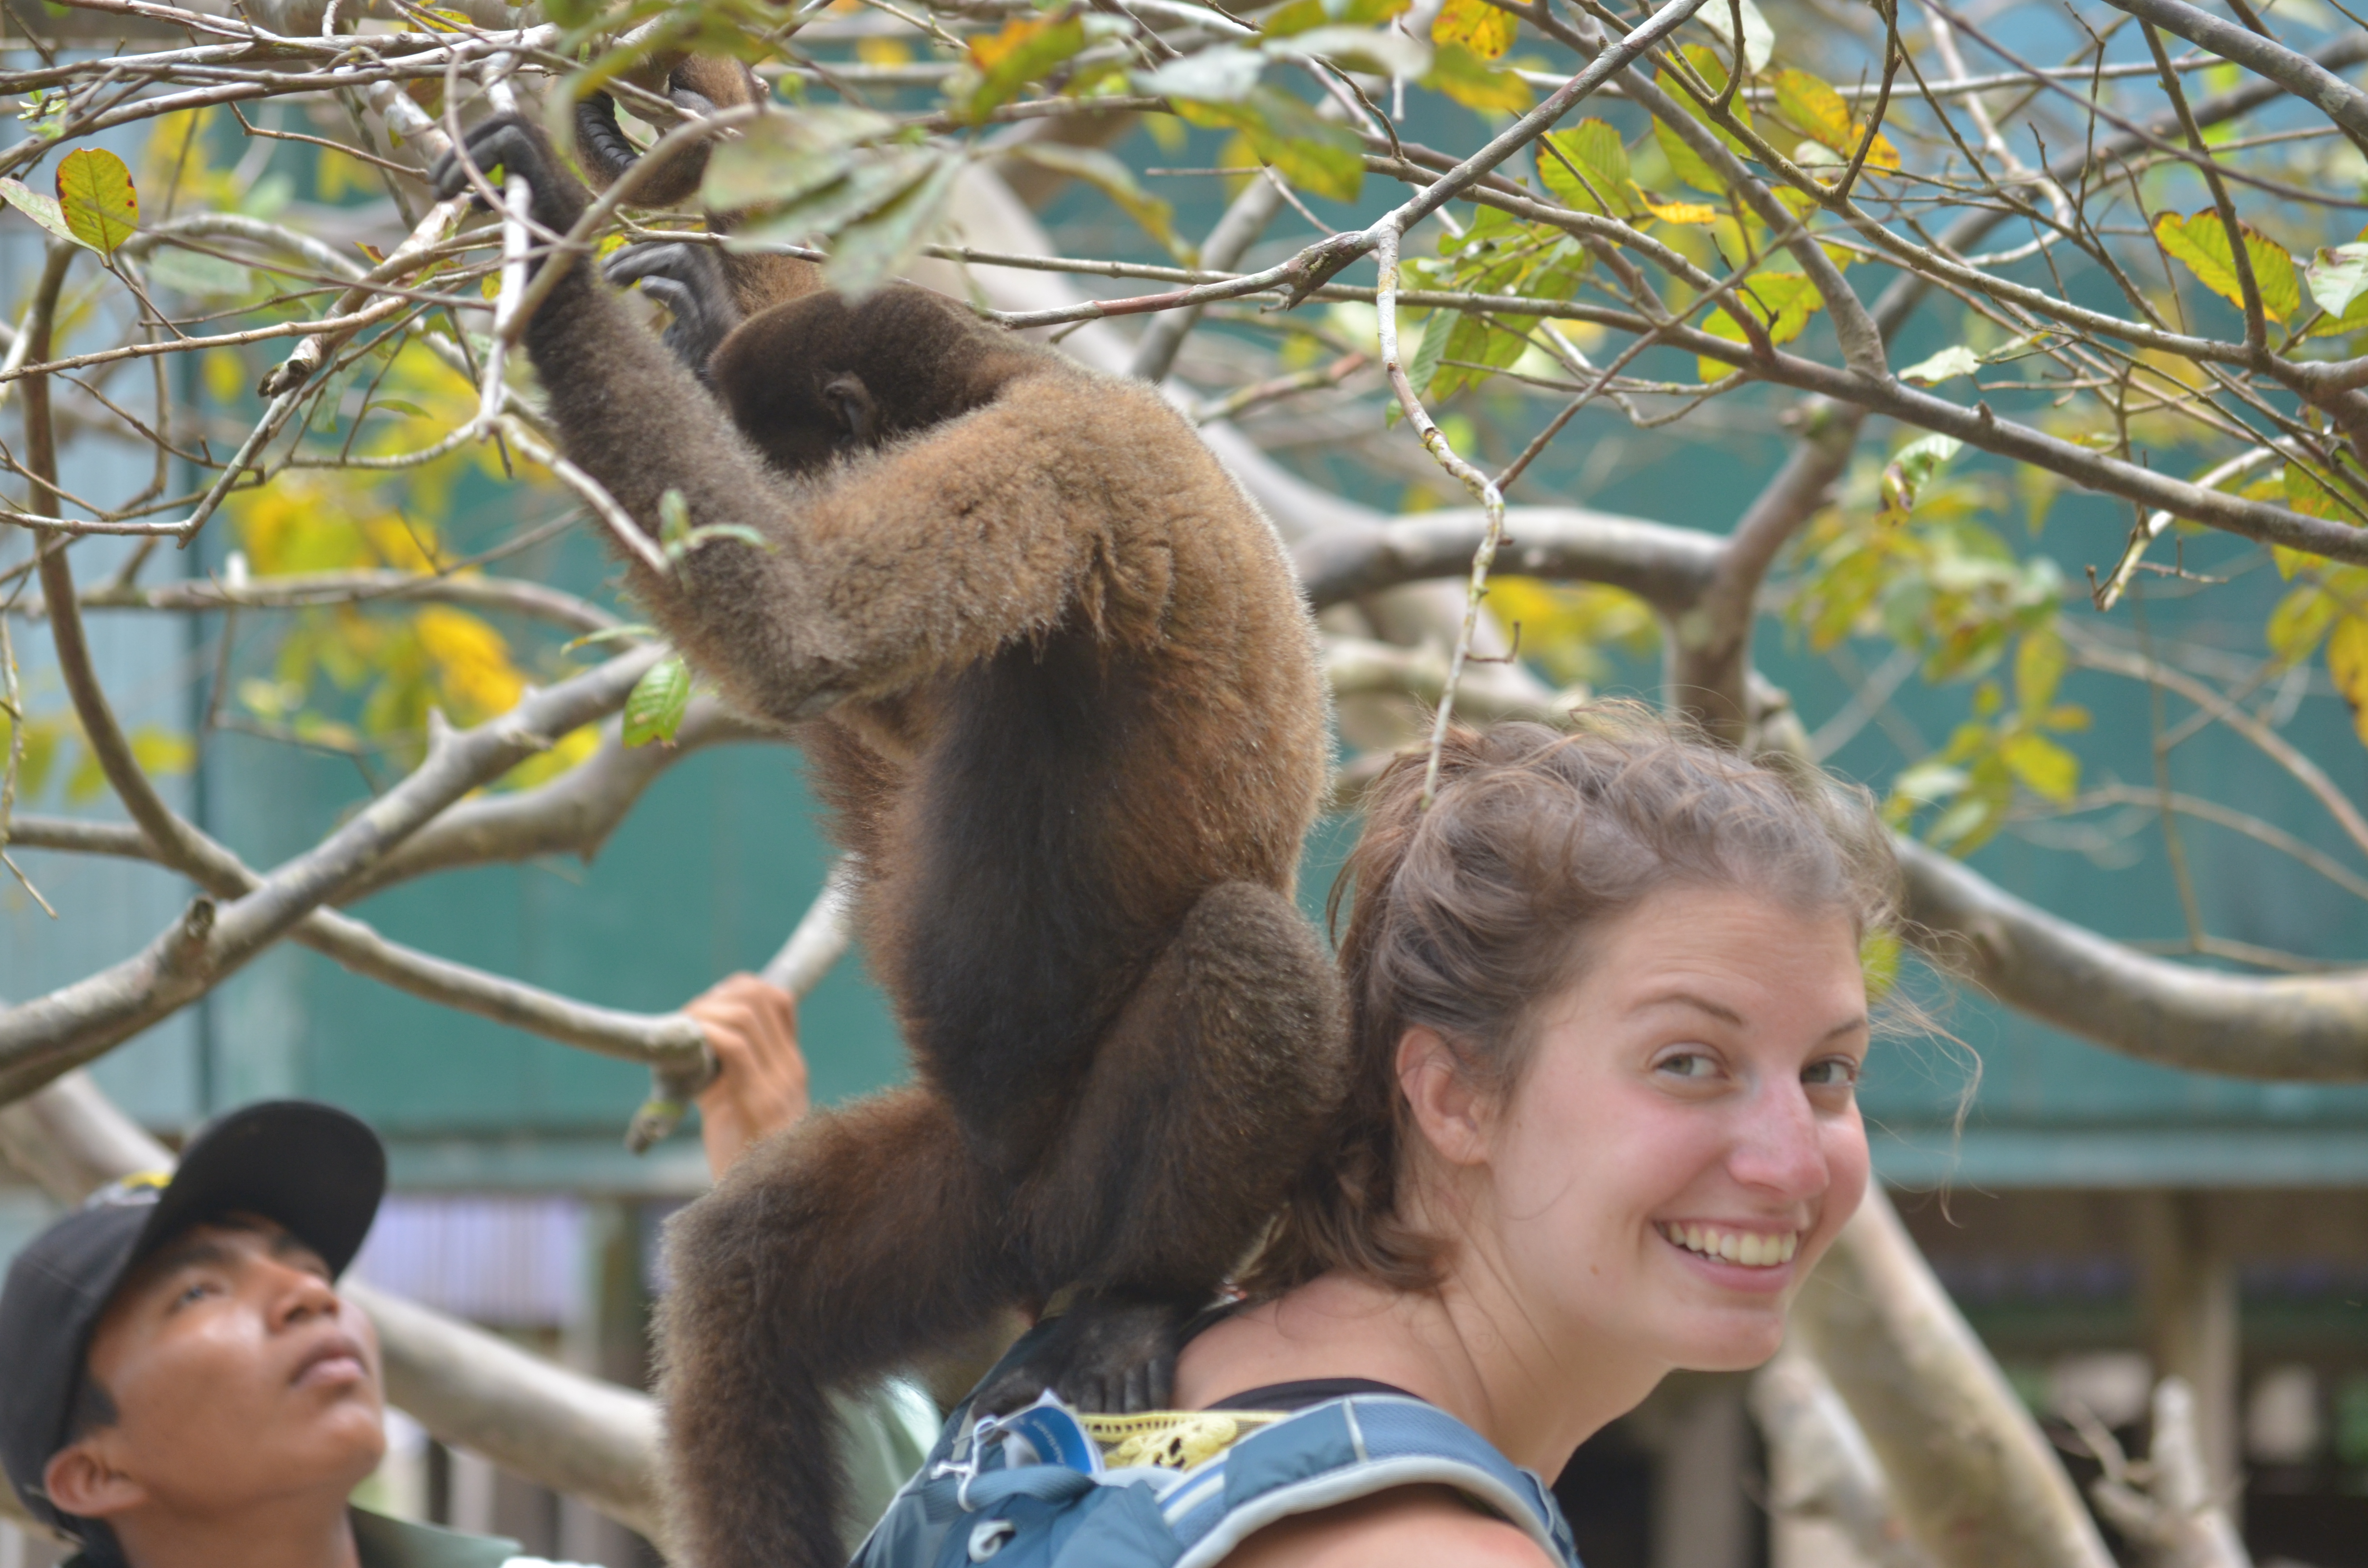
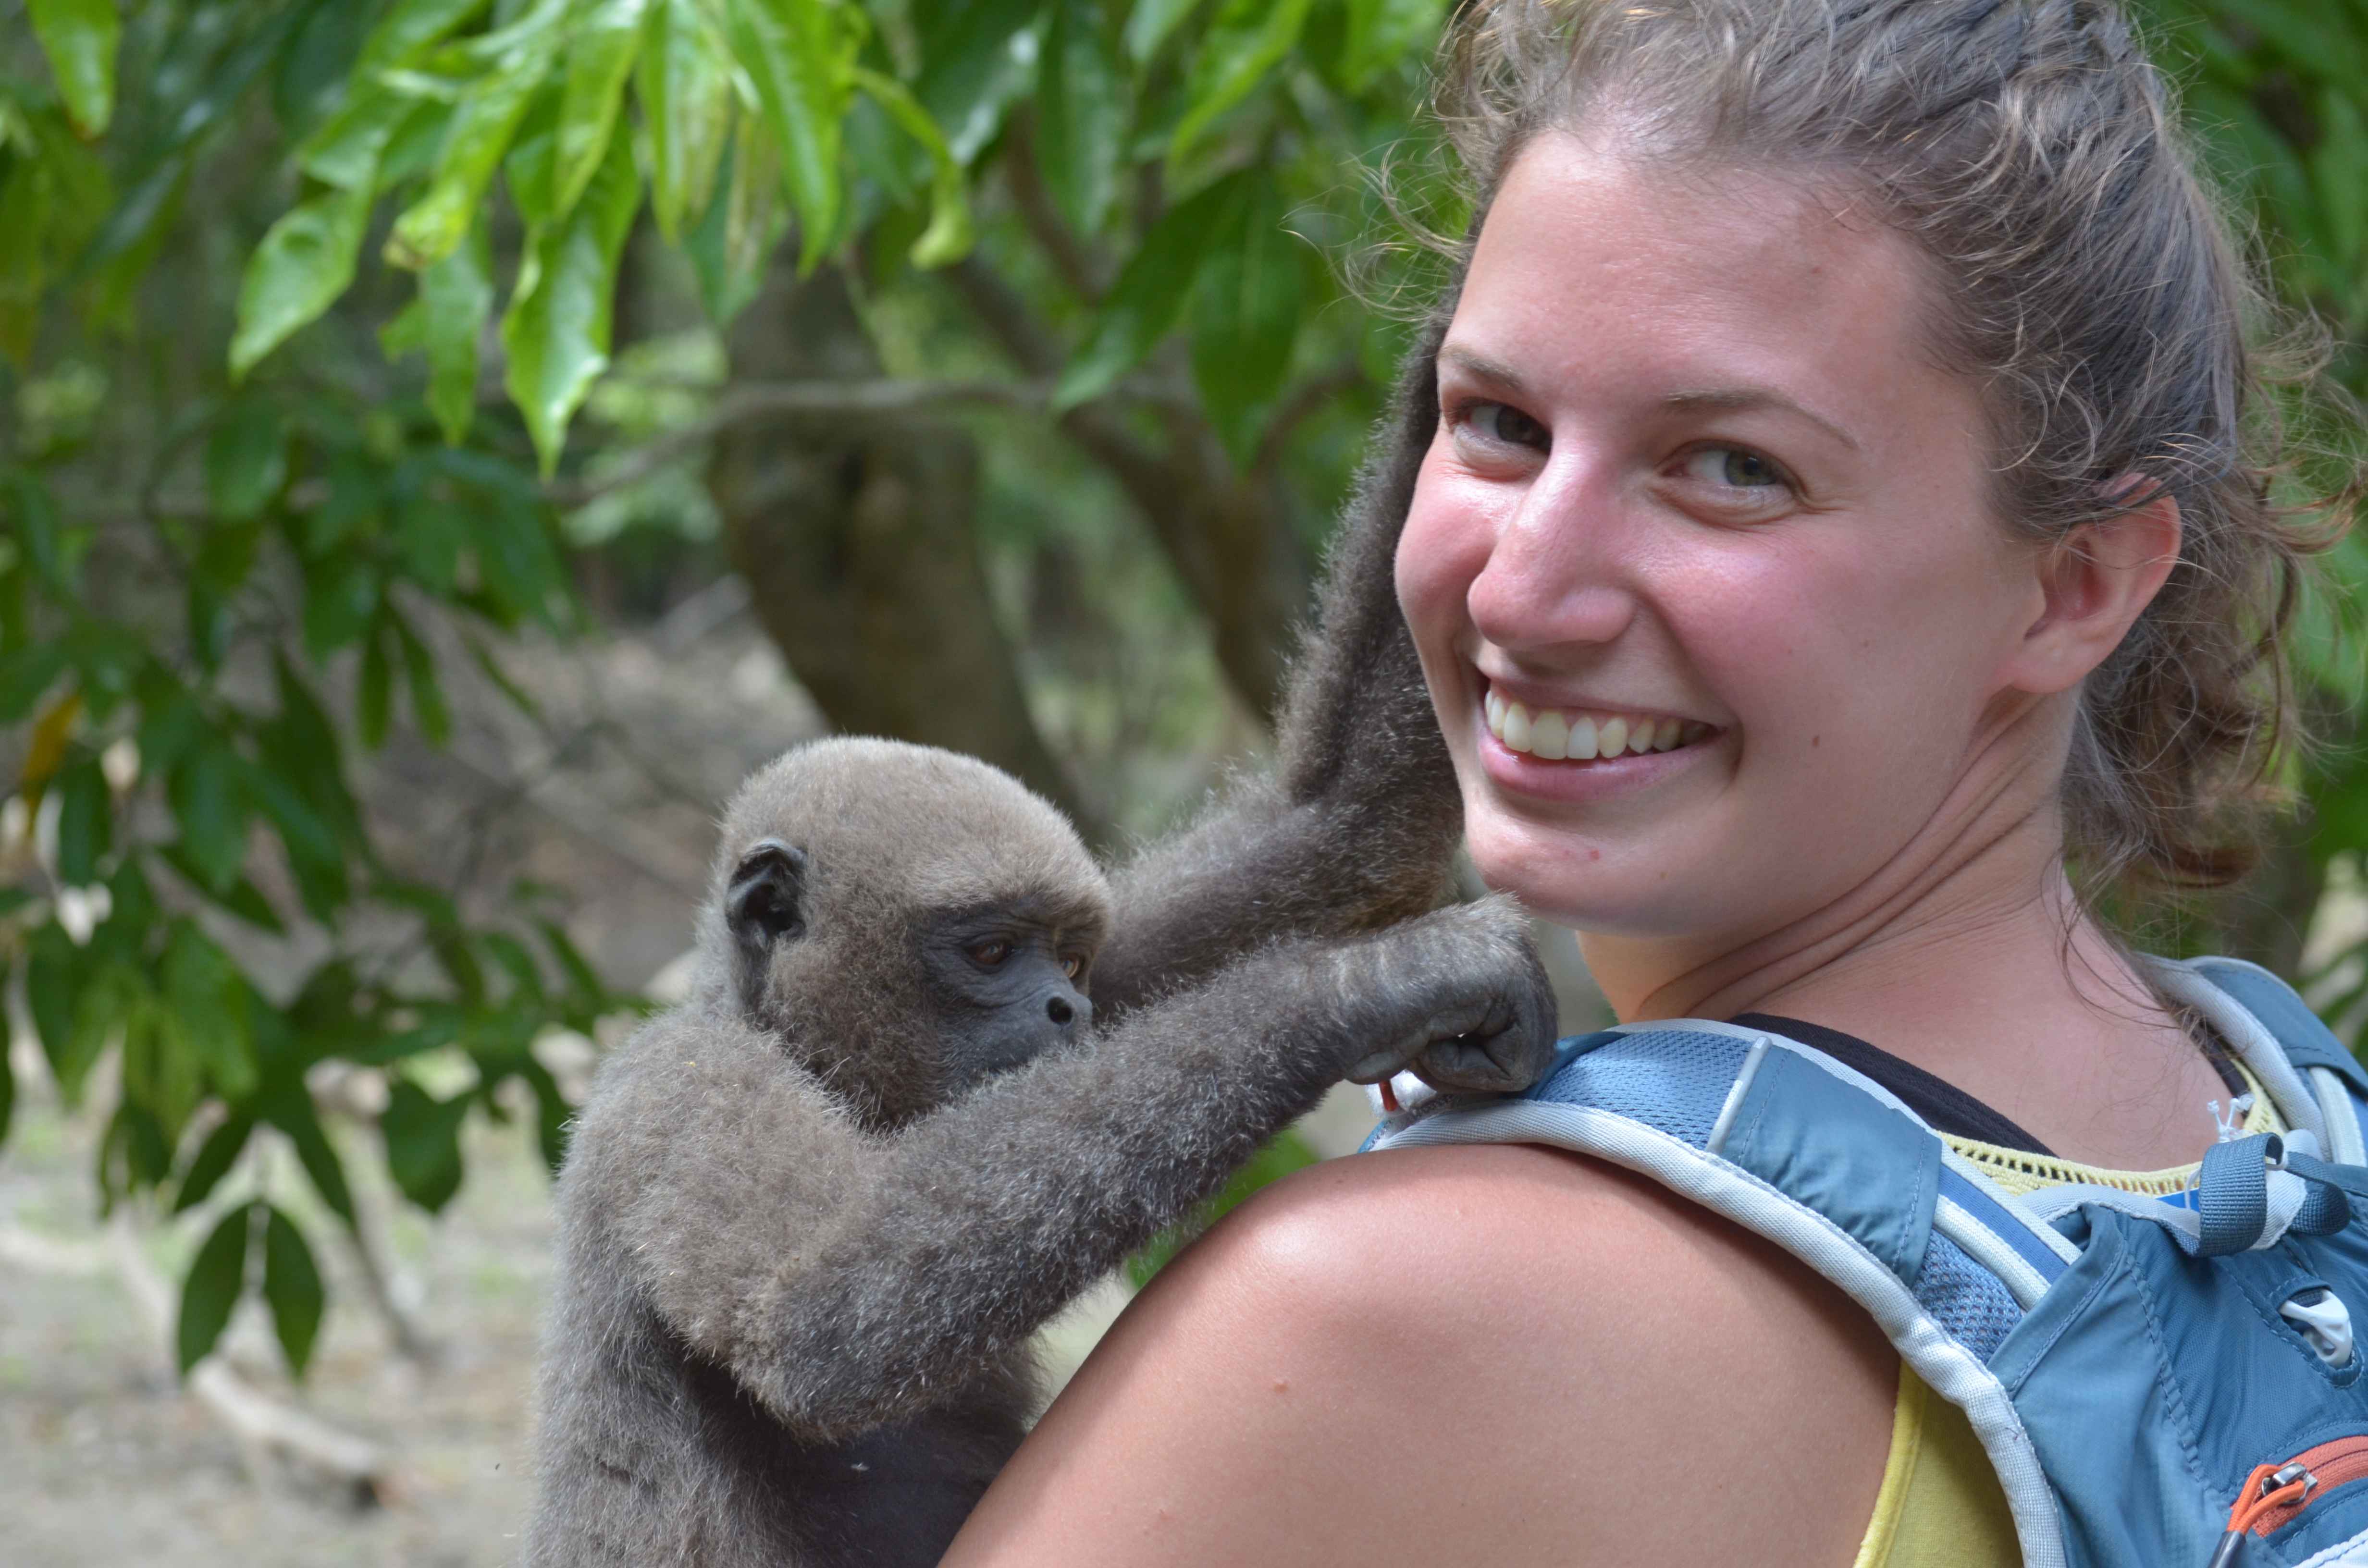
Be sure to completely zip up and bags you have with you and empty your pockets completely. Pablo had his sunglasses on and the monkeys quickly stole those and bent them up. I used my phone for photos but made sure to have a secure grip at all times and we were fine with our GoPro and camera as well. It was so much fun!!!!! Playing with the monkeys, holding them and just watching them climb all over us. We learned that they love grapes as one of the workers gave us some to share with them and they went crazy.

DSC_0313
DSC_0306

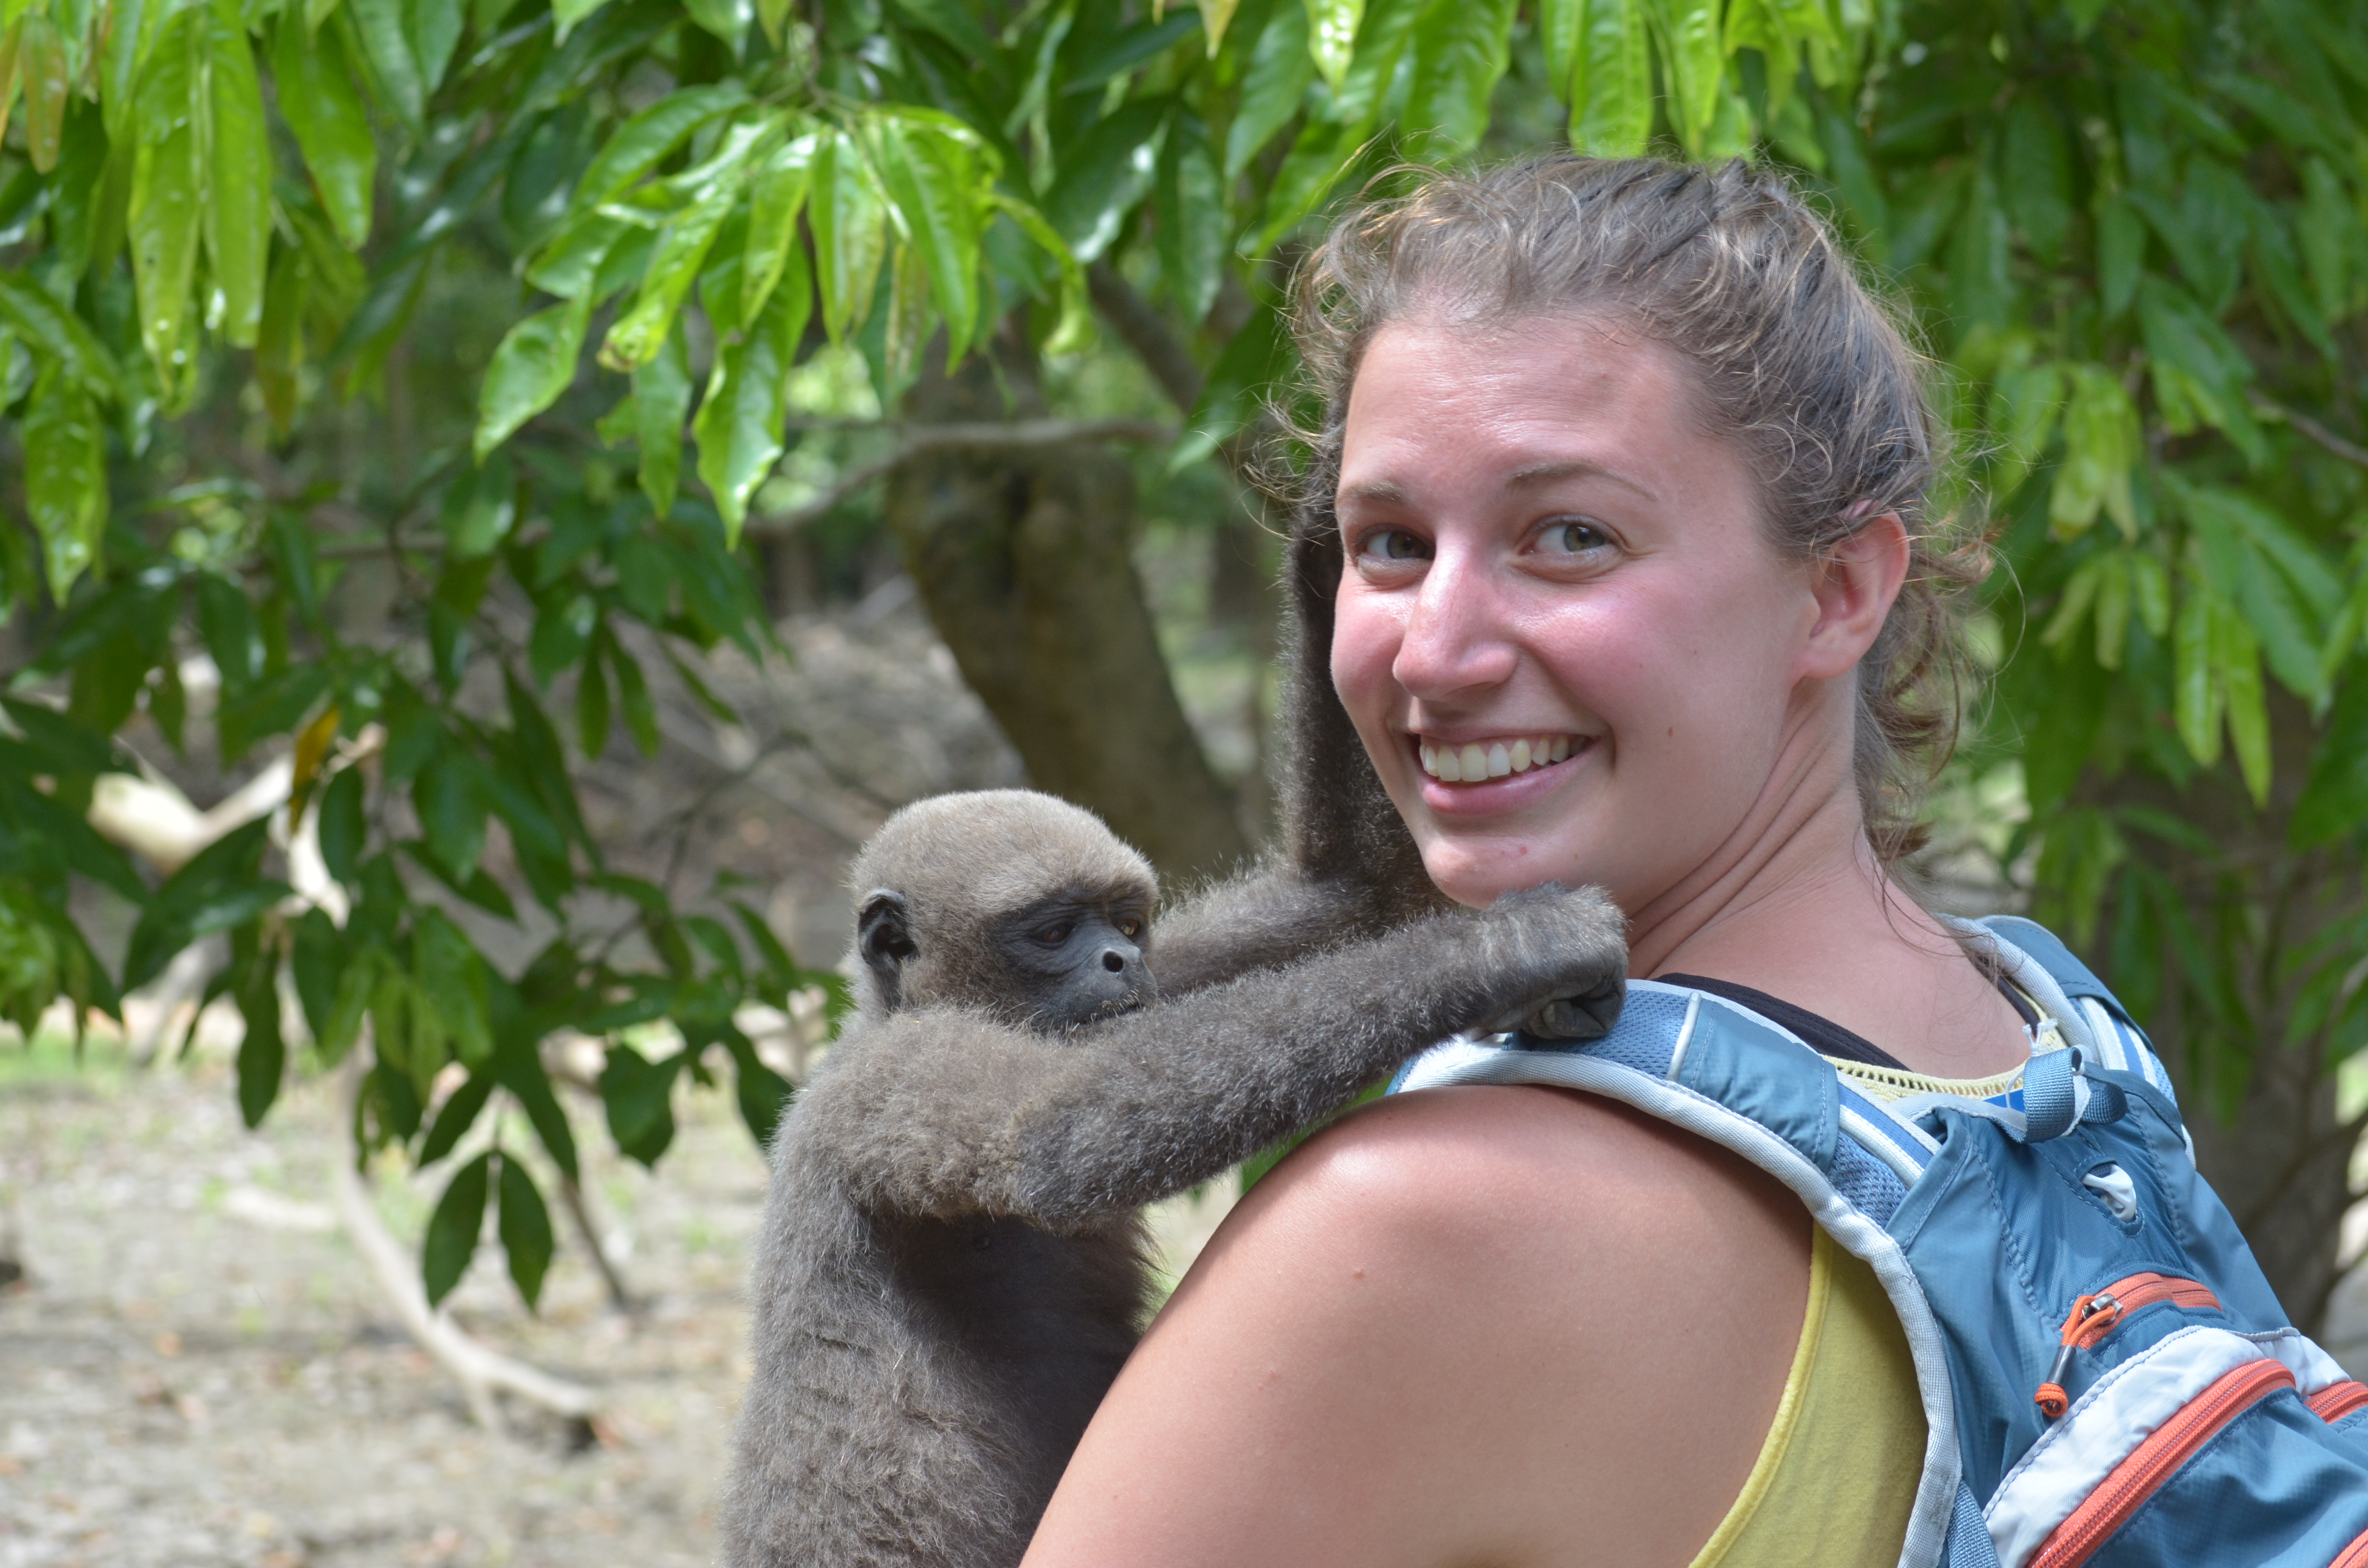
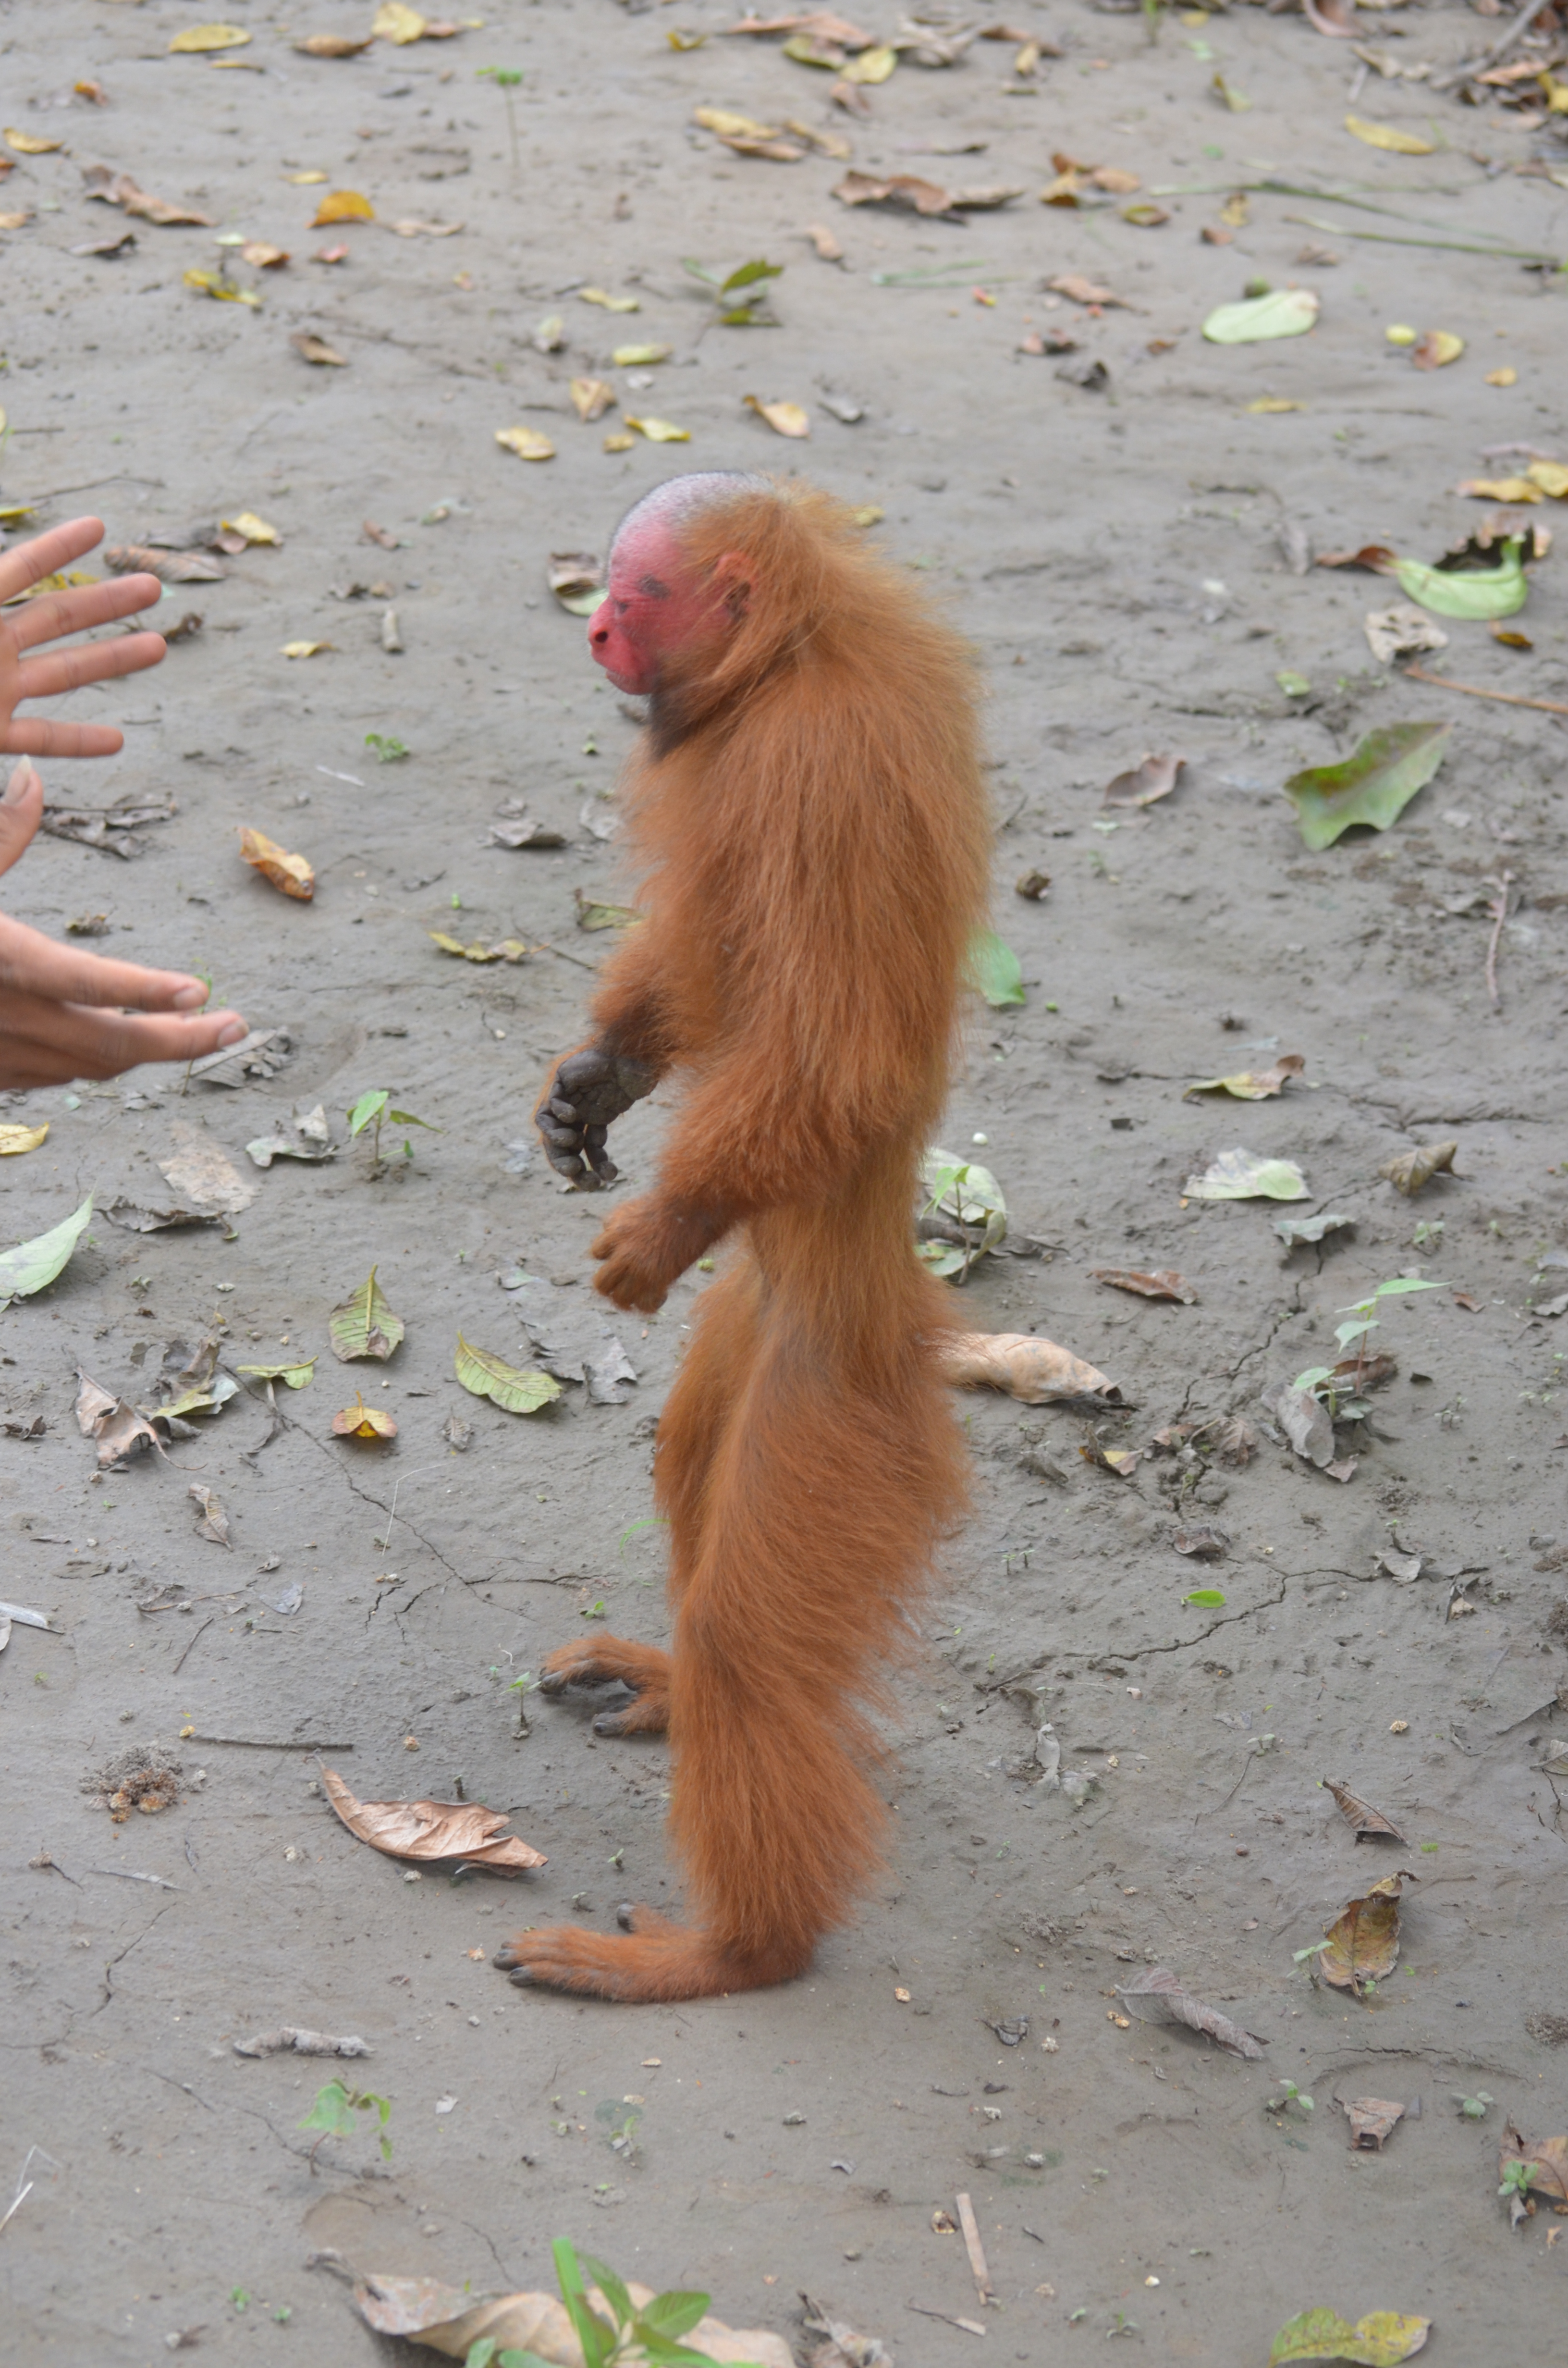
If you’re in Iquitos this is definitely a recommended day trip at the top of the list!! It’s way better than a zoo where you just look at the animals, here you’re interacting with them hands on. We stayed for probably about an hour and a half but could’ve stayed longer as well (it started to get hot). Pack some water with you and bug spray to keep the bugs away and head out to see the wonderful work this group is doing to rescue these animals!

DSC_0379

Chile Itinerary

It’s hard to believe we’re just four weeks away now from our trip to Patagonia! The flights were booked back in January and for a while it felt like November would never come- but now it’s approaching so quickly!

Originally when we planned on this trip our thought had been to do the W Circuit through Torres del Paine in Patagonia region of Chile. However, after our experience on the Inca Trail and just how difficult that was we decided to re-think our plan of spending 4 straight days hiking in unpredictable weather while carrying all our gear and food on our backs for those four days. So, when we got back from Peru I did a bit of tweaking and came up with our revised version below. I’m more excited about this one now than before and think it will be much more fitting for our travel preferences.

Day 1 Leave Omaha at 6:00pmTravel
Day 2 Arrive to Santiago, Chile at 9:40am

Tour Santiago/Pablo Neruda’s house

Fly to Punta Arenas

10:20pm-1:50am on the 25th

Stay in Punta Arenas, arrive very late
Day 3 SLEEP and Tour Puntas ArenasStay in Punta Arenas
Day 4 Penguin Tour and travel to Puerto NatalesStay in Puerto Natales
Day 5 Bus Tour Torres del PaineCamping in Torres del Paine Park
Day 6 Hiking the Torres

Bus back to Puerto Natales at 2:30 pm or 5:45pm

Stay in Puerto Natales
Day 7 Hike Cerro Dorotea in Puerto Natales

Bus back to Puntas Arenas at night

Fly Punta Arenas to Santiago 12:30am, arrive at 3:40am.

Travel at night bus and flight

Stay in Santiago

Day 8 Hike Maipo Canyon near Santiago

Fly Santiago to Omaha at 11:00pm

Flying overnight
Day 9Arrive in Omaha around noonTravel

Cuzco, Peru

The locals are so colorful

Cuzco is definitely on our list of destinations we would return to! Just a short one hour flight from the capital, Lima, it’s a beautiful tourist town. We were there in August which was their winter time and it was definitely a bit chilly. The first couple days were close to fall weather and we were fine with sweaters. But later on we did break out a light jacket to wear over them and a winter hat as well. So be sure to bundle up!

Our hotel
Our hotel, Casa Mayte

One well known characteristic of Cuzco is also its high altitude. Sitting at 11,000 feet it’s not uncommon for visitors to experience headaches or some dizziness. That’s why most hotels will have coca tea waiting for you upon arrival! Not only does it assist with warming tourists on chilly days, it’s supposed to help them acclimate to the high altitude as well. Choosing a hotel can be overwhelming as Cuzco is a popular destination but there are a few things to take into consideration for this process.

Plaza de Armas
Plaza de Armas

First of all, the main square of Cuzco is named Plaza de Armas. We stayed a little off the main square where it was a bit cheaper, but we were still within a 10 minute walk. Getting taxis around the city is never a problem either and usually cost 10 soles if you’re just staying within the city. Expect about 30 minutes to get from the airport to the city center and that costs about 20 soles. Plaza de Armas has some nice churches to see and lots of restaurants spread all around. We didn’t find a market while in Cuzco, but there was some small streets around the Plaza to walk down where it was easy to find outdoor vendors.

IMG_0959
Delicious restaurant next to our hotel called Mama Mia's
Delicious restaurant next to our hotel called Mama Mia’s (fresh squeezed lemonade!!!)

Cuzco is very clean and tourist friendly- we felt safe at all times, even when walking around at night. There’s also a wide variety of food options available wherever you look. And best of all there are TONS of vegetarian options! Cuzco is seriously the most vegetarian friendly destination I’ve ever been to, I was very impressed. Everywhere you look restaurants advertise as vegetarian or vegan and decent meals can cost 15-25 soles ($5-$9).

IMG_1030

The only down side I could find is that street are very, very narrow. And the same goes for sidewalks. So if you’re not walking down the main streets be prepared to be hugging the walls very closely, especially when trucks, cars or taxis pass by. This could make some people nervous but as long as you’re careful there really shouldn’t be a problem.

IMG_0953

Cuzco is usually used as a launching town for a whole lot of excursions. The most popular of course would be to see Machu Picchu (approximately 4 hours away via bus and train). Seeing Moray and Maras, ruins and salt mines, are also a popular day trip and you can read about us going there. There’s also some whitewater rafting options, mountain biking and lots of others. It’s not hard at all to find tour agencies as you’ll see signs for them wherever you look. While I like to book our excursions ahead of time so that I know exactly where we’re going it didn’t look too tricky to book them day of or even a day or two in advance at any of these agencies.

We definitely recommend a trip to Cuzco if you find yourself in Peru!

IMG_1026

                                     Looking out over Cuzco from our hotel

Looking out over Cuzco from our hotel

Yosemite Itinerary and Final Spending

For our weekend trip to Yosemite we traveled over the long Labor Day weekend. Here’s what our schedule looked like:

Friday Land at Sacramento Airport at 8:00pm

Drive 2 hours to Tuttletown Recreation Area to camp

Saturday Drive 2 hours to Yosemite Valley

Day hikes around the valley

Sunday Hike Half Dome
Monday Short Morning hike

Drive 4 hours back to airport (took longer due to traffic)

Flight departing at 4:15pm, arriving to Omaha at 11:30pm

Our expenses came out pretty decent for this trip, especially because we cooked a lot of food at our campsite which saves from needing to pay for restaurants. The money we spent on groceries is not included in our total as we split it with friends and mostly brought things from home. Here’s the breakdown:

ItemMiles/Points usedDollars SpentDetailsActual ValueDate Booked
Flights to Sacramento26,372 miles$11.20 fees each, $22.40 totalSouthwest, used companion pass$1,066.403/6/15
Half Dome hiking permitReservation Total: $20.50

Payment Total: $4.50

Balance Owing: $16.00

$4.50 for 2nd application in lottery

$20.504/3/15

Applied 3/1/15

Camping at Tuttleton$22.00$22.004/15/15
Camping at Upper Pines$78 (for 3 day by accident)$78.004/15/15
Rental car7,952 Chase Points$0.00Booked through ultimate rewards$99.415/24/15
Gas$47.98$47.98
Food52.67$52.67
Airport Parking$26.00$26.00
Park Entrance Fee$30.00$30.00
TOTAL$286.55$1,429.96

How to Pack for the Inca Trail

When researching all kinds of information for the 11 months leading up to our Inca Trail trek it became clear that we wanted to make sure we had all the things in our packs that we would need for an enjoyable experience, yet at the same time packing as lightly as possible to minimize weight we were carrying. Needless to say this proved to be a very difficult task. In the end I think we did pretty well with what we had included and looking back on it here are my recommendations. Keep in mind we hiked the beginning of August so this could differ depending on the time of year you’re trekking.

  • BACKPACK – If anything at all, I would highly, highly recommend having an extremely comfortable backpack and extremely comfortable shoes. We took Marmot packs with us, one with a 45L (me) and one with 35L. It was definitely tight for the two of us, but we were able to squeeze it in somehow.

Of course, if you plan to hire porters (MY BIGGEST RECOMMENDATION OF ALL FOR THIS TREK) then know that you don’t need to give them a backpack to carry your things in- just some bags are fine. If you plan on that ahead of time (unlike us) then you can get away with just bringing a daypack with you (I think mine is around 15L).

NOTE ON PORTERS: The porters will carry up to 12 kilos per person. Or, if you are packed light enough, you can “share” a porter between two people. We did this without a problem, giving the porter our big things such as sleeping bag, pad, extra snacks and extra clothes. This all came to about 12 kilos total between the two of us and we were left with carrying our water, some snacks, cameras and some clothes/toiletries for the day. This helped save us the money of hiring two!

  • WATER – We drank probably around 1.5 liters on the trail while hiking each day; I would recommend drinking a bit more than that. Camel Back or other water bladders typically hold 2L of water so that is what I would recommend packing. Our group boiled water for us each morning and would fill our bladders for the hike for the day. So bringing just a small water bottle with you really isn’t the best idea as there is nowhere to fill up on the trail- plus it takes up more space.
  • SNACKS – I packed way too much food. I ate probably 2 granola bars each day and we went through about 1 bag of trail mix between the two of us. It doesn’t hurt to slightly over pack as you definitely don’t want to go hungry, but they fed us very well at all our meals. I also grabbed some single serving dry mix packets, like lemonade, that were nice to have for some sugar at dinner time. We had one small bag of m+m’s with us as well that we ate during the four days.
  • READING – I brought my Kindle with me thinking I would read at night since we typically reached our campsites by mid-afternoon each day. It was nice to have as a back up, but we were all so exhausted each day by the time we arrived that we typically went straight to bed. I spent zero time reading or bored.
  • HEADLAMP – Do bring some sort of light with you. I have a Petzl headlamp which is nice as it packs down very compactly, however it’s not the brightest. You’ll need this for the mornings when you wake up and it’s still dark, especially on the last day. Headlamp is a must for sure.
  • HIKING POLES – I went back and forth on this item for a very long time, but in the end we bought trekking poles to bring with us. ONE OF THE BEST DECISIONS WE MADE. I’m honestly not sure how I would have made it without them. They were helpful to lean on for the many stairs we took going up but more than that they provided stability on the very steep steps going down. I felt like they helped way more saving my knees on the downhill than anything else. Bring hiking poles with you!!! Here are the ones we got.
  • TOILET PAPER – There are small toilets along the trail that are literally just holes in the ground you squat over. But no toilet paper is provided. Be sure to pack some with you! The two of us shared a roll over the 4 day hike and that was fine. I would recommend bringing some extra or some tissues with you as well as it can be a little chilly some day and I needed some for my nose.
  • SLEEPING PAD – Thermarest is the way to go. They pack down compactly and don’t weigh very much. Here is the one I have that packs down to about the size of a nalgene bottle and weighs next to nothing. You can also rent some from the trekking company typically. They’re a lot bigger, so be prepared to clip them on the outside of your backpack, but they were super light so not a bad deal at all.
  • SLEEPING BAG – All we had heard about this trek was how cold it was at night. So needless to say we grabbed not only our winter sleeping bags (rated to about 15 or 20 degrees) but also our summer sleeping bag liners to put inside them. This was definitely overkill and we didn’t use the liners at all. While it did get chilly, it was only in the low 40’s I would say. We were totally fine with our layers and winter bag (mine is a Kelty that’s about 10 years old and does not pack down very small at all).
  • TOILETRIES – Other than the standard items (deodorant, toothbrush, toothpaste, etc) I would recommend a pack of wipes. It’s nice to use just to clean up a little at the end of the day when going to bed without a shower. Also bring sunscreen as the sun can be strong hiking at such high altitudes and bug spray as there were surprisingly quite a few mosquitoes along the way as well. We got eaten alive the first day!

We also packed blister guard bandaids just in case, but never ended up needing them. Oh, and if you’re a light sleeper I would recommend a pair of ear plugs- you can hear snoring from neighboring tents sometimes and the first night since we were near a village there was lots of dogs barking.

Lastly, mostly since we knew were going to the jungle, we also bought Sawyer bug spray ahead of time to treat our clothes with it. This meant we sprayed our clothes down before we left home- I’m not sure if that helped in the end or not but it’s highly recommended. Due to the high altitude, it was actually a little hard to get the bug spray to “spray”. You will either need some patience with it or to find a cream and rub it on your skin instead.

  • ACCESSORIES – Each of us have a Buff and I think they’re just the best hiking accessory ever. I would strongly recommend investing in one as they can keep your ears toasty when it’s chilly out while not causing you to overheat. Sunglasses were also great to have on the trail as the sun can get really bright.
  • MEDS– We were never in enough pain to need ibuprofen, but headaches can be a common side effect of altitude sickness so it’s a good idea to bring some along just in case. I also REALLY REALLY recommend getting altitude sickness medicine. We got some diamox from our doctor before we went but realized we didn’t have enough when we arrived. We bought some ______ locally at a pharmacy in Cuzco and took the pills religiously each day. Be prepared for tingly feelings the whole time, especially in your feet, face, and fingers- this can be a side effect of the meds of just from the altitude in general. But it was totally worth it to avoid feeling nauseous, having a splitting headache or throwing up. We had no altitude sickness at all and I’m extremely thankful for that.
  • CLOTHES – Here’s what I packed for actual clothing:

2 pairs of thin wool liner socks for hiking

4 pairs of regular wool socks for hiking

2 pairs of underwear- sounds gross I know

2 sports bras

1 pair of thin, spandex leggings, 1 pair of thick knit leggings. I used these for sleeping and didn’t really need the thick pair at all

1 pair of quickdry, convertible zip pants. Used these as pants and shorts during the trip

2 longsleeve shirts- I did use both of these

1 sweater- didn’t need this

1 fleece jacket- I used this at night and in the early mornings

1 rain jacket shell- Used this the entire last day when it rained the whole time

1 winter hat- used this at night and mornings

1 pair of winter gloves- never used these

2 short sleeve shirts

Nights are definitely cold and so are the mornings. I started off with my long spandex on under my quick dry pants for the mornings when we began our hikes. But always within about 15 minutes of hiking I would warm up enough that I didn’t want them anymore and usually just wanted to zip the pants into shorts instead. So I would recommend using the spandex for sleeping in at night and maybe wearing at night around the campsite but other than that it’s not actually needed for hiking. It’s really hard to change out of it in the filthy bathrooms along the way when you’re trying to avoid anything touching the floor at all costs.

  • SHOES – Finally, hiking boots. It is so so important to have comfortable shoes for this hike- getting blisters is just not something you want to deal with. I completed this hike in 5 year old hiking boots from Walmart and my feet were in PAIN each day. I’ve since bought nice Merrell boots and it’s made a world of difference.

I read reviews that you should bring along a pair of shoes to change into in the evenings to wear around camp, but we decided not to do that. It meant just more weight and a whole other item to try to fit. The amount of time we actually spent up and about at the campsites was very little. We basically went to sleep right away so we never needed them. If you are planning to shower in Aguas Calientes you may want a pair to wear in the showers there.

  • CAMERA – Lastly, we brought our phones with us (though do not expect to have any signal or WIFI during the trek) to take photos, our DSLR camera and GoPro. We had back up batteries for the GoPro since there’s no opportunities to charge it along the way and we had large sized memory cards to use for them since we wanted to have the chance for lots of photos!
  • MONEY – Oh yeah, bring cash! You’ll be expected to tip the porters and your guide so you’ll need some cash for that. Bring extra if you’re not planning to hire a porter, just in case you change your mind along the way. Also, you will need a few soles for a locker to store your pack at Machu Picchu and some cash or credit card to buy a bus ticket down to Aguas Calientes ($12) if that is not included in your trek package.

That was all! It doesn’t sound like much but it all adds up very quickly and our packs were busting at the seams. It was nice to have our phones once we made it down to Aguas Calientes as the restaurant we were in had free Wifi for us to use. We were very smelly by the time the trek ended so if you have space and weight available, consider bringing a fresh outfit to wear for the four hour trip it takes to get back to Cuzco. Some of the restaurants also have hot showers available (even for free) so again if you have space you can toss in some travel size soap and shampoo and enjoy that at the end as well.

I learned from this hike that I do not do well trying to hike and carry weight in my pack at the same time. I would caution anyone who does not have a lot of experience with this to load up your pack with all the items you’ll actually be carrying and practice hiking for long periods of time with it on. I threw in some items that I thought would equal out to the weight I’d be carrying and we went on some walks with that. But when you factor in the high altitudes which provides a lot of shortness of breath, and hiking uphill it was a lot tougher than I had anticipated. The fact that things also took up so much space and made my pack huge was tricky as well. I’m so glad we hired a porter in the end, but if you’re looking to save a few bucks make sure to do some practice runs with your pack ahead of time to 1) make sure everything fits in it and 2) see if you’ll be happy carrying it for four days straight.

Trekking the Inca Trail: Part Two and MACHU PICCHU!!!

IMG_0593
IMG_0572

Days 1 and 2 on the Inca Trail were down and that meant days 3 and 4 were supposed to be easier. We still decided to hire a porter for day 3 and again I’m very glad we did so. Even though the second half of the trail didn’t involve another 5 hours hiking uphill, it was still tough! At the end of the second day we learned that some of the close campsites to the Sun Gate had been washed out in the rainy season so it looked like we were going to have to camp farther away than normal. This meant we slept in a bit on the third morning since we had less to hike.

DCIM101GOPRO
IMG_0571

But day 3 was still rough! Not as steep, but lots of ups and downs. However, this was one of the prettiest days as the scenery changed to begin looking much more green and lush and jungle like. There were a few especially pretty look outs along the way and we took so many photos on this day. Even got a close shot of a hummingbird! Again, passed more ruins throughout the day and we learned that corrals for llamas were built every 20 kilometers along the trail. This was because that’s as far as the llamas could go in one day.

IMG_0618
DCIM101GOPRO
Beautiful flora on the trail

Our last campsite was near a big set of ruins, but I was so exhausted by the end of this day I actually started to fall asleep while sitting at the ruins listening to the history of it. This was where we hit the steepest and scariest stairs yet of the whole hike. And that’s also when I learned we would be hiking down the treacherous stairs at 3am the next morning.

DCIM101GOPRO
DCIM101GOPRO

Usually if you camp at the regular campsite near the SunGate it’s about 1 1/2 hours hike to get to the Sun Gate and Machu Picchu. However, since we were so far away we had much longer to go and woke up to start our hike at 3:00am. We were going extra slow since it was both pitch black out AND raining. Thank goodness we had our poles and head lamps, I was really nervous trying to go down the stairs in those conditions. Our guide, Edwar, was so kind, he saw how scared I was and how slow I was going and switched his backpack with mine. So he took all the tons of weight I had and I carried his little tiny daypack instead. I was so grateful for this and I’m sure the rest of the group was as well since I would’ve been much slower without that :-).

IMG_1008

Funny enough, I found the last day to be the hardest day out of the whole trek. It took us about 6 hours to reach Machu Picchu and my hands were cold, we were soaked, and I was exhausted from going through the dark and getting up so early. I think part of it was a mental thing since I was expecting it to be an easy hike on the last day and kept thinking we were practically there already! But again, the last day also involved a lot of ups and downs and almost entirely over rocks and cobblestone which resulted in some very sore feet.

IMG_1014

One part in the trail is so steep in fact that you have to put  your poles away and use your hands and feet to climb up the insane stairs. This is known as the “gringo killer”, not surprisingly. Thankfully it’s not too long, but it was the one part where I started to cry since my fingers were numb and I was exhausted and sick and tired of hiking in the rain. By that point I was pretty much ready to be done and never hike again! (Though thankfully that didn’t last too long :-))

IMG_0636

Then soon after that we reached the Sun Gate which was the sign we were almost there! Sadly our last day was the one day it rained so the clouds made it nearly impossible to see Machu Picchu from the Sun Gate. We also met a lot of tourists there who had hiked up from Machu Picchu and were a little confused to see us coming from the other direction.

IMG_0634

I will say Machu Picchu is one of the most incredible sites I have seen. Whether or not you decide to do the Inca Trail, I would absolutely highly recommend visiting Machu Picchu! It was just absolutely huge and there was so much to see. Our guide took us on a tour around Machu Picchu after we paid a few soles to leave our bags at the locker area. You could easily spend a few hours touring around Machu Picchu, but with the rain/cold/exhaustion we only spent about an hour. Be prepared to be met with a lot of crowds wherever you go and know that getting down to Aguas Calients (the main town) is another hour hike down from Machu Picchu. Or, like us, you can pay $12 for a bus to take you down in about 10 minutes. From Aguas Calientes you catch the train back in the direction of Cuzco. At the main train stop you’ll grab a collectivo (mini van buses) to take you the rest of the way to Cuzco. All in all it’s about 4 hours minimum from Aguas Calientes to get back to Cuzco.

Back to Machu Picchu: they say a picture is worth 1,000 words so I’ll leave a few here to speak for themselves.

IMG_0637
IMG_0642
IMG_0657
IMG_0658
IMG_1016
IMG_0705
IMG_0698
IMG_0697
IMG_0694
IMG_0690
IMG_0683
IMG_0669

Trekking the Inca Trail: Part One

View at the start of the trail

Hiking the Inca Trail was both fun and miserable, all at the same time. We did a lot of prep work for it as we had to plan so far ahead to make reservations- read all about that process here. The whole hike is 4 days in length and ends the final day at Machu Picchu. The way the majority of visitors travel to Machu Pichu is via train but we wanted to hike the way of the ancient Incas!

DSC_0051

Because of unforseen flight delays we had only one day in Cuzco to acclimate to the altitude- regularly 2-3 days are recommended. In fact, some trekking companies won’t even let you on the hike unless you can show proof from your hotel that you’ve been in Cuzco at least 2 nights.

View of the first ruins we hit

The first morning starts very early, for us it was around 5:00am. We drove for about 1 1/2-2 hours to KM 88 which is the check point for the start of the trail. Eat breakfast ahead of time and buy water in Cuzco as well- you are not provided water on the first day of the hike and while you can buy it along the trail that day, Cuzco is much cheaper. The trekking company offered sleeping bags and sleeping pads for rent, but we brought our own. So we took a bit of time unloading things and gearing up and then after our passports and ticket for the trail was checked we were off.

The first day was a definitely a bit of a challenge, but by far the easiest day of all. We probably started hiking around 9:00am or so since we had also stopped at a restaurant for breakfast along the way. We hiked for around 5-6 hours which included some gentle slopes up and down and some flat space as well. This was nice as it was mostly dirt- not a lot of hiking over rocks yet. The downside is that the first day you’re passing through a lot of small villages for the whole first day. This means it’s not as much nature, it’s more manure from donkeys along the way, very poor people and houses and some small huts to buy snacks and drinks from. Our first night we camped right near one of the villages and heard barking dogs all night (thankfully I had earplugs with me and had no trouble sleeping with those in). Because there are so many groups starting each day there are many campsites spread within a quarter mile or so- you won’t be too close to the other campsites.

So many stairs along the pass

Typically groups can have around 10 hikers at a time, sometimes even up to 15. Ours only had 4 for whatever reason. Our guide told us that when he leads the large groups usually there is one person every time who can’t make it the whole way and turns back. We passed a handful of people on this day who were doing just that. The second day is the most physically challenging so if you finish that, you’re already half way there and no sense it turning around then.

Oh our way up to Dead Woman's Pass
Oh our way up to Dead Woman’s Pass

Around 1:00pm we stopped for lunch on the first day which the porters had already prepared for us. After lunch it was around 1 1/2 – 2 more hours until we reached camp. It sounds like that leaves a lot of free time in the afternoon since we arrived around 4:00ish- but honestly each day we were so exhausted by the time we reached camp that once we unpacked our sleeping bags and pads and set them up we pretty much fell asleep until dinner time.

Don’t get your hopes up too high for bathrooms along the way on the trail. They pretty much consist of outhouses. Again, our guide, Edwar, told us that they’re trying to renovate these as it’s really hard on hikers to trek all day and then have to squat to use the bathroom. Plus it’s nasty! Don’t forget to pack toilet paper as that’s not available along the way.

Day 2 started bright and early around 6:00 or 6:30am with the porters delivering hot coca tea to our door. This tea helps with altitude sickness, which we thankfully didn’t experience, so we made sure to drink it each morning. We had a delicious breakfast consisting of a pancake with fruit and we were off. After being tired enough from carrying a pack on the “easy day” we decided to hire a porter for the next two days. Each porter will carry up to 12 kilos so Pablo and I each unloaded about 6 from our packs so that we would only have to pay for one porter. This was plenty as we were left with just a few things in our packs that weren’t very heavy at all. Usually porters cost $100 to carry your bag for the whole trek, we paid 200 soles for 2 days for ours so pretty close to the regular charge cost.

Highest Point on the Trail

Day 2 is known as the hardest physically because it involves 5 hours of going uphill on stairs the whole way. And boy was it hard. Wear layers as the mornings are cold but you’ll be warming up in no time from the excursion it takes to go up step after step. I tried putting my long spandex on under my quick dry pants and quickly regretted that idea. Same with a winter hat. Within 5 minutes I was sweating too much to want either of them. So stick to just a buff to keep your ears warm and just quick dry pants- though they’re thin and you’ll feel a little chilly at first, trust me you heat up fast. I wore a t-shirt, long sleeve shirt and fleece every morning to start and would lose the top layers throughout the day as we went (usually the fleece didn’t last long at all).

IMG_1001
Campsite view
Campsite view

Dead Woman’s Pass is the highest point of the trail and this is what takes 5 hours to hike up. The views were great!! After that it was about 3 hours hiking down hill down stairs on the other side of the pass to our campsite waiting below. We arrived early at it again and had both lunch and dinner there. This time I really fell asleep so fast once we got there because I was exhausted from all the strain on my legs from the day. While going uphill is challenging and exhausting, going downhill can be more painful. I was so grateful to have our hiking poles going down as they really help to take some of the shock off the joints and feet on the steep downhill steps. We had such great views from our campsite on this night, and were very close to all the other hikers groups as well! But no noise to really worry about because everyone is in bed early, up early and very, very tired.

DSC_0082

Preparing for the Inca Trail

IMG_0975

The Inca Trail was the main thing that drew us to Peru in the first place and caused us to plan our trip. But I will say when I was doing research on the trail I was completely overwhelmed by what I found. I’m hopeful that by sharing the information I’ve found it will help to cut down on others’ time as well.

  1. Which trekking company do I go with?

    This is perhaps the most overwhelming part of all as there are so many companies to choose from! You will find all sorts of price points from the different groups and different dates of departure and inclusions as well. We went with Eco Path Trek and couldn’t have been more pleased with our decision. They were one of the cheapest quotes I found which made me a little wary, but this was mostly due to the fact that they’re a new company. This also made me slightly nervous as I could only find a total of two reviews for them online, but what I read looked good so we went with it and paid $385 per person. Some things to know about what was included and not included in this price:

  • Bus from Machu Picchu down to Aguas Calientes NOT INCLUDED: $12 a person. You can also walk down but it will take about an hour. It was cold and raining the day we were there and we were tired from already hiking a ton that day.
  • Train ticket and bus transportation back to Cuzco INCLUDED: The pricing on these tickets can vary greatly.
  • Porters to carry our packs NOT INCLUDED: I would absolutely highly, highly recommend paying for this if it’s not included in your trek. We tried to tough it out and do it ourselves and gave up after day 1. Hiring porters was the best decision we made (and literally EVERYONE on the trail does it).
  • Guide, porters to carry cooking/tent equipment and transportation to the start of the trail INCLUDED. Tents were two people per tent and very spacious, we didn’t feel squished at all.
  • Meals along the way MOSTLY INCLUDED. Breakfast the first day was not and on the last day lunch/dinner was not. We did make a stop on the first day at a small breakfast place where we ordered food and on the last day we ate at a restaurant in Aguas Calientes.
  • Entrance ticket to Machu Picchu INCLUDED.
  • Tips for guide and porters NOT INCLUDED. Be prepared to pay around 70 soles for a tip to each porter- however this is divided among all the hikers in the group. The more people, the more porters needed, but the more people to divide the cost between.

Our guide, Edwar, was fantastic!!!! He spoke excellent English and of course Spanish and was very knowledgeable about everything we saw along the way. The food was also extremely impressive- who knew they would be cooking us multiple course plates for each meal! I barely manage spaghetti when we go camping so not sure quite how they did it. One night they even produced a freshly baked cake! Edwar did say he sees some other companies do less of the carbs and more just focus on serving salads for the meals. This caters more to the European crowd, but the last thing I wanted to be eating after hiking for hours each day was a salad. This would be a good question to ask whatever company you book with.

IMG_1009

2. Is it really that hard?

Short answer- YES. While I wouldn’t consider myself to be an expert hiker, we do like to go on several good hikes each year and the Inca Trail was by far the hardest I’ve ever done. It’s also the longest one I’ve ever done so keep that in mind. Up until this point climbing Mt. Kinabalu in Malaysia was the winner but that was only two days.

What makes it so hard? First of all, the altitude. It’s so difficult to breathe up there! I absolutely would recommend everyone to get altitude sickness medicine when attempting it just to be on the safe side. We got diamox from our doctor before leaving and in Cuzco bought some at a local pharmacy as well (make sure you buy the actual stuff to help you with the altitude- there’s other meds you can buy that are pretty much just a lot of caffeine which also helps, but is not what  you really want). Note, your face, hands and feet will probably feel very tingly when hiking- this can be a side effect of the meds or just from being at a high altitude in general; it’s weird at first but after a while you won’t even notice it anymore. Second, there are hardly any flat sections of the trail. It’s almost uphill or downhill and mostly also over rocks. My feet were sore by the end just from constantly stepping on uneven ground and not having a soft smooth surface. I can’t stress enough how much hiring a porter helped and using trekking poles. I think I would have been crying on the trail without those two pieces.

IMG_0977

3. How do I train for this hike?

From what I had read the best advice is to start at least 3 months in advance and work up to using the stair master for 2 hours a day. Yes, you read that right, 2 HOURS EACH DAY. We never made it to quite that level of dedication, but we would regularly go to the gym at least 3-4 times a week and do the stair master for 1- 1 1/2 hours each time. It’s really hard, but I think really helpful as well.

We also spent some time getting used to the weight in our packs by carrying them with us on walks. If you can find hills to walk up and down with your pack on, even better. My advice here would be to actually fill your pack with the exact items you will be taking as the date of departure approaches. I tried to fill it with weight I thought would be equivalent, but then had a surprise in store for me when I put the actual stuff in there. It was slightly heavier, but more than that it took up so much room! My pack was jammed full!

IMG_0998

4. When is the best time to go?

I believe April-October are the main months for doing the hike. You may be able to do it in November or March, but during the months of December, January, February it’s rainy season and you can’t access the trail. August is the peak month go, which is when we went right at the beginning of the month. Do keep in mind they’re below the equator so August was actually wintertime in Cuzco.

5. How far ahead should I plan this?

We made our reservations 11 months in advance. This is probably a bit on the safe side, but it’s definitely strongly recommended to reserve at least 6 months in advance, especially for the busy season. Our guide told us he thinks a year in advance is the best option so that trekking companies can put in reservations early to get the best campsites along the way. Keep in mind that if you have exact dates you need to do the hike you really want to make a reservation as soon as you can. If you have some flexibility, you probably have a bit more time.

DSC_0049

6. Can I just hike this on my own?

No, no one is allowed on the trail without a guide and all the proper paperwork. Don’t forget to bring your passport!

7. Why is it so expensive?

This was my first thought too, but when I looked at all the costs that are actually included it doesn’t start to look so bad in the end. Here’s some estimations to help you understand (and rationalize) the spending better.

For example, it’s 299 soles (US$105) for the entrance ticket for the Inca Trail, 126 soles (US$44) for your Machu Picchu pass and around 45 soles (US$16) for a guided tour of Machu Picchu. On top of this is your US$48 train ticket and bus transport to and from the Inca Trail and Machu Picchu.

If you add all these costs up, you’ve got US$213 vital elements included in your ticket, meaning you’re paying around US$45.50 per day for your food, porters, camping equipment and guide.

IMG_0572

8. Any tips for the trail?

I know I sound like a broken record, but HIRE PORTERS AND BRING HIKING POLES. This will make your hike so much more enjoyable. Other than that, pack bug spray because the mosquitoes were annoying (sprays are hard to work at the high altitude so if you have a cream or lotion even better). Sunscreen is important, sunglasses, a buff was great and a water bladder. Other than that, enjoy each day along the way as it’s all fun, not just when you reach Machu Picchu!

DSC_0070

Salineras de Maras

DSC_0222
DSC_0224
DSC_0267
IMG_0727

For our last day in Cuzco I knew I really wanted to get out of the city to see the famous salt mines about an hour away. Our flight was departing at 3:15pm so we had signed up with a tour company for a private tour with just our own driver and no guide. This way we could go at our own pace and be back early enough for our flight. The typical standard tour departs around 9:00am and arrives back in Cuzco around 3:00pm, including stops at both Maras and Moray, another ancient ruin close by. The cost to join a group tour is $20 per person, but since we had limited time and had just seen Machu Picchu we decided to skip the Moray part and just focus on Maras instead.

DSC_0213
DSC_0241


DCIM101GOPRO
Getting to walk around amoungst the actual salt pools!

9:00am came and no one showed up at our hotel to pick us up. After we called them at almost 9:30 they said someone was on their way. Long story short, someone did eventually show up but we spent the next hour following them all around the city until we eventually realized they thought we were part of the group tour. We explained we had a private tour scheduled, the company claimed that wasn’t the case because there was no confirmation, they tried to charge us extra money than our original quote since now it was “last minute”. Eventually we just took our money back and decided we would figure it out on our own. I don’t like people taking advantage of others for any reason and wanted no part in being ripped off by these guys so once we left we had a quick huddle to decide what to do. It was now 10:00ish am as we had wasted so much time but Pablo just flagged down a taxi and asked if they would take us directly to the Salt Mines. The guy said sure! It cost us 100 soles for him to drive us both to the Salt Mines and then wait for us for an hour while there. This ended up being cheaper than what the tour company wanted to charge us anyway and they literally had done the same thing, just flag a taxi down in the street. Morale of the story: If you need to do a quick trip there and don’t mind not having a guide, just hire a taxi yourself.

DSC_0245
DSC_0231
IMG_0719
DCIM101GOPRO
The Salt Mines are literally in the middle of nowhere which just makes them look all the more impressive!

The entrance fee to the Salineras is 10 soles per person and we really could have used more than an hour there. I would say at least 1 1/2, maybe even two hours, would be ideal. This is partly because it takes a little bit of time to hike down into them from the parking area and honestly just because the views are so out of the this world! You want time to explore and walk around.

It’s one of the last manually working salt mines in the world, to my understanding. This means there’s no machinery used to harvest the salt here, it’s all done by hand. The workers around are friendly and a few told us a little about the process. It was much more hot being down in the salt mine than back in Cuzco and I was not prepared for that. I highly suggest bringing layers as we were covered in our warm wool sweaters because of how chilly it had been in Cuzco.

DSC_0234
This worker was carrying 50 kilos of salt!
DSC_0265

Of course you can buy samples of the salt if you’d like which we didn’t do but now wish we had. They have some small gift shops near the parking lot to purchase salt or other souvenirs and they have toilets available to use for 1 sole as well. I would also recommend bringing water and sunglasses as the sun reflecting off the pools of salt is so bright and you will get thirsty from the heat. The roads to get there are also quite curvy in sections and I know Pablo was starting to feel a little car sick by the time we arrived so just a caution there as well. Though it may seem like a bit of a drive to reach it, I believe it was 100% worth it as it ended up being one of my highlights for the trip! It’s just something you don’t see everyone on a regular basis and a really unique experience. If you make it to Cuzco, definitely add in some time to visit Maras!

DSC_0234
DSC_0221
DSC_0214
DSC_0263
DSC_0224

Yosemite Valley

DSC_0012

First views of El Capitan driving into the Valley

A few things we learned about Yosemite Valley during our weekend there included just how crowded it can get in the parking lots. We arrived to the Visitor Center parking lot around 9:00am and had no trouble finding a parking space, but there were quite a few cars there already. Although you can drive to the different trail heads, there is a free shuttle throughout the park as well. This cut out us having to worry about finding parking everywhere we went. The shuttle was very quick, coming by every 5-10 minutes. There’s also a store near the visitor center where you can buy some basic food items though be prepared to pay top dollar for them. And if you really want you can also eat at the deli or couple other restaurants there as well. The store closes at 10:00pm and I’m assuming the other restaurants are about the same.

A very dry Mirror Lake

I had really wanted to do the Upper Yosemite Falls hike which is around 7 miles and supposed to be pretty strenuous. However, upon arrival and speaking with the ranger we learned that the Falls were in fact dry; so we would be hiking the whole way to not see any water. We decided that was not worth it and headed out to Mirror Lake instead via shuttle.

This was another disappointment as we quickly completed the 1 mile hike to Mirror Lake to find it completely dry without any water in sight. This was quite a bummer so we turned around to catch the shuttle back to our car and decided to head to Sentinel Dome instead. The main shuttle does not go there and it took close to an hour for us to drive there due to crazy traffic in the park around the visitor center. (I do believe there is a less frequent shuttle that goes there, but it ends around 6:00pm and we wanted to stay later than that to see the sunset).

Mirror Lake hike
Mirror Lake hike

The hike up Sentinel was great! Only a mile long, but the views from the top were still excellent. It was warm hiking up, but chilly at the top with the wind. I would definitely recommend this hike if you want killer views and not a long way to hike. Driving from the Yosemite Valley Visitor Center to get there was probably just under an hour, with a little traffic around the Visitor Center included.

DSC_0079
Top of Sentinel Dome
IMG_1017
IMG_1021

Just 2 miles further down the road is also Glacier Point which has a reputation for fantastic sunset views. When we spoke with the ranger that morning she told us this was a very popular spot to hit and the parking lot tends to fill up throughout the day. If we were to reach it and it was already full a ranger would be there to direct us to an alternative parking lot where we would then catch a shuttle over. However, she did add that by sunset (which was at 7:20pm) it started to clear out a bit so we may have some luck just finding a spot. She recommended we try to be there by about 6:00pm to ensure we could find a spot and get settled in prior to the actual sunset.

A bear ran right across the road in front of our car on the way to Glacier Point!

When we showed up right around 6:00pm, the line of cars trying to get into the lot to find parking was super long. We waited there for a bit but eventually gave up as it was just taking way too long. I’m still not sure why this was the case as we could see several open spots from where we were but regardless we back tracked up the road about a quarter mile to where there was another look out point with parking available. After parking there and checking out that view for a bit we just walked the 10-15 minutes down to Glacier Point.

View from Glacier Point

There were definitely plenty of people there, many with tripods already in place to catch the perfect shot. Several gentlemen also had giant telescopes they had brought to view the top of Half Dome and were happy to share with all the visitors and explain how they worked. One could zoom in so close we could actually see a person standing on the top of Half Dome, far far in the distance. There was also a gift shop center of some kind there attached to a small museum but it was already closed by the time we arrived.

There were a lot of good vantage points there to watch the sunset and Pablo captured quite a few good angles. It was definitely chilly by this time of the evening so make sure you have some layers to bundle up in- I was glad to have my buff, long pants and fleece jacket to wear. The only downside of this stop was the long drive back to camp afterwards, a little over an hour to get back. We were exhausted by the time we arrived and didn’t even feel like making dinner, but with our plan of getting up very early for our big Half Dome hike the next morning we knew we needed to eat something so we whipped up some quick pasta. Day one complete!]

Our trusty campsite at Upper Pines- complete with its own bear box for food storage