Zion- Birch Hollow Canyon (Sep. 2014)

Birch Hollow Canyon
Birch Hollow Canyon

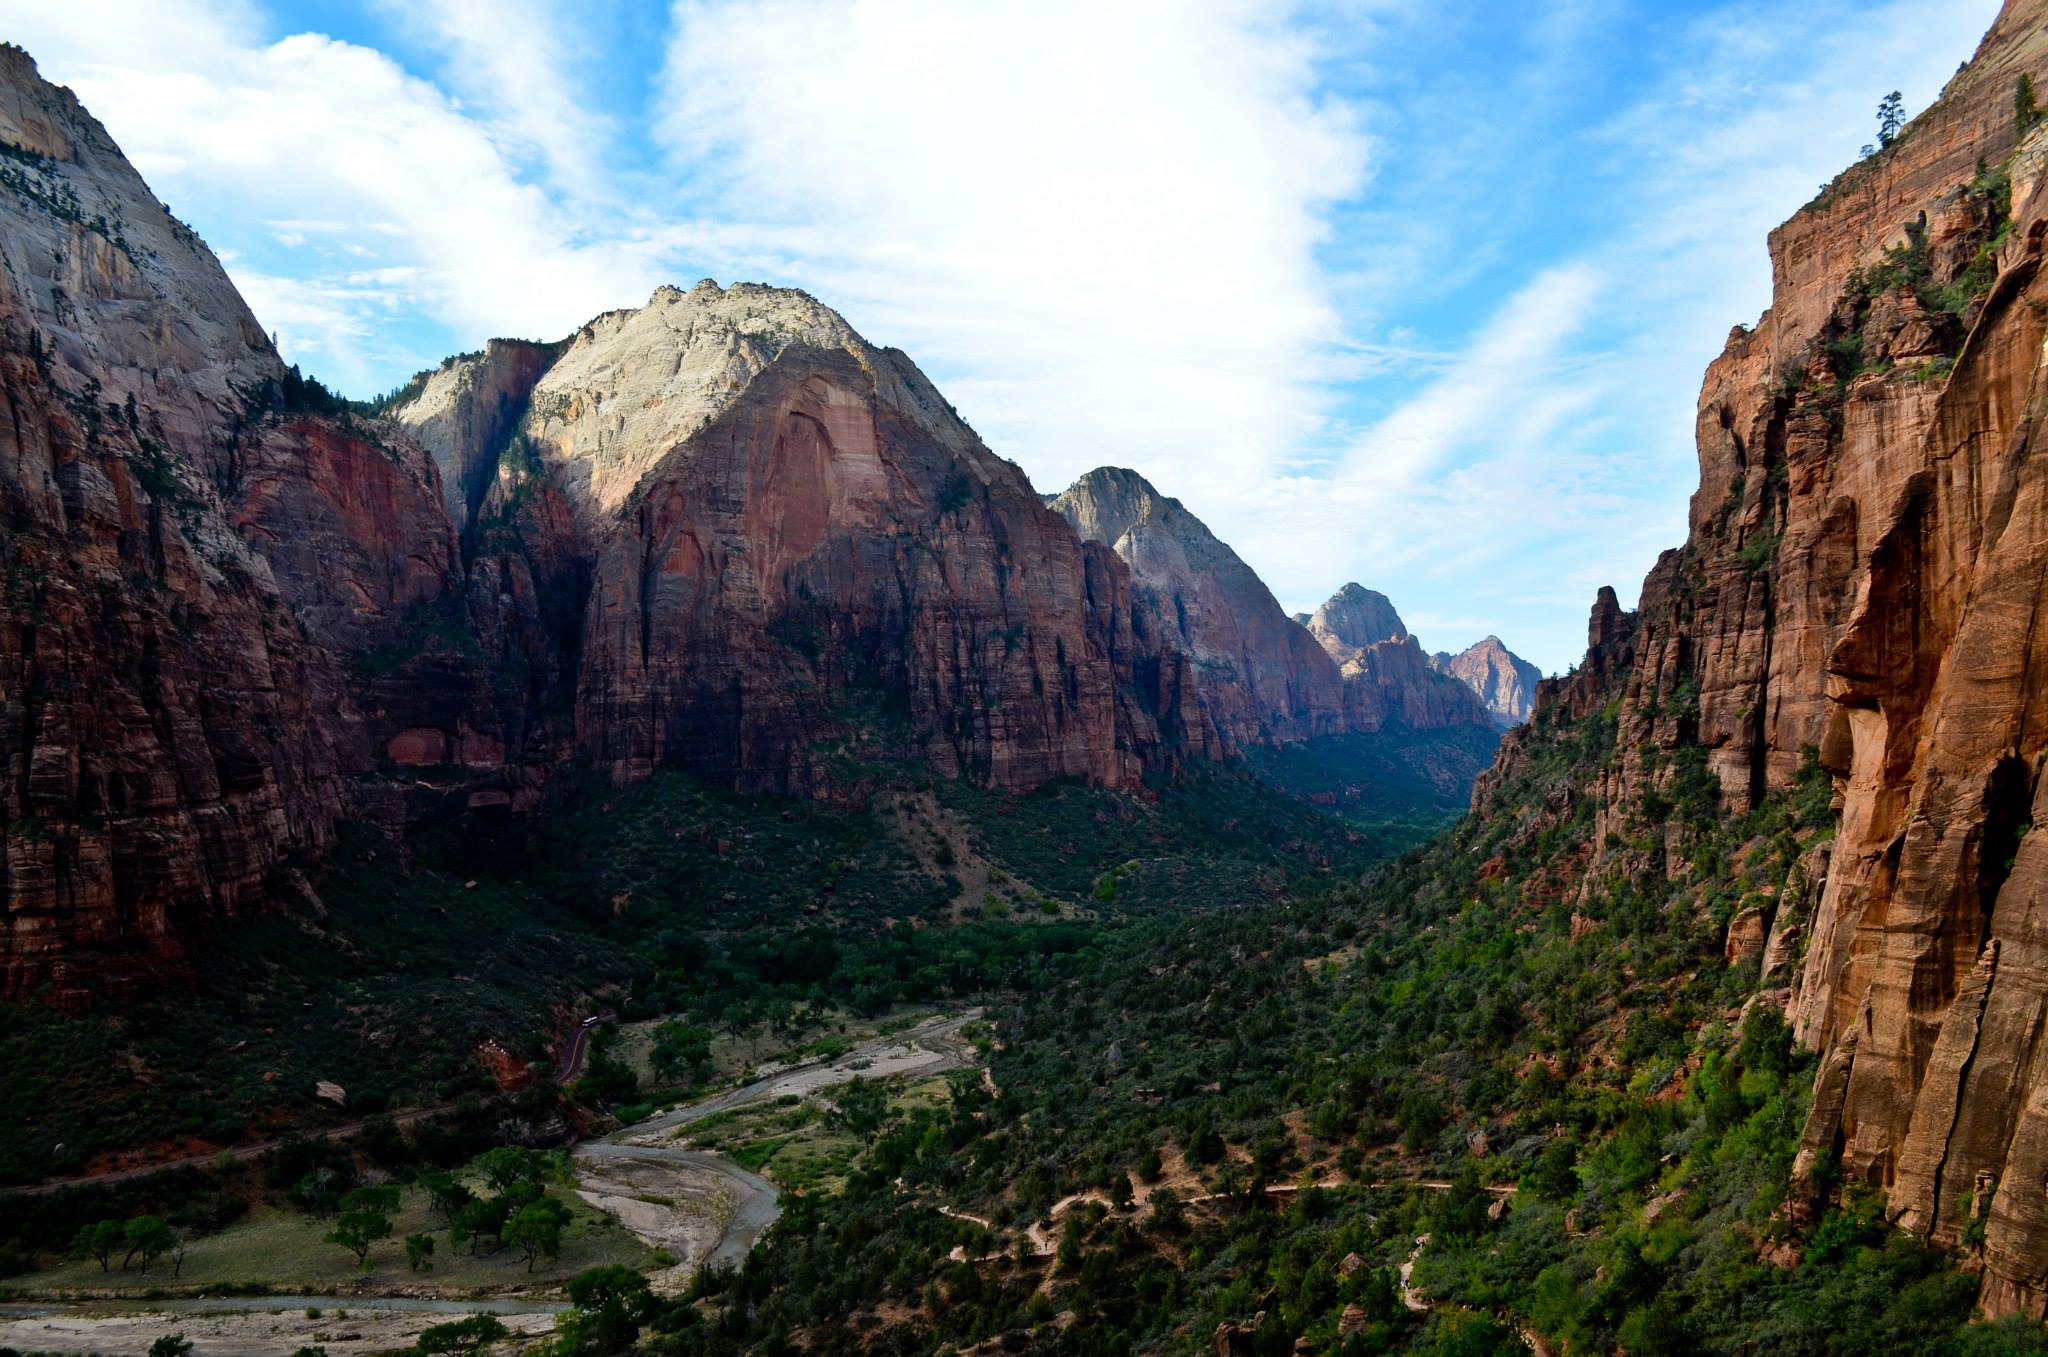
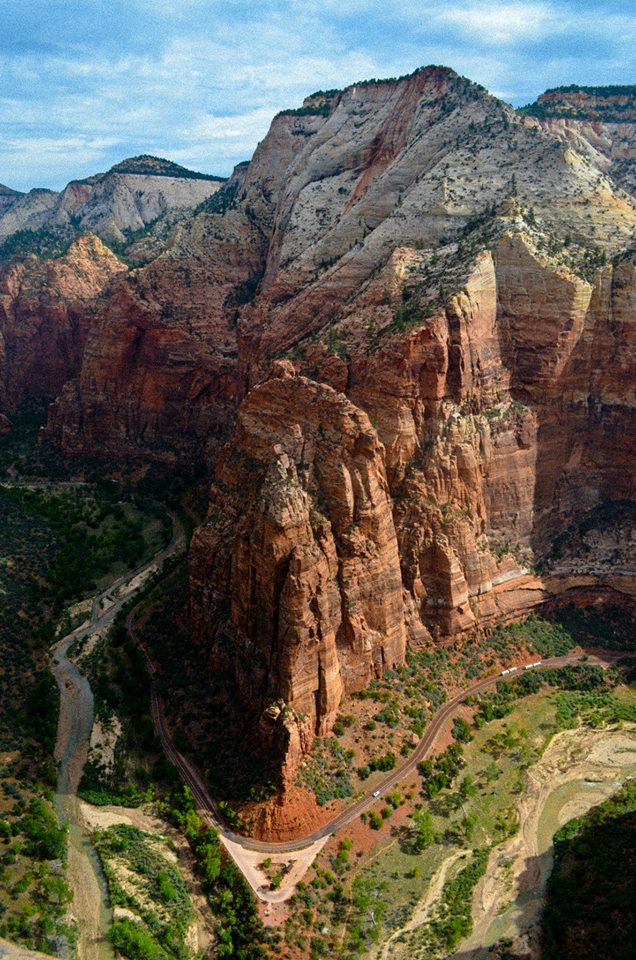
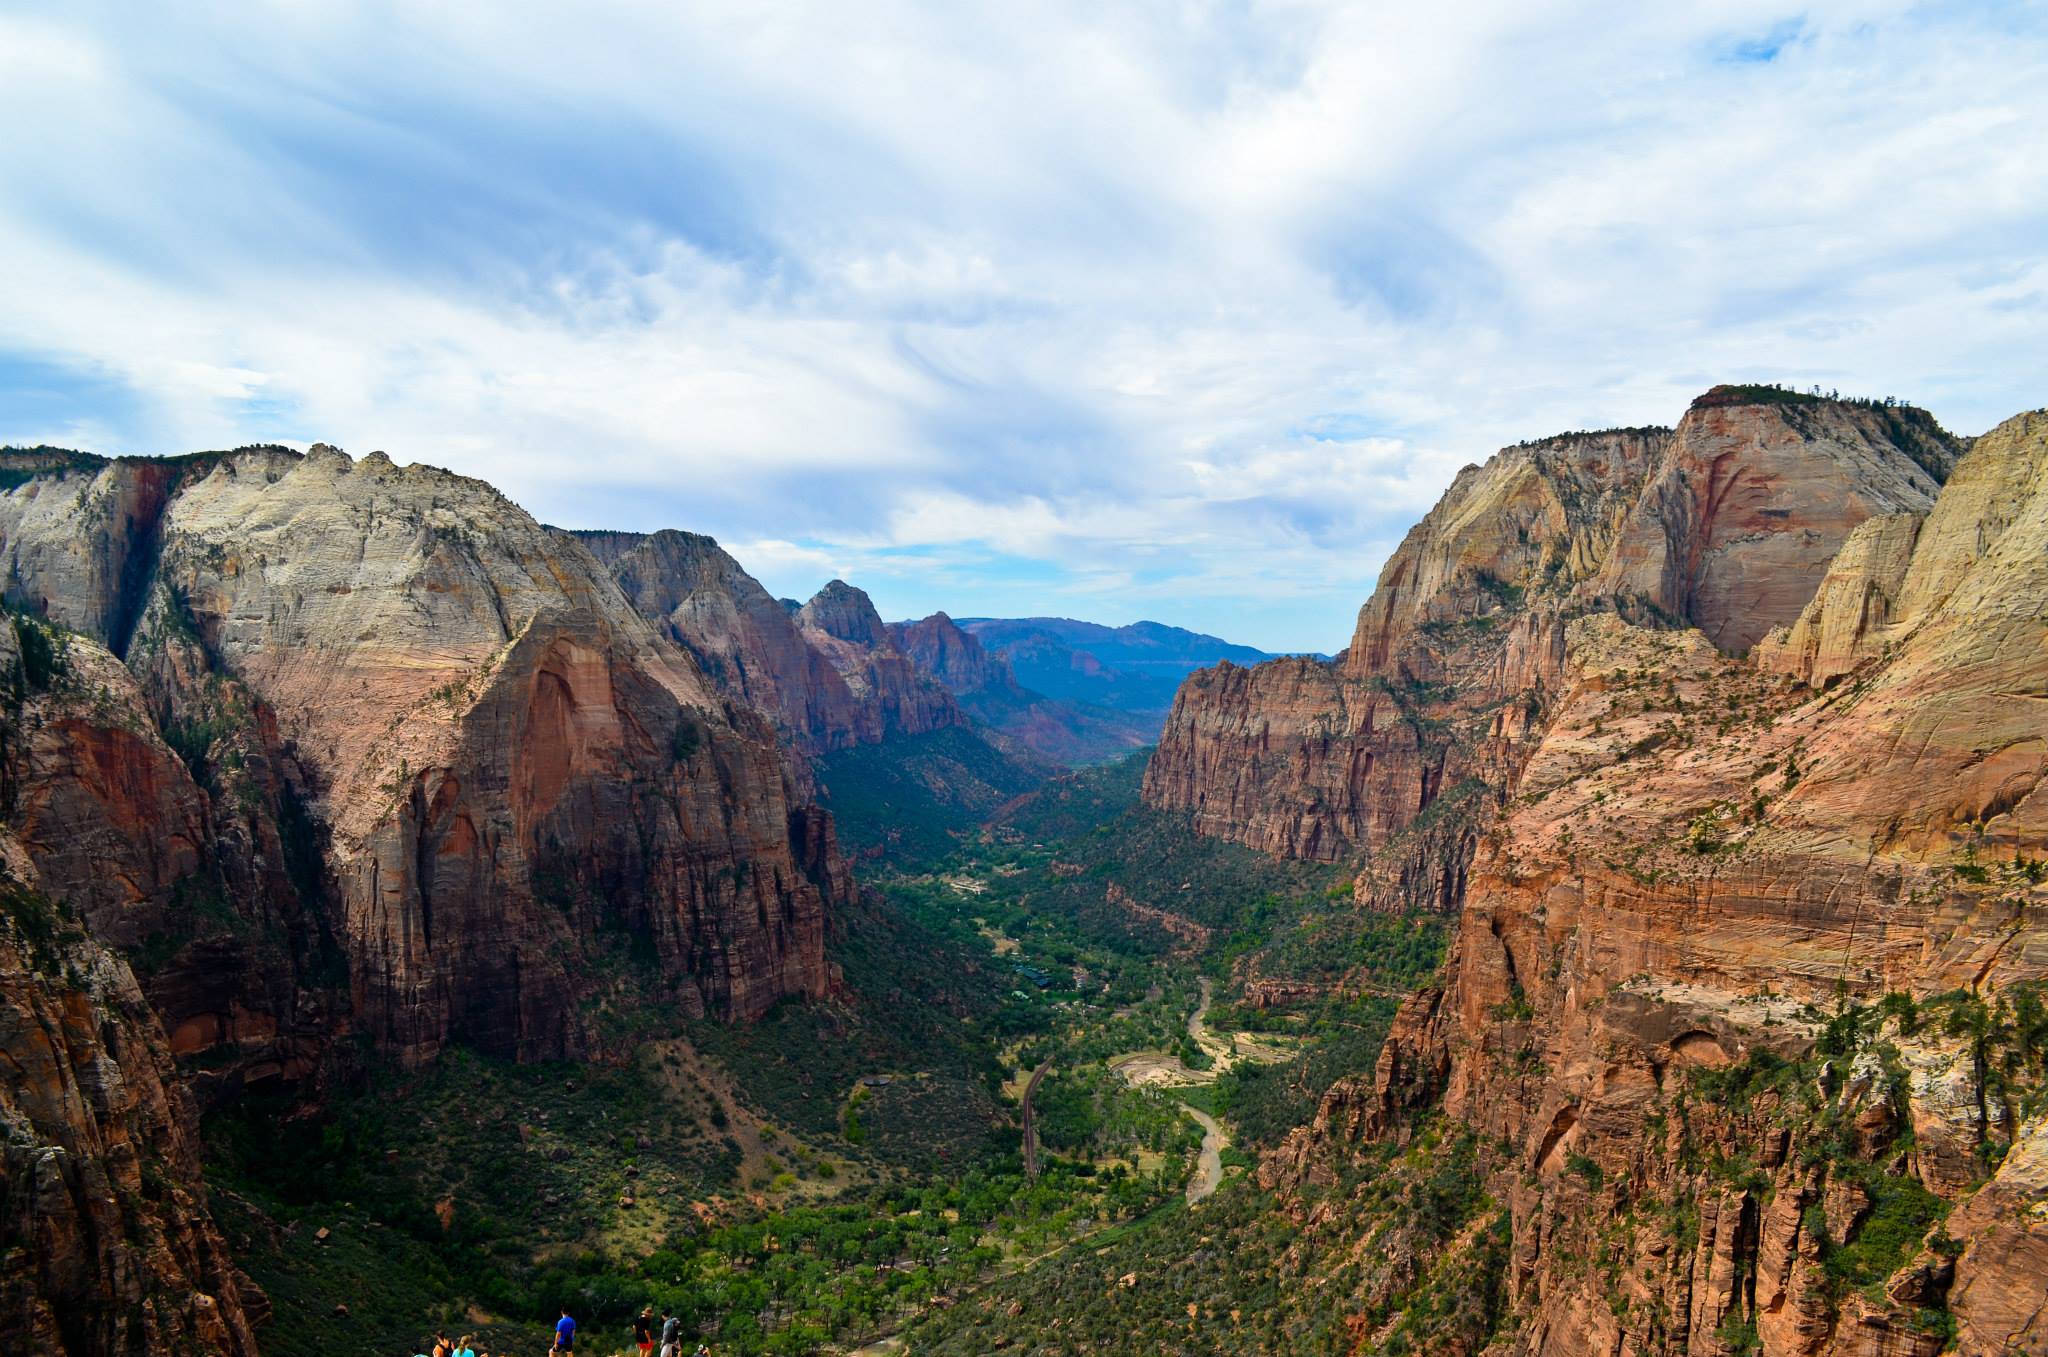
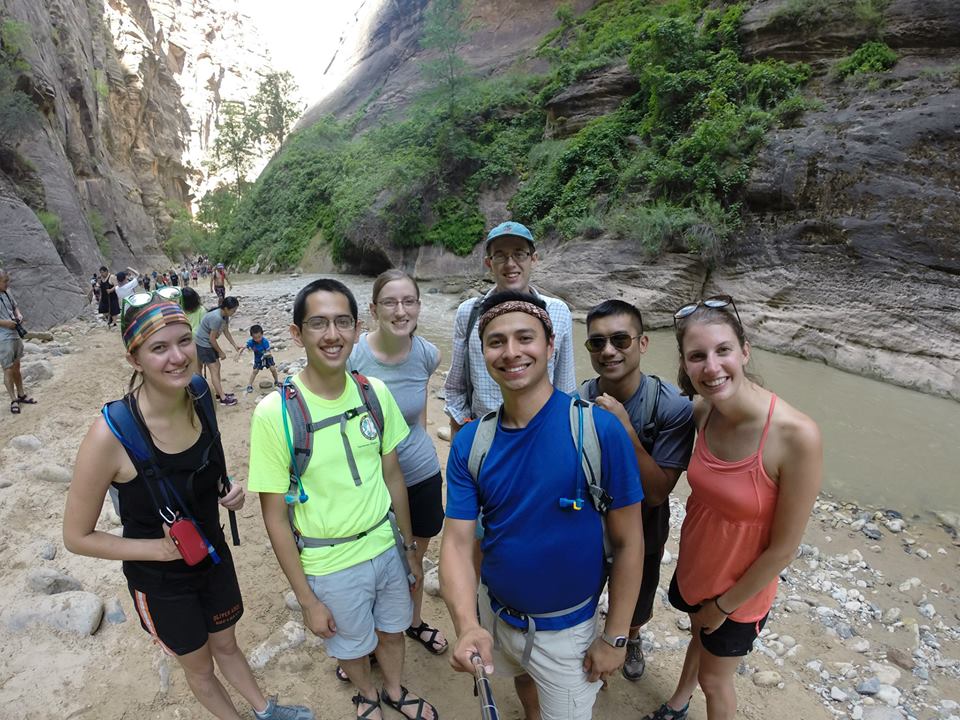
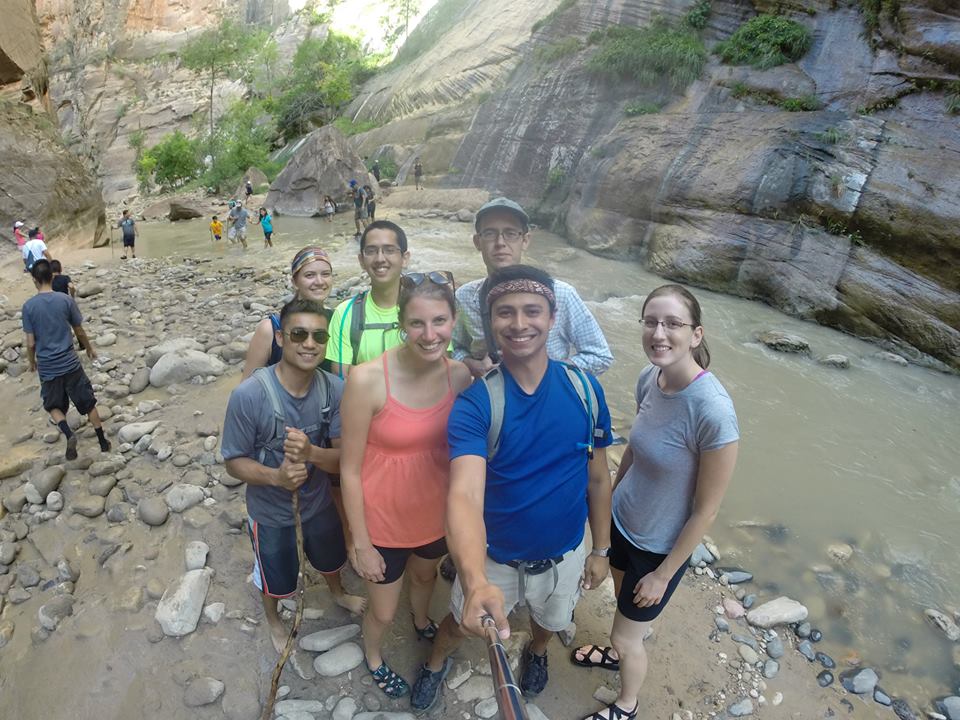
Angel’s Landing and the Narrows were an amazing first day and our second day didn’t disappoint either. Zion is full of opportunities for canyoneering but there are a few complications. First, for most of the rappelling areas you need to get a permit. These permits can only be gained by winning a lottery and there a lot of people who enter this lottery. On top of that, many of these rappels involve swimming and wading through deep, COLD water. We don’t have wetsuits so that wasn’t going too work too well for us either. But we REALLY wanted to do some rappelling while in Zion so Pablo did some researching and found Birch Hollow Canyon.

The first rappel
The first rappel

Birch Hollow Canyon is located about an hour outside of the park to the west. We drove from Watchman campground through the whole park and out the opposite entrance. From there it’s not far to a dirt road that leads to Birch Hollow. This link provides good driving directions to start. This hike does not require a permit as it is outside the park limits. Take two cars and park one at the beginning with the small sign for the canyon. Park the other at the end of the hike where you’ll come out. It took us about 9 hours to make it through the whole hike so we were very happy to not have to walk 11 miles back to the car from the exit as well 🙂

The whole gang at the first rappel

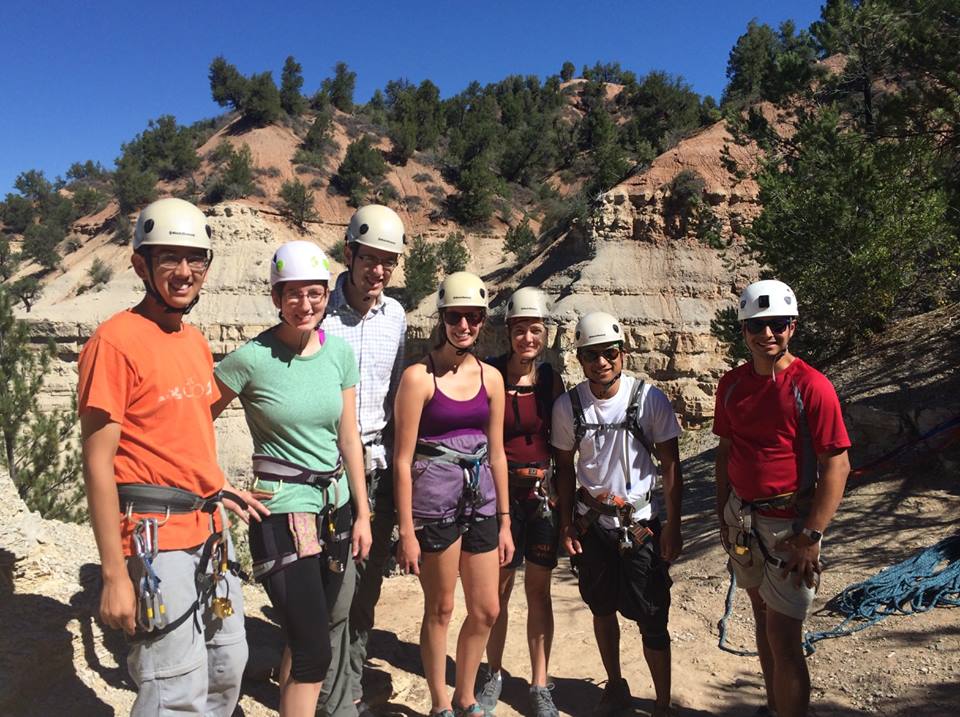
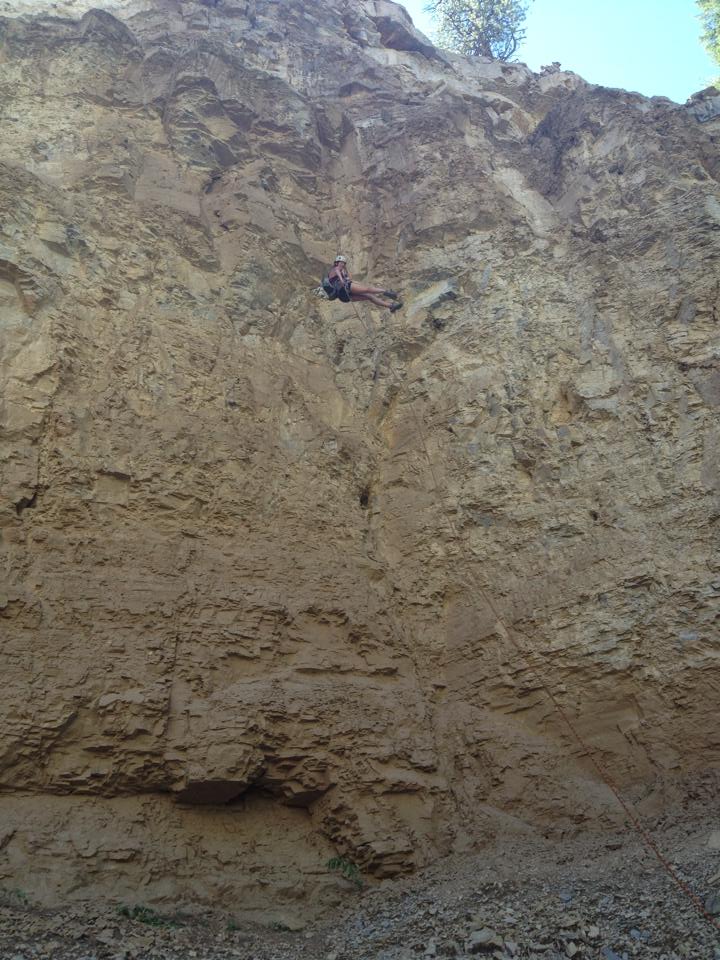
There were 11 rappels total on the hike, the largest at 120 feet and the smallest at around 30-40 feet. It took us close to 9 hours going at a steady pace and we had 7 people in our group. We ran into a few other groups along the way and had to wait for a while behind one of them. When they ran out of rope halfway down it was a good thing we were there with extra for them to borrow! If possible, I’d suggest bringing 2 ropes with you. The last 6 rappels or so are pretty close to each other so the first members of our group would start setting up the next rappel as the rest of us were finishing the previous one. It was a good system that saved time.

DCIM100GOPRO

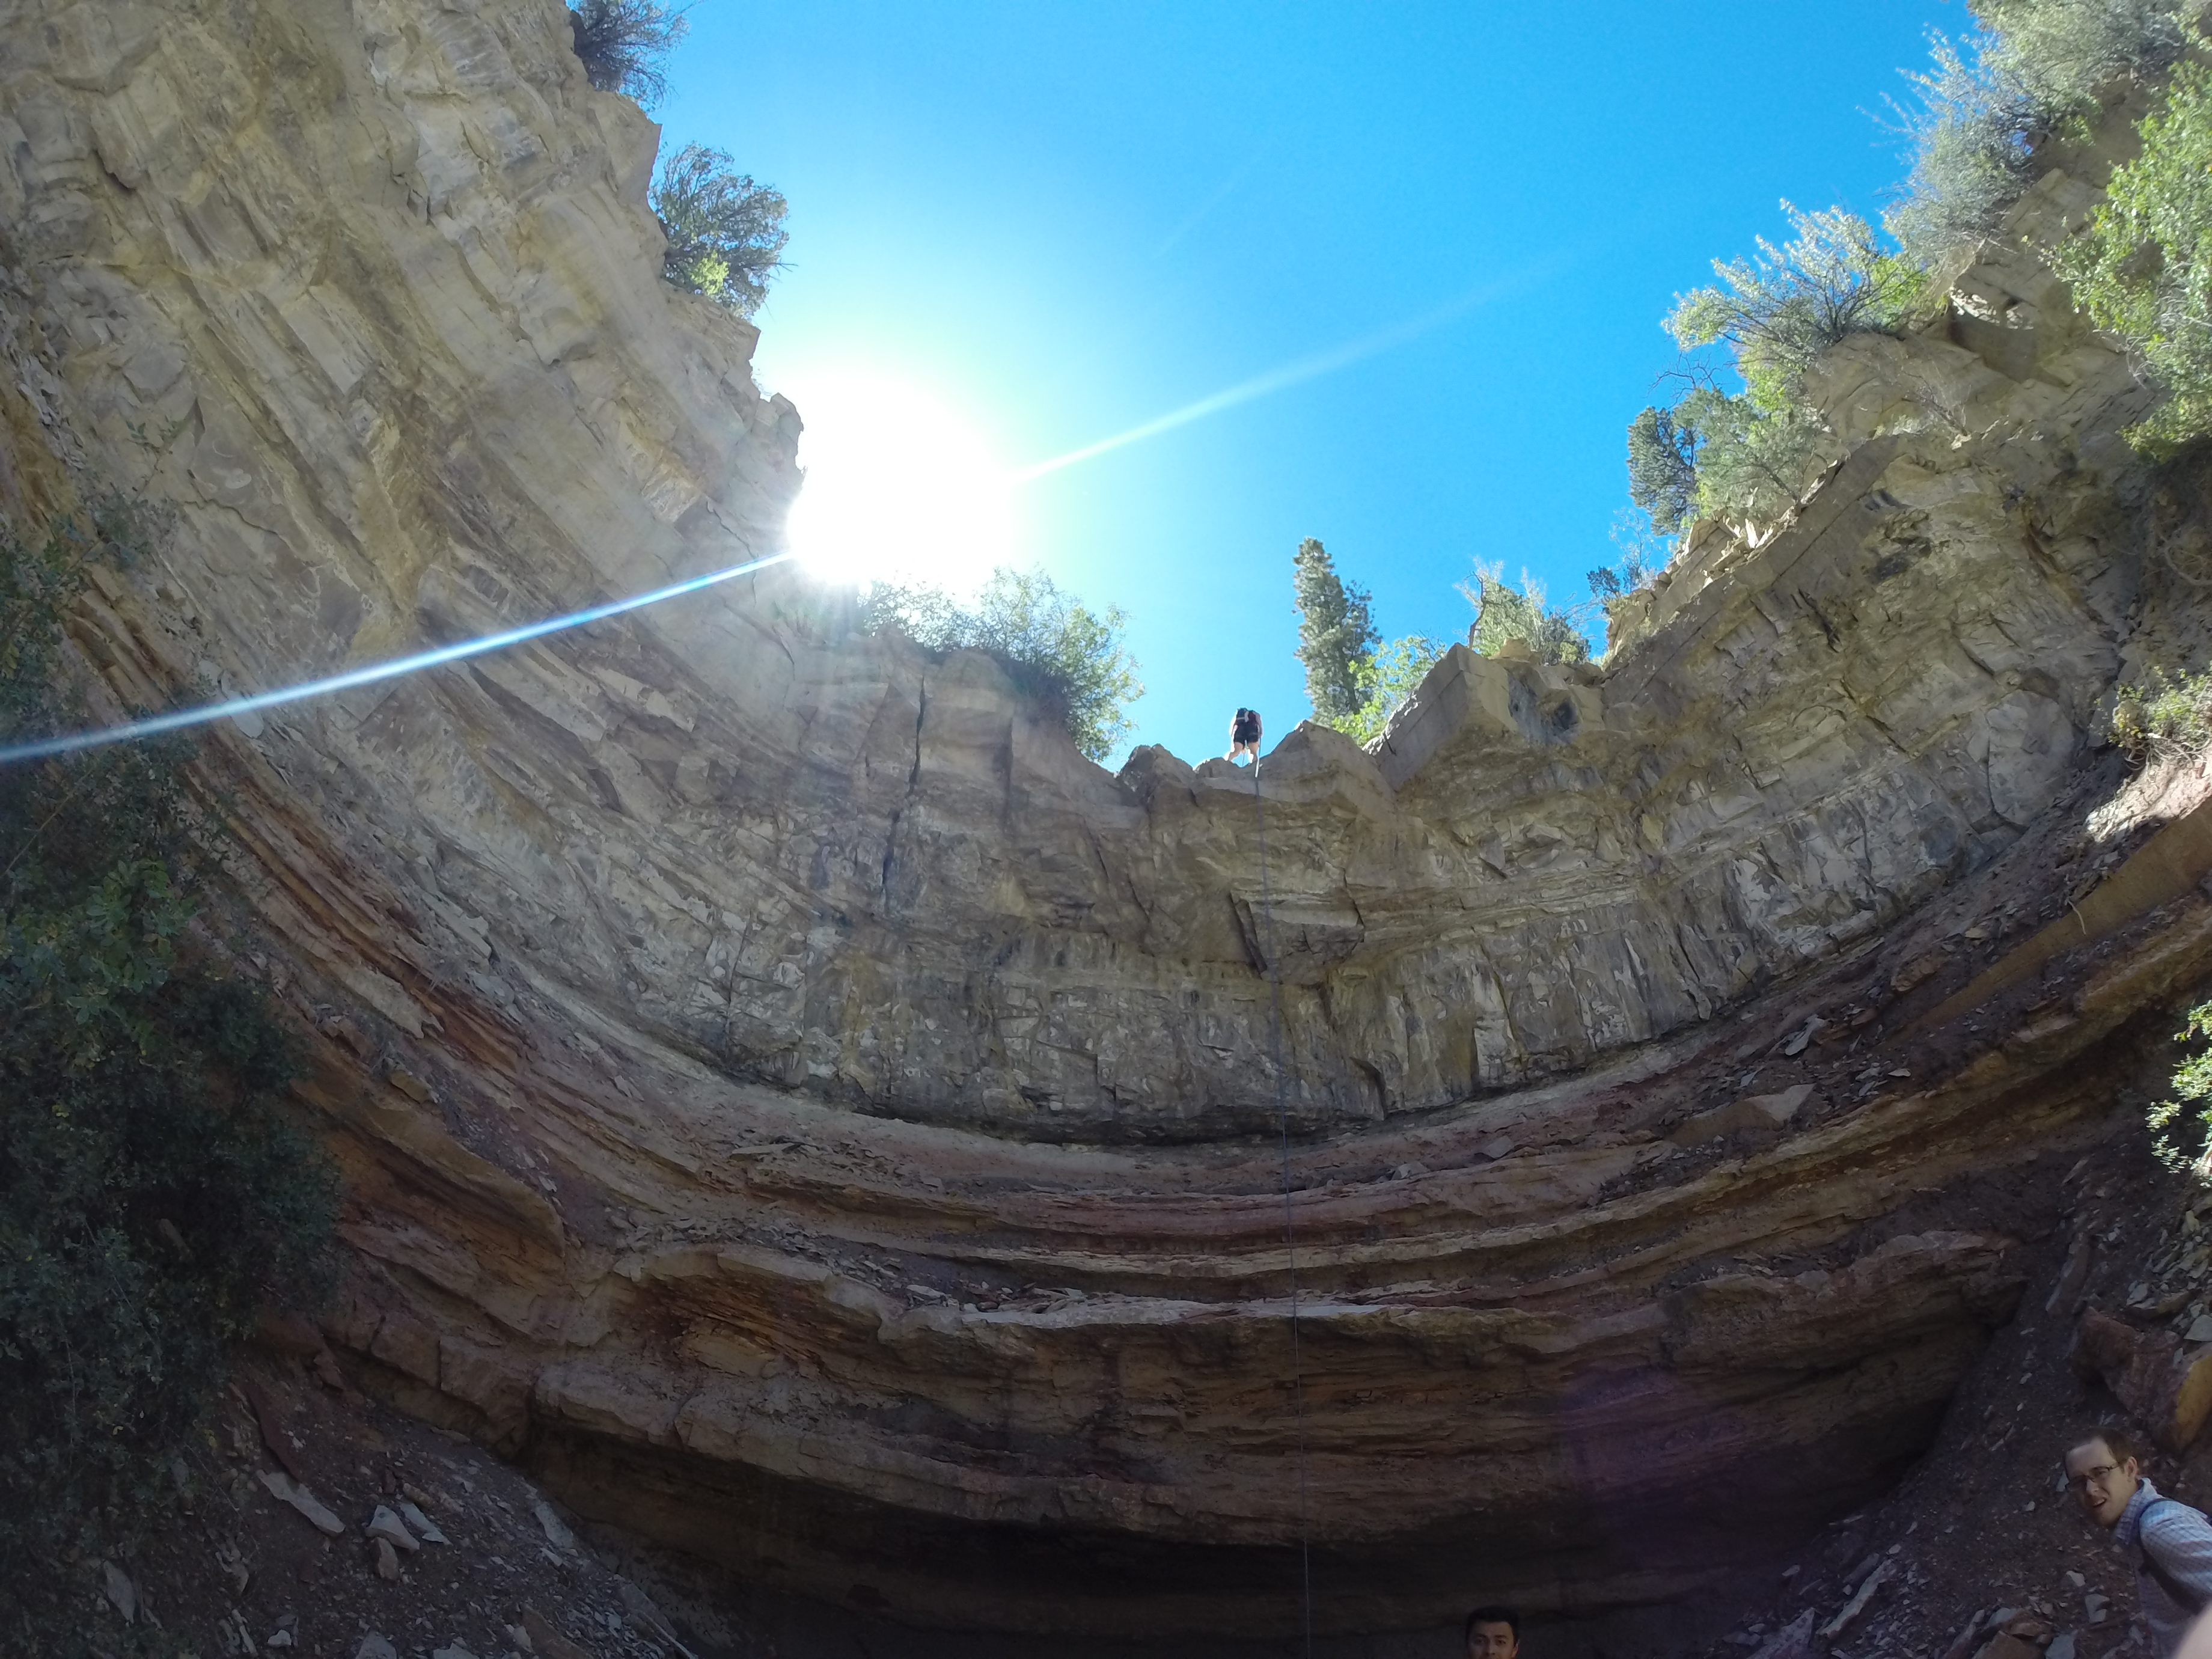
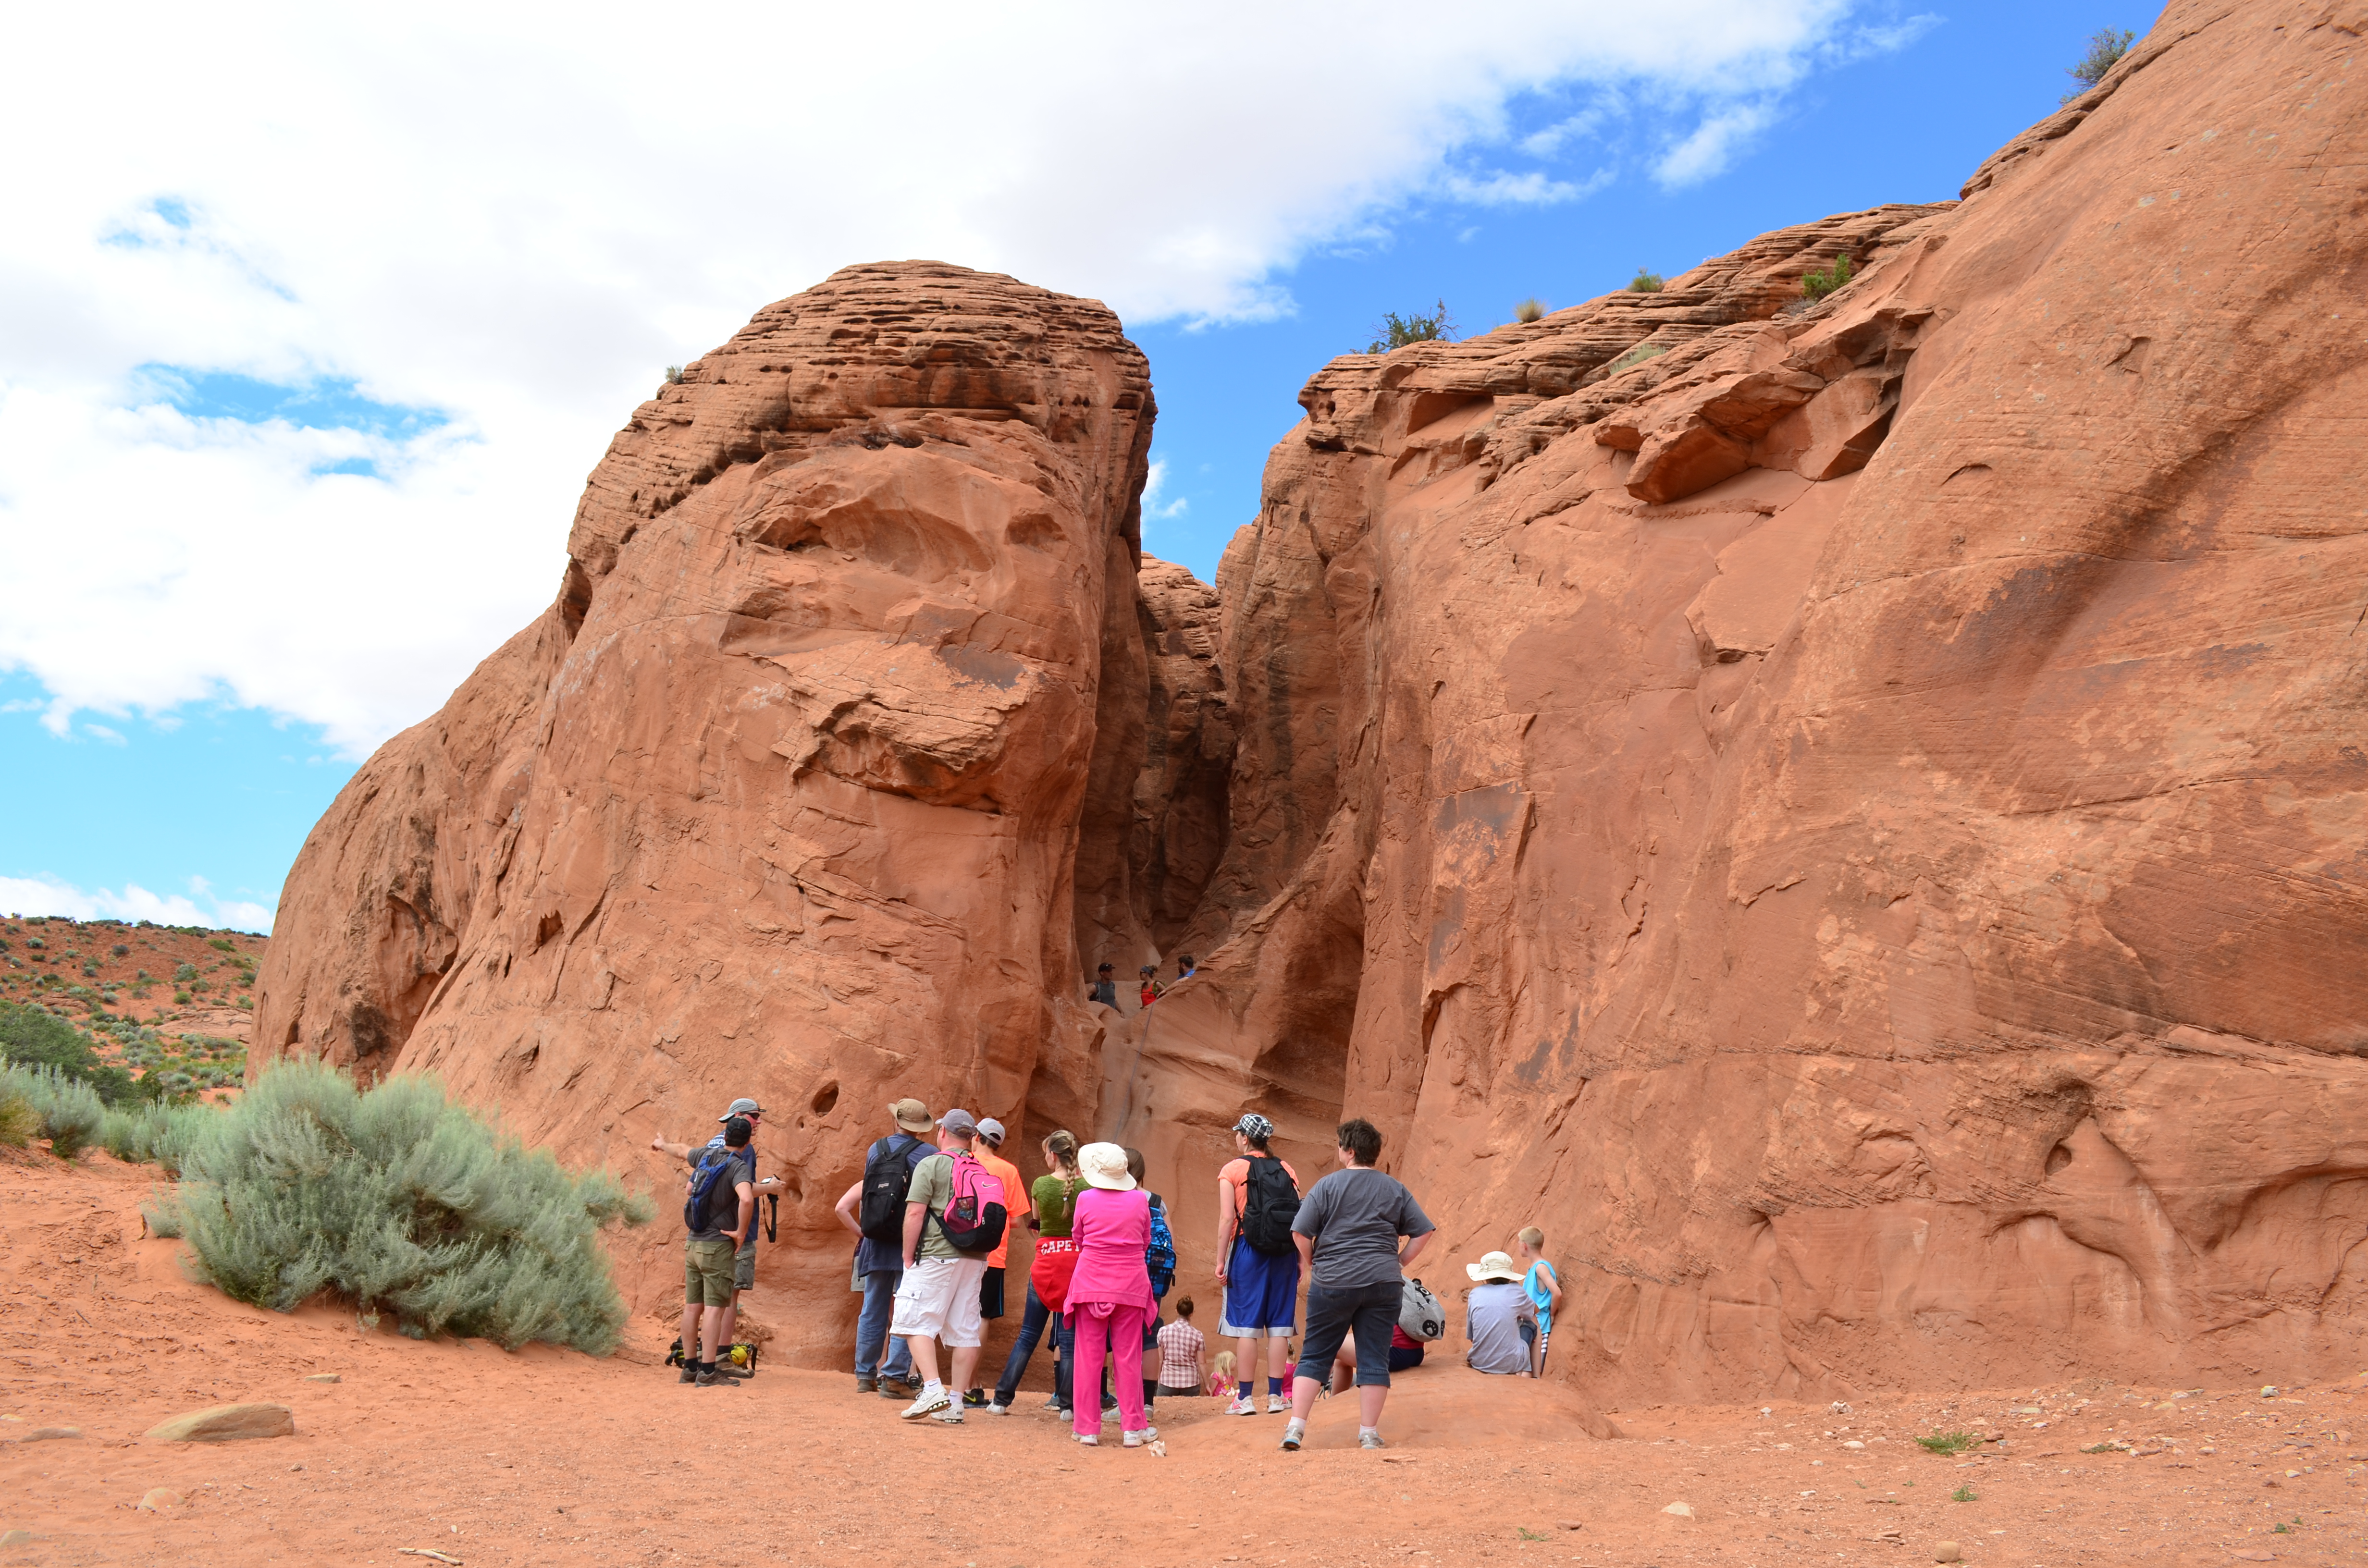
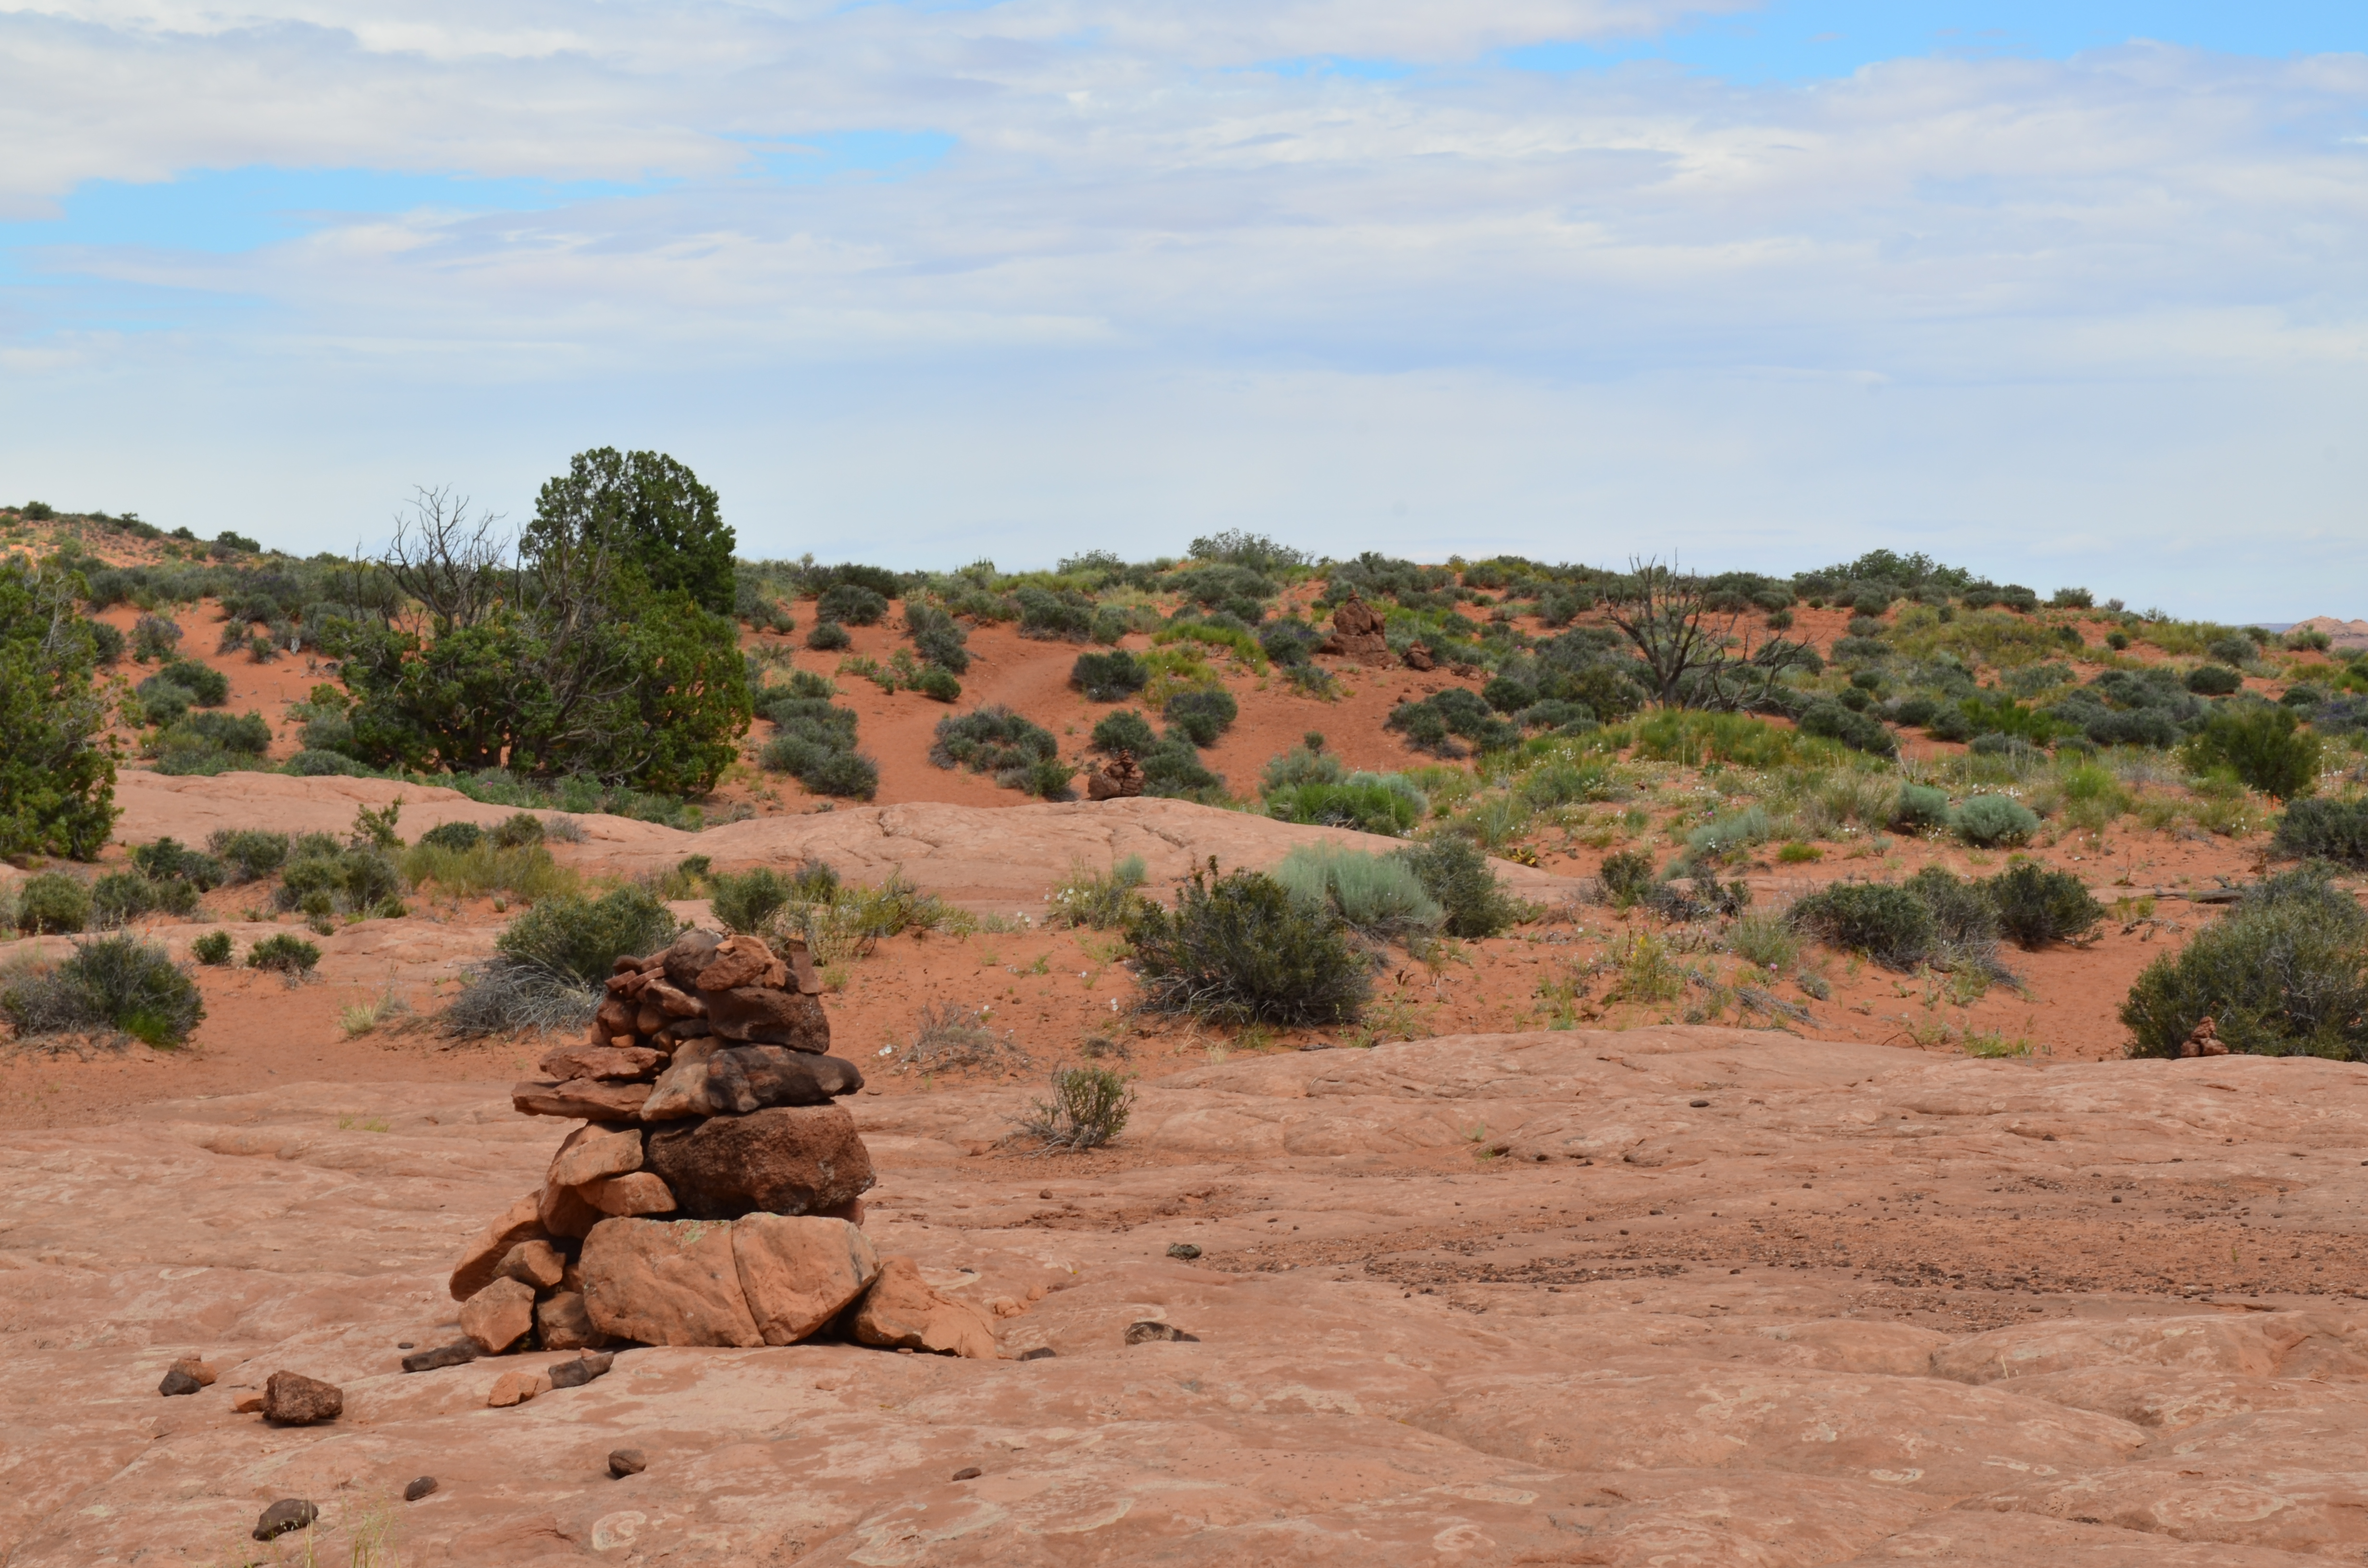
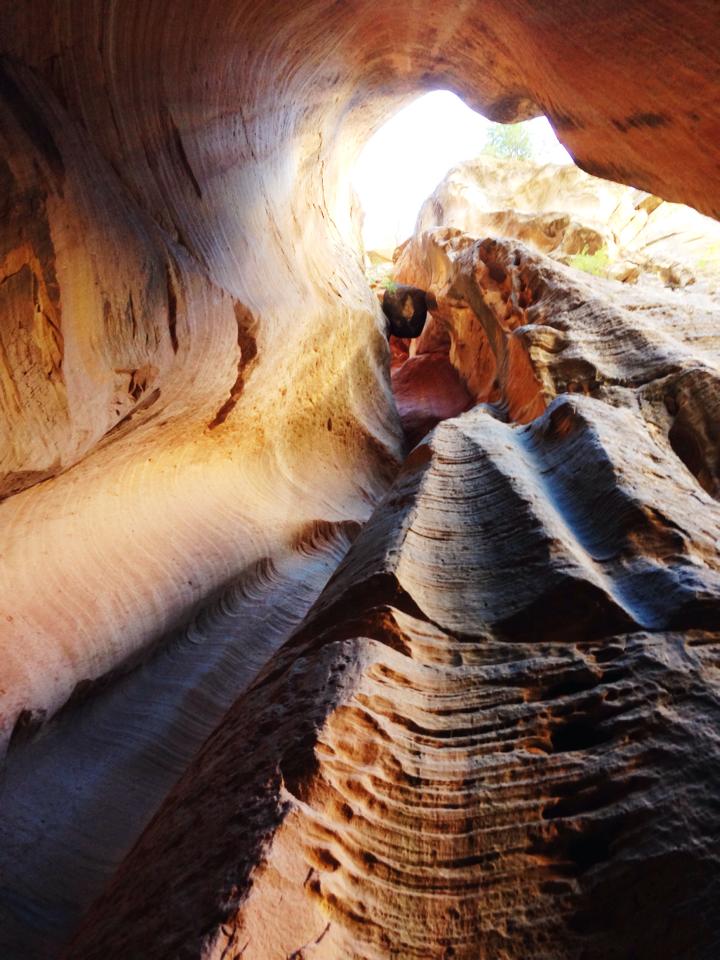
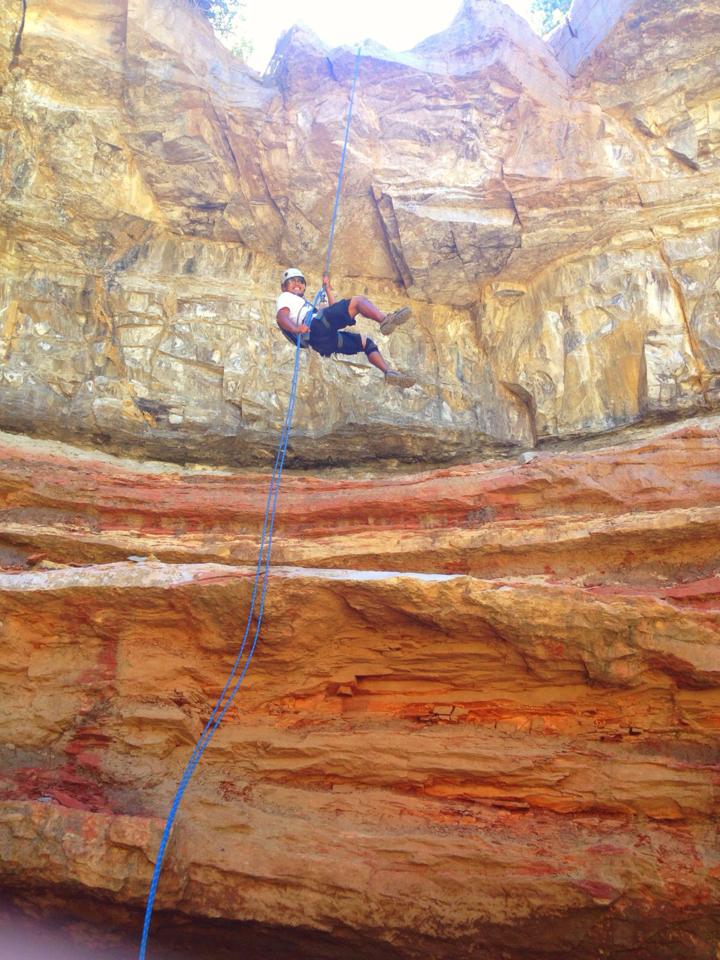
Finding the start to the hike was fairly easy. We picked up right away the area that looked most likely to start (left side of the road). Hiked for around 45 minutes or so until we hit the first rappel- the big one, 120 feet. It was a little scary beginning with such a high one! But there was gear all along the way set up for us already. We only left behind a tiny bit of webbing on the whole hike! All the anchors were stable along the way and easy to locate at each rappel.

Birch Hollow 2

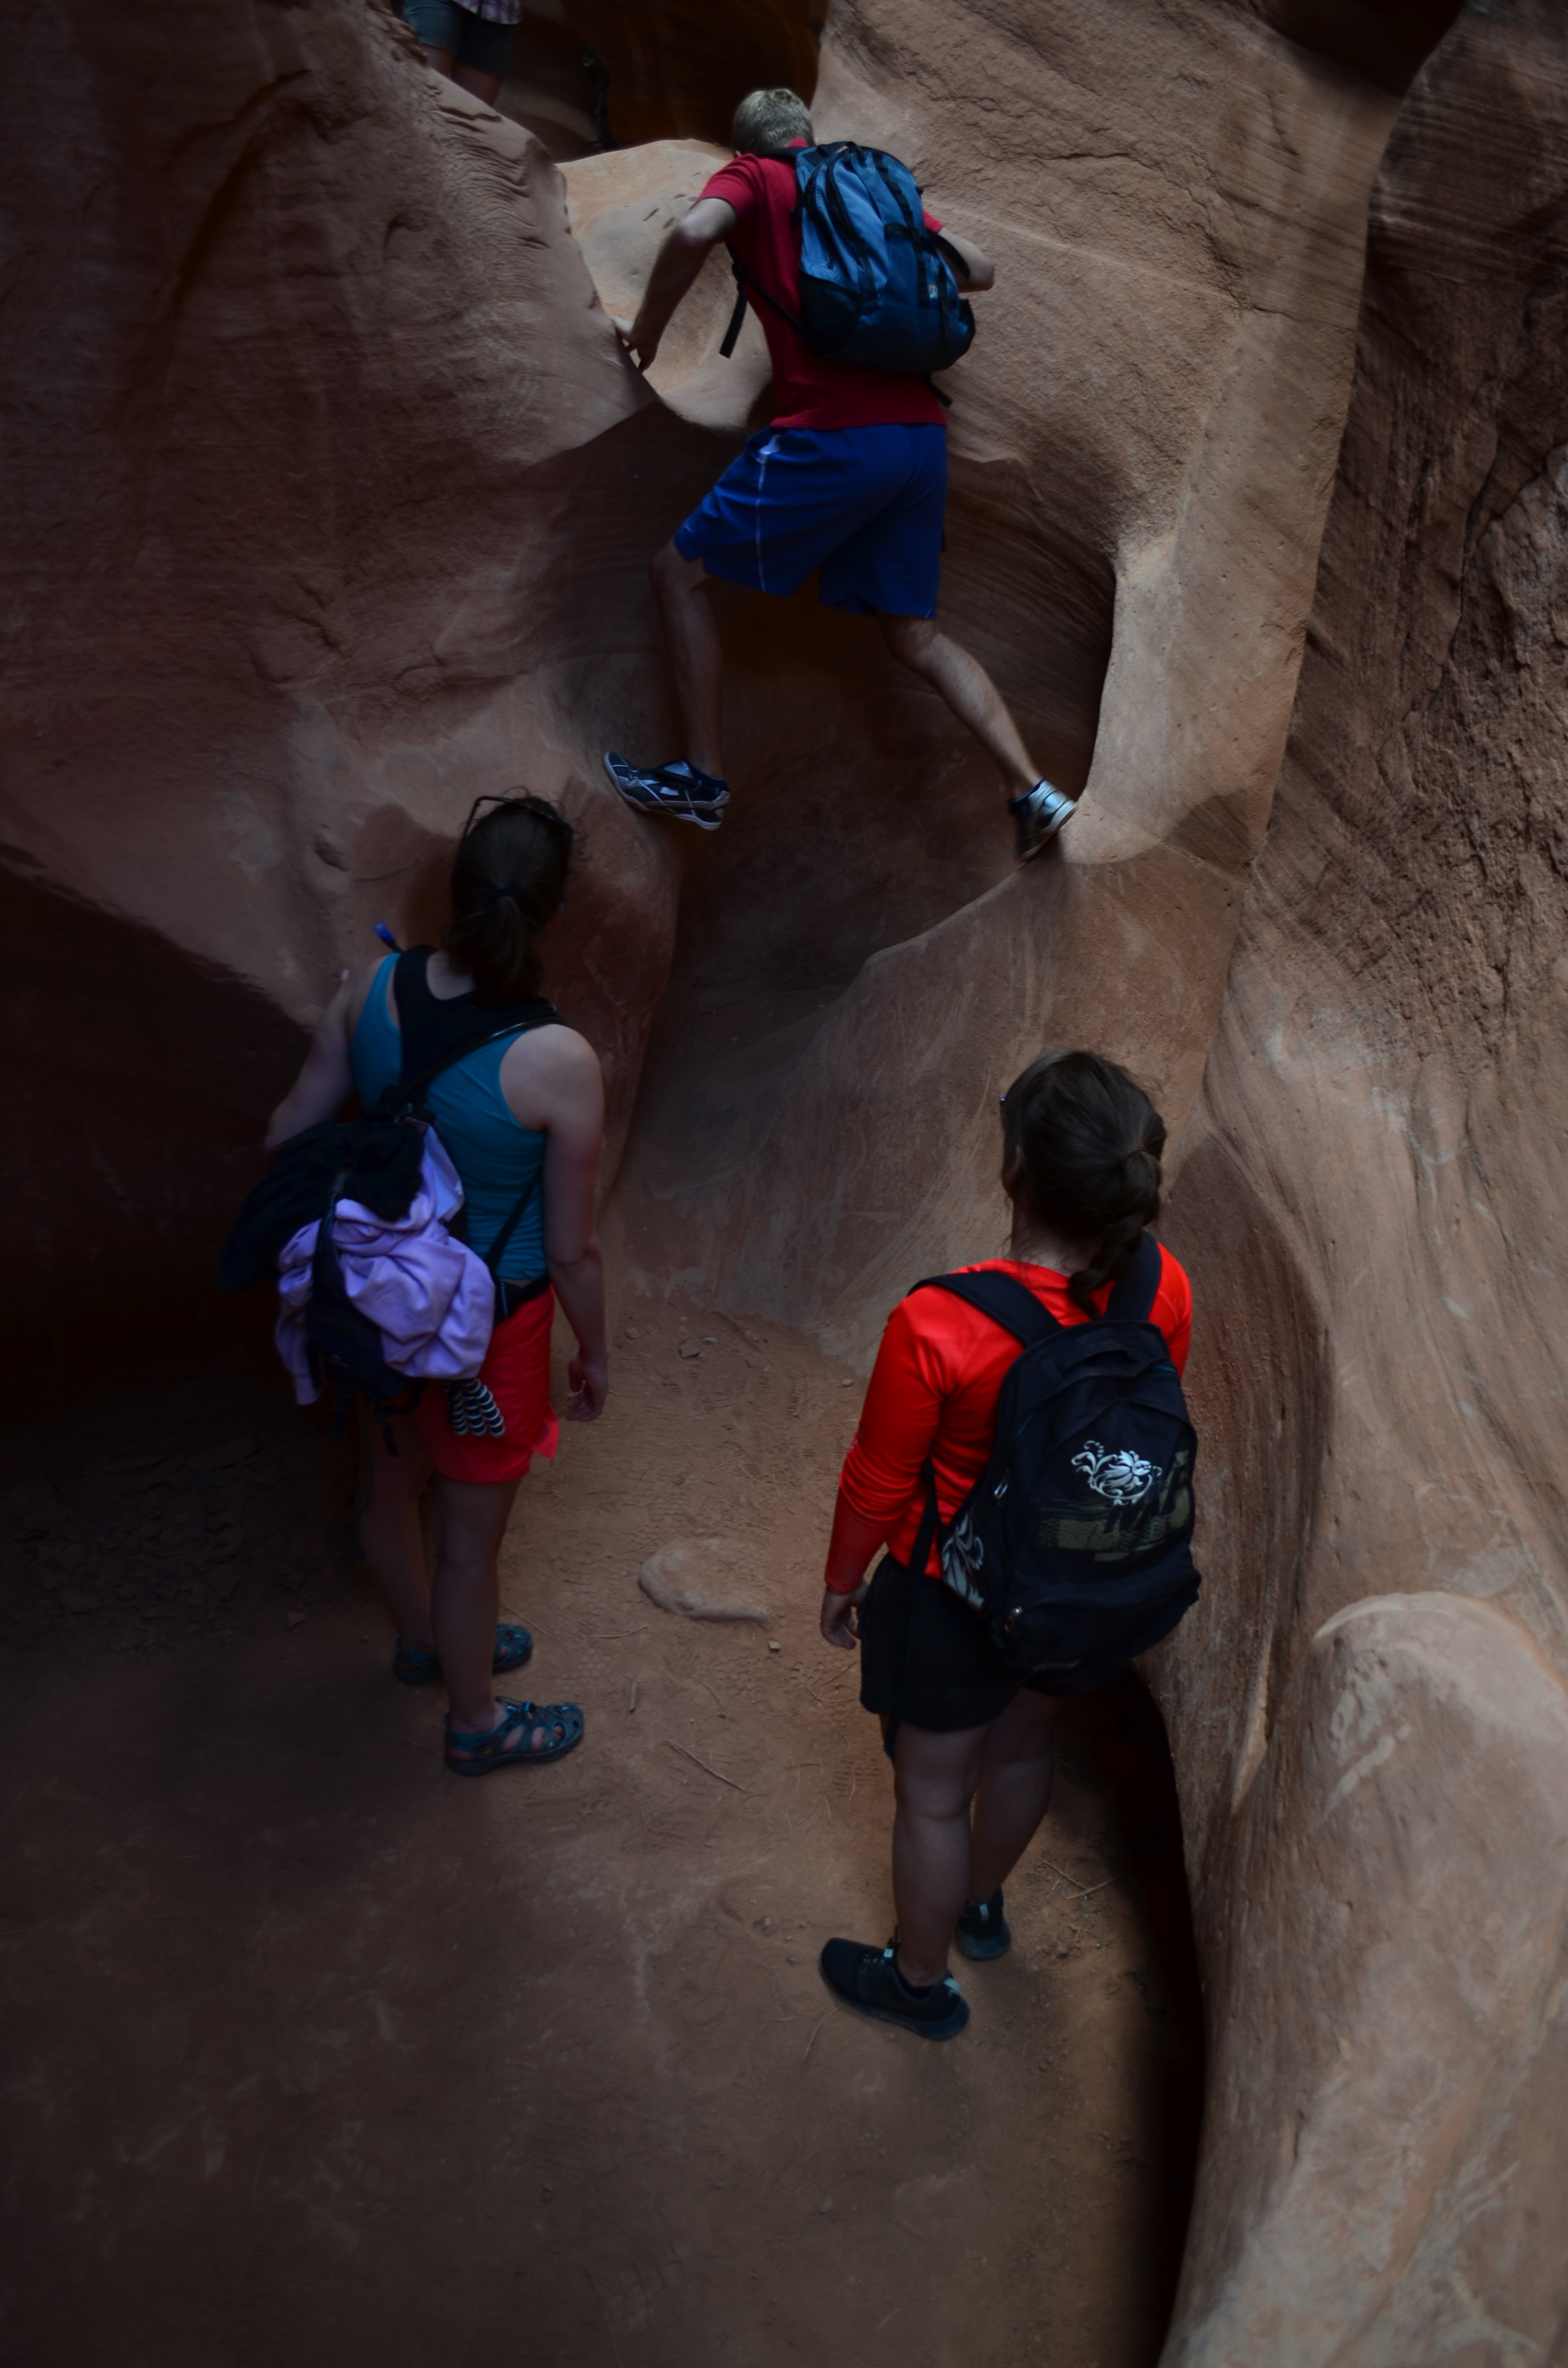
You can’t really get lost along the way once you find that first rappel, just keep following the wash the whole way.

Pretty view from the bottom of a rappel

When we reached the end, we didn’t plan to go down through Orderville and back into Zion (that would take a lot longer) so we turned right to head back out to where we had parked the second car. This was a really tricky route to follow. We found it in the end, but for about the first half of the way we weren’t even sure we were headed in the right direction. And wow was it a lot longer hike out than we expected! I’d say it was around 2 hours. It was also around 5:00pm at this time and HOT out in the sun. Thankfully part of it was in the shade, but the last bit is walking UP A VERY STEEP ROADWAY. The rest of the hike is pretty easy, not strenuous at all, but wow the end was tiring :-).

Birch Hollow 3

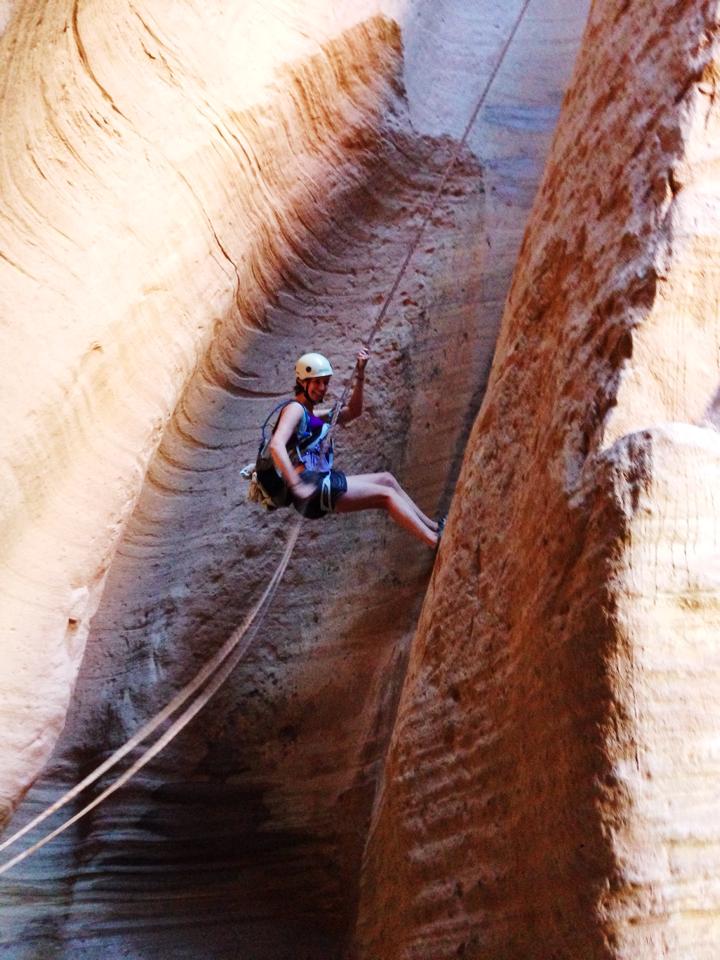
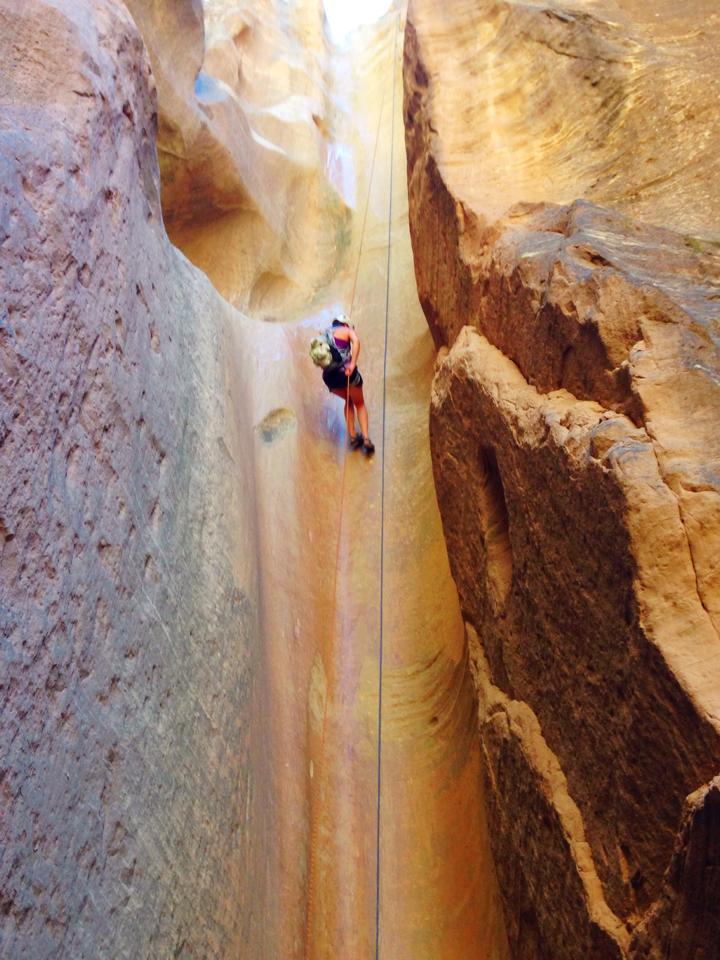
The whole trip was so fun. Most of the rappels were not free rappels which was a little disappointing. The first one is but after that most of them have a wall you follow down. One of them had a really tricky ledge, they’re definitely not the easiest rappels to hit. But we had more than one newcomer in our group who did just fine, it’s just helpful to have someone along who knows what they’re doing and can help direct.

Tricky ledge
Tricky ledge

I would DEFINITELY recommend this route to anyone looking for rappels. It’s an easy hike, full of lots of rappels, and just fun along the way. Inside the canyon is not too hot, it was just the hike out that was warm. Plan for lots of time, bring snacks and pack lots of water 🙂 Also plan ahead, there are no bathrooms anywhere along the way or signs- you better be observant!

Another helpful link: http://www.canyoneeringusa.com/utah/zion/technical/birch-hollow/

Zion National Park- Angel’s Landing and the Narrows (Sep. 2014)

Though I’d visited Zion before, it had been during Thanksgiving time and there was not much opportunity for hiking due to the weather. After doing further research on the park, especially discovering Angel’s Landing thanks to our good friend, Wally, I knew this national park was getting moved to the top of my priority list to visit.

Summit of Angel's Landing
Summit of Angel’s Landing

Summit of Angel’s Landing

The park gets REALLY hot during the day, so we decided to wait for Labor Day weekend to make the trip rather than July 4th weekend in prime time summer weather. I’m glad we waited, Labor Day was still plenty hot! Zion is a 16 hour drive from Lincoln, and we left Friday afternoon, arrive on Saturday morning. With 4 of us in the car, we figured there would be plenty of drivers. But boy was it a miserable way to spend a night- no one really slept well at all and we were exhausted when we arrive the next morning. I swore I’d never do another drive like that again, but by the end of the weekend it was all completely worth it.

View from Angel's Landing
View along the Angel’s Landing hike

We were so excited to hear that our good friends in California were going to be able to meet us there! What a fun reunion with James and Rachel again :-). They have long been our camping buddies so it was fun meeting in the middle to enjoy it once again. I reserved our campsite months in advance and got the VERY last one available in the park for Labor Day weekend. It’s a very popular park in the summer, so if you are planning on going, make your reservation online asap. We were warned there may not be shade on the site (there was none) but the bathroom facilities were excellent (no showers though).

Angel's Landing 4
View from Angel’s Landing

Angel’s Landing has got to be one of my favorite hikes I’ve ever done now. It’s really a short hike, took us about 2 hours to get up. But it’s steep the entire way. I was exhausted after just a few minutes of walking up such steep angles through switchbacks and literally climbing tons and tons of steps. This hike is also not for the faint of heart. The last quarter of it is extra high, extra steep, and very narrow with cliff drops on either side. There were quite a few groups who chose to wait at the 3/4 mark and just enjoy the views from there. But all of us did the whole thing, and it was not as bad as I was expecting at all, I felt pretty comfortable the whole time. The chains available on the steepest parts really help.

Climbing up Angel's Landing
Climbing up Angel’s Landing

Climbing up Angel’s Landing

Once you hit the top, the views are incredible. All along the way there are spectacular outlooks, but at the very end you really have a true 360 panoramic to enjoy. Be sure to start early ( we left the visitor’s center by 8am) as it quickly gets hot throughout the day. I still had my hoodie on when we hit the summit, but on the way back down, It quickly came off as the sun began beating down on us. We enjoyed our views, grabbed some photos and chowed down on some snacks as well before heading back down.

Angel's Landing 6
Snacks and break time at the summit

Although the way down is completely downhill, it’s so steep it was actually a little tough. My knees were sore by the end from the constant slap of stepping down hard each time. But I would totally do this hike again in a heartbeat! Keep in mind that cars are not allowed to drive past the visitor’s center in the park. You must take the free shuttle instead. The shuttles operate very frequently (ever 5-10 mins) and we never had a problem catching one. But we spent close to 40 minutes on the shuttle riding from the Visitor’s Center to the trailhead for Angel’s Landing. So be sure to calculate that into your time.

Angel's Landing 2

We were all quite sleep deprived and figured we’d head to our campsite for some lunch and a nap before doing another hike. Lunch worked out well, but it was so INCREDIBLY hot by this time mid-day that there was no chance of being able to sleep. It was pretty miserable sitting in the heat so we figured we might as well find another hike to enjoy. We decided on the Narrows as that is the other big draw to Zion (besides the Infamous Angel’s Landing hike). This 16 mile route is between canyon walls through a river and it was so much cooler there I would definitely recommend it to anyone looking for an afternoon hike in Zion. We took the shuttle back out (took closer to 50 minutes to get to this trailhead) and walked the 1 mile River Walk to the start of the Narrows.

The start of the Narrows

From there it’s really up to you how far you want to go. We weren’t going to do the 16 miles, but just figured we’d go along until it got late we decided to turn around. The water was very cold, our feet were numb quickly, but it wasn’t to the point of being painful. Some sort of water shoes are definitely a good idea. A couple people in our group had to go barefoot which was not impossible, but definitely more difficult trudging through the water over rocks and all.

Hiking through the Narrows

The water levels really varied along the route, from ankle deep to levels close to my hips. It was SO MUCH FUN! It was not hard to see at all why it’s such a popular hike and the amount of people there gave evidence to it. There was a wide range of ages, including many families with children hiking through the river. The current could be strong in some areas, but it was all quite manageable. We enjoyed heading upstream for a couple hours until we decided to turn back. I wanted to keep going farther, but it was getting late and we wanted to be back to the campsite before complete dark.

Our turn back point.

What an incredible day we had! Even though we were running on practically no sleep, it was so much fun and we were all quite energized from the beautiful scenery along the way and the thrill of climbing steep cliffs and wading through rivers. There are many opportunities in the Narrows to do rappelling and more technical routes. However, you need to enter a lottery to receive one of the permits. You can do this 3 months in advance, or a last minute one within a week of the date you’re looking for. We saw people in a line waiting at 6:30am to try to get any last minute available spots for many of the canyoneering routes Zion offers. Since we had such a large group with us, we didn’t even attempt the lottery but still enjoyed our experience very much. Plus, we had plenty of rappelling in store for the next day.

2 Roundtrip Tickets to Peru for $250 (in first class on the way home!)

Planning travel is fun-especially when it’s free! I just booked our tickets for our trip to Peru next year- and I didn’t spend a single penny. This is all thanks to my little friend the Citi AAdvantage Executive MasterCard! It’s an American Airlines credit card that gave me 100,000 bonus miles for signing up. For those of you new to the miles game, that’s HUGE- in fact it’s the biggest bonus I’ve gotten from any credit card to date. Needless to say I was thrilled when hearing about this offer back in May and getting approved for the card.

It did arrive in a fancy box set just like this :-)
It did arrive in a fancy box set just like this 🙂

The card did have a $10,000 spending minimum that needed to be met within the first three months. However, thanks to my Bluebird tactics, we “spend” way more than that each month by buying Visa gift cards and then uploading them to our Bluebird account for the cash. So while I’m putting all this spending on MasterCard, it’s really not costing me anything with the help of Bluebird and UPromise. I know this confusing, so if you’re interested in starting in on the free miles that are available let me know and I’m happy to walk you through it.

The last piece for this particular card bonus was that it comes with an annual fee of $450. I paid that back in May, but was quickly refunded $200 for meeting the spending. So in essence, it still cost me $250 for the card, but the amount of miles it provided FAR outweighed the $250 price tag. And obviously I’ll be cancelling this card next April before getting hit with another $450 annual fee that does not provide any additional miles.

So, with our 125,000 miles that we had in our account, I knew we would be flying on American Airlines for our trip next year. Our aim was to do the 4 Day Inca Trail Trek to Machu Picchu and spend time in the Amazon Jungle. The only trick is that when booking with rewards miles, you have to plan far ahead in order to get the particular dates you want. Due to our school schedules, we were looking at next summer, though a bit flexible in our exact dates. I aimed for beginning of August so that it would give us the whole summer to train for the Trek, and still get us back in time to recuperate for a few days before the fall semester began. I’ve been checking flight availability on a daily basis waiting for the right tickets to become available- and they did.

Thanks to our plethora of miles, we’re even flying first class on the way home (an overnight flight)! I’m pretty excited for that, maybe we’ll actually sleep well! With both Pablo and I in school right now, and only one of us working full time, there’s no way we could afford all of this travel without deals like this. I’m thrilled that we’re able to make a trip like this without hurting our wallets. We even have enough miles left over to use for our flights within Peru (Lima to Cusco, Cusco to Iquitos and Iquitos back to Lima), so we literally won’t be spending anything on our airfare for this trip.

For those of you interested in the last nitty gritty details, here’s some final tips. When booking award space travel, the miles you have do not cover the cost of taxes on the flights. For our flights to Peru, it came to a total of $148.88 for both of us- definitely worth it for an international flight, but I still didn’t want to pay that :-). So, I used my Barclay Card to cover this. This card gives me 2 points per dollar spent on it and it has a unique travel reward system. It recognizes any purchases made for travel (airfare, restaurants, rental cars, hotels, excursions, etc) and gives you the option to ask for a “reimbursement” for these. This only applies to travel purchases. So, since I currently have 15,000 points on this card, I can use those points to reimburse for the $148.88 (14,900 points) I just spent on travel paying for the taxes. (P.S. I love that this card doesn’t require you to have enough points at the time of purchase- I have up to 4 months to request reimbursement! So I’ll follow the same strategy when I book our other flights within Peru, knowing that I’ll have more than enough points to pay for it within the next 4 months).

In the end the only cost I will have incurred is the $250 I paid back in May. If anyone can find me a round trip ticket in first class to Peru for less than $125 per person, please let me know 🙂

Couchsurfing.org

20 nights of travel across Europe. Total cost of lodging: $184.75.

How’d we do it? Say hello to couchsurfing. Couchsurfing is literally one of the greatest inventions ever in my opinion .During our trip we spent a couple nights at local cheap hotels (some free with points, some I had to pay for), a couple nights at Hiltons (free with points!), some with family and the rest through couchsurfing. It was incredible to me to witness firsthand how many authentically kind people there are in our world.

So what exactly is it? Couchsurfing.org is a website dedicated to travelers who are curious about the world, meeting individuals from other cultures, and traveling on a small budget. The whole premise is that you join the site to open your home to travelers free of charge. It provides a connection for travelers to contact other couchsurfers to find a place to stay. There is absolutely no money involved at all- you do not charge guests for staying with you and you’re not expected to pay anything when you stay with someone else either.

It’s set up similar to facebook where you create a profile telling the world about yourself: your philosophy, hobbies, travel experiences and travel dreams. In addition, you include details of what sleeping arrangements you have available for guests to use, such as a guest room, pullout couch or even floor space with an air mattress. It’s also quite safe as you can read an individual’s references on their profile from guests or hosts who have met them. If someone receives a lot of negative feedback, they are removed from the site. But out of everyone I’ve spoken to so far through couchsurfing, no one has ever had a bad experience.

It may sound similar to other programs like airbnb.com where people offer their homes to rent out to travelers on vacation. But what I love about couchsurfing, is that it’s free! Not only this, but it has a strong focus on building relationships. So when you stay at a host’s house, they are there too. You meet them, swap stories, sometimes share meals and just learn about so many fascinating people! If you’re looking more for just a free place to stay, this probably isn’t it for you. Couchsurfers like interacting and getting to know their guests.

When we used this for our trip to Europe this summer, EVERYONE was skeptical. Some people were scared for our lives, while others just thought it sounded very uncomfortable staying with people we had never met. But it was incredible! Some days were tough, as I was exhausted and felt much more like going straight to bed than staying up and chatting. But we have so many good stories from it, I would definitely recommend it again! And you will be shocked at how considerate people are. The majority of our hosts actually came and picked us up at the train stations when we arrived- they had no reason to have to do that other than out of the kindness of their hearts. It made things so much easier than wandering around looking for their houses, and even those who couldn’t meet us provided us with very detailed directions. Many times they gave us maps, tips and advice on where to go and what to see. It was like having our own inside scoop at all times. Some made us breakfast the next morning, so made us dinner when we arrived. Everyone was extremely understanding. When we missed our connections a couple days because of train delays, our hosts were not put off by our late arrival at all. In fact, they still came to pick us up and still waited to meet us!

Anja told us her story of backpacking South America for 6 months with a friend- at least that was the plan until her friend met a man in Mexico, he proposed that weekend and she stayed to marry him! Anja spent the rest of the trip traveling by herself (and yes, the friend is still happily married a year and a half later. She’s never even been home to collect her things).

Stijn, our couchsurfing host near Bruges

Stijn opened his home to us which was pretty much like staying in Miracle Max’s house from Princess Bride. Stone floors, wooden ladder to second floor, fireplace with an easy chair pulled up to it and sheepskin rugs and blankets everywhere. Plus he had the coolest accent ever and told us about his non-profit business (even gave us a tour!) helping young people plan their trips around the world at low costs.

Nina gave up her own bedroom for us and slept on the couch in the living room. Etienne had dinner waiting for us even when arrived an hour late due to some issues with getting in his apartment building (the intercom was broken and we had to wait for someone to walk by and let us in!). Mayte toured Paris with us and took us an to authentic Parisian lunch. And that’s not to mention those we’ve hosted at our home as well! Our first couchsurfer happened to be from New Hampshire, about 10 minutes from where my grandparents live and where Pablo and I got married! Other guests traveling from Utah have told us if we want to go skiing/snowboarding in the winter we’re welcome to stay with them as they live close to a great mountain.

We never once had any sketchy guests or hosts. No one tried to rob or kill us in our sleep. I have to say I was blown away by the amount of kindness shown to us during our trip. And we LOVE hosting people at our house as well. Given my passion for travel, it’s always so sad to see others who are unable to go out and see the world because of financial limits. What an incredible thought someone had in creating such a wonderful program that opens doors to so many more people to travel, even if they had never considered it before. If you’re thinking about it, stop hesitating and give it a try! You won’t regret it.

Rocky Mountain National Park- Nymph Lake, Dream Lake, Emerald Lake and Bierstadt Lake Hike (July 2014)

With July 4th falling on a Friday this year, that meant another long weekend that needed some travel plans! After toying around with many national park options for the weekend, we decided on Rocky Mountain National Park. Besides its obvious beauty, the location of being only 8 hours from Lincoln was a large attraction (we’re in summer school now so a bit more tired when combining that with working full time!) as well as the weather factor- July in Northern Colorado is absolutely spectacular! And we couldn’t have been happier with our choice.

Our first views of RMNP, above Nymph Lake

Although there are a few campsites available in the actual park, they were all completely booked. I decided to expand my search to camping in Estes Park, the lovely town right outside the Eastern are of the park where we were interested in hiking. There were quite a few camping options here, though many were also full. We chose Hermit Park Campground which was about 2 miles south of Estes Park ($20/night). It was perfect! A bit farther from RMNP (it took us a little over 30 minutes to make it to the trailhead from our campsite) but it was camping in an actual park, not an RV park site. Our campsite itself was beautiful and the toilets were the cleanest I’ve ever seen when camping. We didn’t get to do any actual hiking and exploring in Hermit Park, but even just staying in our little spot was awesome.

water break along the hike

We left Thursday after work and it took us about 8 hours to drive the whole thing to Hermit Park. We didn’t arrive ’til close to 1:00am, so we took it slow on Friday the 4th. I knew I wanted to do some lake hiking that day since that wouldn’t be as difficult as climbing an actual mountain and would give us some time to adjust to the altitude. We entered RMNP through the Beaver Crossing entrance ($20 fee good for 1 week) and headed for the Bear Lake Trailhead. Because we got there later in the morning and it was a holiday weekend, we drove to the Park and Ride spot in the park and hopped on a shuttle that took us to the trailhead. The shuttles were great, arriving every 5 minutes to pick people up, and we had no trouble catching one for the way back either- not to mention they’re free!

Dream Lake
Dream Lake

The rangers at the Bear Lake Trailhead were very nice and helpful. We got a map for our route and started out on the 3.6 mile round trip hike. We hit the first lake very quickly, but Nymph Lake was nothing to be excited about. We barely even stopped and just kept hiking past on up to the next one- Dream Lake.

Hallet Peak and Flattop Mountain above Dream Lake

Dream Lake was much prettier. Sadly, the day was cloudy so the colors aren’t quite as vibrant as we were hoping for. The trail was also very crowded with families out for the holiday. Although the entire trail only has about a 600 ft. elevation gain, the trailhead starts above 9,000 ft. The fact that I’m out of shape combined with where I live (Nebraska) made it for a little bit of tough going- it was hard to catch my breath at the altitude! The hike was still fun though and a good starter for our next day.

Almost married 2 years!

Last lake on this route was Emerald Lake. It honestly looked pretty similar to Dream Lake, and I thought Dream Lake was better. The rangers had told us that thunderstorms were in the forecast as they are most afternoons in the park. Just as we were leaving the lake to hike back down (around 1:30pm) rain started. It was actually really fun since the rain was not coming down hard at all and the thunder was very loud!

Emerald Lake
Emerald Lake

One highlight on the trek back down was seeing an elk! It was right on the side of the trail and didn’t seem too disturbed by the hikers passing by. When we reached the bottom it was no longer raining and the ranger told us the nearest lightning strike was 41 miles away. We decided to head out on another hike, this time to Bierstadt Lake. The shuttle driver had given the most valuable tip all day- if you want to hike Bierstadt, DON’T get off at the Bierstadt Lake stop. Instead take the shuttle to Bear Lake and then hike over to Bierstadt. It was 2 miles from Bear Lake to Bierstadt, but it was only 200 ft elevation gain. Hiking from Bierstadt Lake trailhead was literally switchbacks all the way up to the lake- would have been SO exhausting.

DSC_0046

DSC_0055

We took the hike around Bierstadt Lake and stopped at the “beach” viewpoint. The beach was actually just a marsh :-). At this point our camera was dead so we hiked down through the switchbacks to catch the shuttle back to our car. We headed to the nearest Starbucks in Estes where we charged the camera battery and checked out new GoPro footage from the day. It was going to be an early morning the next day as we planned to do a sunrise hike and then hit Flattop Mountain. Read about those soon!

Arches National Park: Moab, UT (May 2014)

Although both Pablo and I had already been to Arches National Park, when rain showed up in the forecast for Bryce Canyon we had to change our itinerary. Bryce still awaits for a future visit.  At least we still made it to Escalanate

View through Double Arch

Moab is beautiful. And apparently quite popular during Memorial Day weekend, we had to wait in a long line of cars to enter the park. After about 20 minutes we paid our $10 entrance fee which covered us for 7 days (the minimum time option).

We stopped at the Visitor Center right away since we wanted to do some canyoneering. Unfortunately the ranger was zero help in this area other than directing us to the forms to fill out for this (free!). There was not much information in the way of maps or locations for good rappelling spots, but we found where we thought Elephant Butte was and decided to head there.

Double Arch
Double Arch

First hike we did was to Double Arch which you could pretty much see from the road. Very short trip, like 1/4 mile. You can actually climb up the rocks and sit right in the arch itself, though it’s a bit steep and I was pretty afraid of it. I’m told I’m just a wimp and it’s really not that bad which is probably true since parents had their small children up there with them. We actually climbed down the other side of the arch (ABSOLUTELY TERRIFYING) to try to find Elephant Butte which was a fail. However, this landed us into the Cove of Caves, another cool site.

Cove of Caves, which you can see from the Double Arch

We turned around after hiking across the cove and decided to move on to Delicate Arch. This is the most famous arch, but was my least favorite. I think this was due to 1) the huge amount of crowds there and 2) the steepness of the hike up. It actually wasn’t all that steep, but it’s uphill pretty much non-stop the whole way which I think is about 1.5 miles. There’s bathrooms at the parking lot, but no water so come prepared! The large crowds also easily filled the parking lot and we had to drive a ways down the road and park on the side. Not a big deal, but just something to be aware of.

Delicate Arch
Delicate Arch

After Delicate Arch is where things really got fun! We decided to head to Devil’s Garden which had a lot of hiking options. The trail we picked was the one headed to Double O. We didn’t end up doing the full hike as it was getting late/dark/we were hungry. But we stopped at 5 arches along the way and the whole trip probably took around 3-4 hours.

Pine Tree Arch (not super exciting)

The first detour option is to Tunnel Arch (very boring) and Pine Tree Arch. It was a quick detour but neither of these arches were particularly pretty. We kept going and the next one we came to was Landscape Arch. Beware that this area around Landscape Arch is completely covered in sand- we saw some abandoned strollers that were waiting to be picked up for the hike back out when the trail had solid ground again.

Landscape Arch
Landscape Arch

Hiking up from there to the next arches was definitely my favorite park of the day. There were lots of rocks to scramble over and around which would make it a little difficult with small children. We had tons of fun though and Pablo was quite disappointed to notice there were a few possible rappel areas- but of course we had told him to leave all the ropes and harnesses behind since we had been striking out all day. Oops 🙂

Hiking up past Landscape

We hit Navajo Arch next by taking the detour. And it was the BEST. Just look at how beautiful it is! Only .3 miles off the main trail.

Navajo Arch after walking through it
Navajo Arch from the back after walking through it

We walked through the arch and then turned around to take these photos. Then saw this small pathway(?) out the backside and took that to get back to the main trail.

Hiking out the back way from Navajo

Next up and final arch of the day was Partition Arch. Really great view of the whole area and good one to end on.

Great view from Partition Arch

We hiked back out and drove towards the picnic area we had seen close to the parking lot for Devil’s Garden. Ended our day with some good old tomato soup and grilled cheese.

Our European friends were very excited to try Campbell's
Our European friends were very excited to try Campbell’s

Review: Partition Arch and Navajo Arch were my favorites. Moab is just all around beautiful and there were way too many trails for us to hit them all in one day. Definitely picnic there if you can, it was a beautiful location to enjoy some good food after a long day of hiking. There’s one campsite available again right near the picnic area by Devil’s Garden, but it was completely booked when we were there. Maybe next time!

Our beautiful photo location.
Our beautiful picnic location.

We drove about 1 1/2 hours from Arches on to camp near Goblin State Park. The park was full so we camped in the gravel parking lot camping area closer to the main road. There was just one other RV there and it was free, though camping on rocks is NOT comfortable. Then we headed on to the slot canyons the next day!

Peek-A-Boo and Spooky Slot Canyons: Escalante, UT (May 2014)

Long weekend last weekend meant we had to travel somewhere! I couldn’t stand wasting an extra day off by staying in town 🙂 So we decided on a 15 hour road trip of course! First stop was Arches National Park, and then we headed onto my favorite: slot canyons!

DSC_0729
Drove through Dixie National Forest on our way from Arches to Escalante. It was too pretty to not stop for a photo, though much chillier than the other areas.

Hiking a slot canyon had been on my wish list for a while, and when I found Zebra Slot Canyon in Escalante, UT I was thrilled! Only problem was when we actually started driving, rain was in the forecast. When there’s a chance of rain at all, a slot canyon is the last place you want to be. So we had to adjust our plans and delay our trip to Escalante by a day. Not only that but when we got there the rangers informed us that Zebra was full of water. If we wanted to hike it we’d have to swim through freezing cold water- which I definitely did not want to do.

Great view from the start of the trail before even hitting the slot canyons

Instead we hiked Peek-A-Boo slot canyon and Spooky slot canyon, also in Escalante. These canyons are off of Hole-In-The-Rock Road, a famous road in Escalante, though quite rough. While Zebra is only 7.8 miles down, we had to drive the full 26 miles to reach Peek-A-Boo and Spooky. This took a little over an hour as the road was SUPER rough and we could only average about 20 mph. Picture driving down a giant rumble strip for an hour straight, where the road is dirt and the ruts are from wind blowing the dirt around. It was rough. We were very ready to be out of the car at the end. But everyone agreed it was worth it!

The rock face at the beginning of Peek-A-Boo. Scariest part for me!

There are two parking lots at the end, and we had to park in the one that was a mile from the actual trail since our Nissan Versa didn’t have high enough clearance to make it over the gigantic bumps along the road for the last mile. It was no problem though and we just parked and hiked over.

Peek-A-Boo was really pretty

The hike itself was AWESOME!! Bring lots of water as it was warm and very sunny and dry. We hiked for about 5 hours and did Peek-A-Boo and Spooky and about half of the Fork.

Peek-A-Boo
Peek-A-Boo

The start of Peek-A-Boo does involve a scramble up a rock which was a little scary. If there hadn’t been someone at the top to haul me the end of it, I don’t think I would’ve made it. There is an option to hike around Peek-A-Boo and come through the canyon from the back which would then involve going DOWN the rock face at the beginning. I’m not sure if this would’ve been better or scarier, but some people did it that way instead. The canyon itself also required some scrambling throughout so it was good to be in a group and have people to help hoist each other up along the way.

Scrambling along the way

It was pretty, a reddish color throughout. There was a narrow section where we had to squeeze a bit to make it through, but it wasn’t too long. There were other people much larger than I am who made it through so don’t be too worried. And some people even had their little kids hiking it with them as young as 3 years old (they were some tough little girls!).

Cairns guiding us from one canyon to the next

At the end we took a right and followed the cairns for about 1/2 mile across over to Spooky slot canyon. There are no signs anywhere in the area, but the cairns are excellent and we didn’t worry about getting lost at all.

Getting ready to squeeze through Spooky

Getting through Spooky was a bit more challenging than Peek-A-Boo and TONS of fun! The narrows section in here is even thinner than in Peek-A-Boo and much longer. It’s not as pretty, the rocks are a darker gray color but it was so fun and we loved it all. There is one section where we had to scramble down, underneath a pile of rocks and out the other side. That was a bit stressful as we couldn’t see where we were going, the space was dark and tight and we had to have someone at the end to help us down. But honestly it was less scary to me than scrambling up at the beginning of Peek-A-Boo.

Spooky
Spooky

Although the trip was a ton of driving, it was DEFINITELY worth it!! It takes a bit of time hiking out to the slot canyons as well and on the way back it’s all up hill. That was tiring hiking up the rocks and through the sand but we all agreed we’d love to do it again. I would totally encourage anyone to go visit! Another bonus? It was all completely free and the rangers are super helpful with tons of information.

Nice guys with a truck drove us the mile back to our car at the end.

Most helpful tip I learned: Call the visitor center and talk to the ranger. They were really helpful giving suggestions and even directions on how to find the visitor center.

Myth Buster: Credit Score Breakdown

With graduation this past weekend, there are lots of new grads heading out into the world in hopes of landing their dream jobs. The real world is full of exciting new opportunities and shocking realities such as student loans bills. Many young people will be looking for their first credit card and trying to learn how to balance all their finances. When I graduated, credit scores were a completely foreign world to me. Since I believe in not spending more than I have, I had never had a need for a credit card. But using a debit card and cash to pay for everything doesn’t do you much good, in fact it actually hurts you. In fact, the fewer credit cards you have, the more opportunity you are missing out on to raise your credit score. Those with more lines of credit can actually build their scores higher faster than those with fewer lines of credit. So although applying for multiple credit cards can seem like a bad idea, it’s actually quite the opposite.

This is because you aren’t taking the opportunity to build your credit score. I hadn’t realized how crucial this was until we applied for our first mortgage and were denied because of my low credit score. This wasn’t based on me having any negative history like not paying my bills on time. It was just because I literally did not have much history. I had already paid off all my student loans, and felt like that should count for something. Not to mention that we had gotten a car loan about 8 months earlier and had been making all our payments on that as well. Didn’t matter, we had to shop around quite a bit before we could find someone willing to give us our mortgage loan.

I’m happy to say 1 year later I’ve made it a point to build my credit score- and it’s up 120 points from last year. It started slow, at first all I could get was a “secured” credit card through our local bank (which was pretty much just a debit card, but it was reported to the credit bureaus as a credit card so that helped me raise my score). I added a couple of department store credit cards (JCPenney and Kohls) and that was it. But by doing those small things, my score increased enough that the really good cards are now available to me!

So how does a credit score work? Here’s the basic breakdown:

Credit Scores


Payment History (35%): The biggest aspect of it comes from your ability to pay your bills on time. I always advise to pay your full amount owed each month in order to avoid insanely high interest charges. I would say if you aren’t going to be able to pay your full bill, don’t get credit cards at all.

Amounts Owed (30%): Next up is the current outstanding balance you owe on credit lines. When I’m getting ready to apply for a new card, I always make sure I first go and pay off all my current balances, even if they aren’t due yet. Usually it takes 1-2 business days for this process, so keep that in mind if you try to do this on a Friday, it may take until Monday or Tuesday for the payments to go through.

If you aren’t able to pay all your balances off when you want to apply for a new card, pay attention to which credit cards have the most spending on them in ratio to the total credit line. For example, if you have a $500 balance on a credit card that has a $1,000 limit, that means you’re using 50% of the available credit. However, if it’s a $500 balance on a card with a $10,000 limit, that’s much different (only 5%). If you’re applying for bank credit cards (Chase cards are my favorite!) you can also make sure to pay down the balances you have on current cards with that bank.

Length of Credit History (15%): The longer you have a credit card, the better. Unless I run into a point someday where I can no longer new credit cards because my amount of available credit lines is already so high, I don’t get rid of credit cards that have no annual fee. There’s just no point. You might as well keep them. However, if you want these to show up on your credit score and help prove that are responsible in the long term, you need to be using them regularly. I have a couple cards that I’ve had for a while and really don’t have great rewards at all. So in order to still take advantage of them boosting my score since I’ve had them a while, I just charge one thing per month on them. One of them is set to pay our Netflix account ($7.99 total) and the other I use for redbox movie rentals ($1.20 each time). It’s next to nothing in spending, but it still is reported to the credit bureaus that I’m using it.

New Credit (10%): This can negatively affect your score if you have tons of new credit cards without much history behind them. Or if it looks like you’re going on a crazy credit card spree. But I’ve gotten quite a few over the last few months and never had a problem. I’ve spaced them out by a few weeks and months- I didn’t apply for 6 all at once in the same month. I’m going to lay off new credit cards for probably a the rest of the year now to take a break and let these build. Unless an offer comes up that I just can’t refuse 🙂 The application for your new credit card shows on your credit report for 2 years (seems like forever!) which can also hinder you in getting approved for new cards. But I’ve heard that most credit card companies don’t care about them after 6 months.

*I’ve also heard that if you are thinking about applying for a mortgage, you may want to hold off on applying for any new credit cards for the two years prior to the mortgage application. But honestly, I don’t know the reasoning behind this or if it’s really that true. More research needs to be done.

Types of Credit Used (10%): This just refers to the many aspects of credit: student loans, car loans, mortgage loans, credit cards, etc.

Hope that gives at least a little more understanding for you. Get out there and start building credit!! If you’re looking for one card to start with, I’d recommend the Chase Freedom card and you can read about that here. It doesn’t have an annual fee and I think it’s always safer to start with that route. Chase is just my favorite bank for rewards, especially because you can combine all your points from all your Chase cards together! Best thing about Chase Freedom to me are the rotating categories of earning bonus 5% back- especially on gas and restaurants!

Last tip- it’s free to check your credit score once each year. I definitely recommend doing this before you apply for your first card so you can get an idea of your ballpark range. You can also take advantage of the Barclay World Arrival MasterCard, among others, which gives you your updated credit score on a monthly basis for free.

Europe Itinerary

I’m so excited to take our big Europe trip this summer! Growing up, my family always took a big family vacation each year which was a highlight for me. I love international travel so much and have continued traveling each year with family, friends or on my own. But last year was the first in a long time when I didn’t take any big trips and didn’t leave the country- and I was NOT happy about that. So I knew for sure that 2014 needed to have some major travel involved.

Itinerary Map

 I started researching options in September of last year and can’t believe we’re finally only 3 months away! For all of you who have asked, here is our itinerary for our trip. Yes, I know it’s a lot. Yes, we’re only going for 2 1/2 weeks. Yes, we’re going to be tired and busy. But our thought is that this is our time to explore all over Europe on an intense backpacking trip and later on we can go back and spend longer amounts of time in specific countries that we enjoyed. So far flights and train tickets have been bought and we’re working on the other details still. I’ll be posting our budget and spending on here as time goes along to everyone can see what we used and how we afford it. If you’d like a preview into our travel $ saving strategy, click here. And then you can take a look at the credit cards that I use as well.

DayCountryLocation
Day 1US to UKFly Chicago to London
Day 2UKLondon
Day 3UK to FranceTravel London to Paris via Chunnel. Tour Paris
Day 4France to BelgiumTour Paris; travel to Bruges
Day 5Belgium to LuxemborgTour Bruges; travel to Luxemborg
Day 6Luxemborg to GermanyTravel Luxemborg to Munich
Day 7GermanyTour Fuessen
Day 8Germany to Czech RepublicTravel to Prague
Day 9Czech Republic to AustriaTour Prague, Travel to Vienna
Day 10Austria to HungaryTour Vienna, travel to Budapest
Day 11Hungary to AustriaTour Budapest, Travel to Salzburg
Day 12Austria to SloveniaTour Salzburg, travel to Slovenia
Day 13Slovenia to ItalyTour Bled, Travel overnight to Venice
Day 14ItalyTour Venice, , travel to/tour Pisa
Day 15ItalyTravel Pisa to Monterosso, Hike Cinque Terre, travel to Florence
Day 16ItalyTour Florence, travel to Rome
Day 17ItalyTour Rome
Day 18Italy to SpainFly to Barcelona/tour Barcelona/Fly to Dublin
Day 19Fly to U.S.Fly Dublin to Chicago, drive to Lincoln

We’re planning to do a lot of couchsurfing along the way, more on that to come. If anyone knows of friends or family along our route who would be willing to open their homes for a night, we’d love to chat and see if we could stay with them! Also, if you have any recommendations of sites to see along our route, please let me know! I’m still doing lots of research on this and am totally open to feedback and opinions!

Never Use Your Debit Card Again

“Never use your debit card for purchases.”

I WISH someone had given me that advice years ago when I opened a new bank account and got my first debit card. I felt all official and thought how easy it was to not have to worry about carrying cash any more. Wow, when I think back now of how many rewards I was missing out on it makes me want to cry.

Debit cards are pointless. Literally. It’s just like paying with cash, which does you no good at all other than you’ve successfully bought the item you wanted. But there’s a whole world of rewards out there just waiting for you! Whether you’re wanting to keep it basic and stick to just earning cash back on items or are more interested in being able to earn free travel miles (like me!), the options can be overwhelming. Once my mind was opened to it, I’ve never looked back and never used my debit card for a single other purchase.

You may call me crazy, but I actually consider following the world of credit cards a hobby of mine now. I’ve found the travel and credit card reward blogs that I like and I’m subscribed to them. I receive daily and weekly emails that I review looking for new deals, tips and tricks. I couldn’t even tell you how many hours I’ve spent researching all this stuff. But I figured if I’m going to be dedicating so much time into growing our budget as much as possible, I should be sharing these findings with everyone else as well.

First of all, if you are not confident in your ability to control your spending, you should really just stop reading here. All my advice is based off the caveat that you will ensure you pay off your credit card each month. If you don’t, the amount of interest you will be charged FAR outweighs the rewards you’ll ever be able to earn and completely cancels out all your efforts. So seriously, if you aren’t very good at keeping your spending in check as it is, or remembering to pay your bills on time, don’t get into the credit card world. Credit card debt is a dangerous thing to be involved in and extremely difficult to escape.

If you’re still with me, then you should also know that despite all the cards we sign up for, we still don’t make any extra purchases than we normally would. I don’t ever pay extra money to buy things I don’t need just in order to take advantage of a credit card bonus or the rewards they offer. It’s simply not worth it. And right now we have enough credit lines open to spend close to 50% of our annual income. That’s scary. Don’t do it. Stick to your regular spending habits.

If I still haven’t scared you away, yay! Time to share the fun stuff. Did you know that since January of 2014, I have gotten 6 new credit cards and Pablo has gotten 1? There are so many offers out there and it can get overwhelming. But I’ve determined my strategy. Not only that, but my credit score is now higher than it’s ever been (last I checked it was a 740). Here’s just a sampling of what we’ve earned:

40,000 bonus miles from the Barclay World Arrival Master Card

45,000 bonus miles from the Chase Sapphire Preferred Visa Card

20,000 bonus points (miles or cashback) from the Chase Freedom Visa Card

Just about to earn 50,000 points and $50 statement credit with our Hilton Honors Visa Card

My most exciting news yet, I just got approved for the CITI AAdvantage Card which will give us 100,000 bonus miles after meeting the minimum spending requirement!!

Intrigued yet? Once I started earning these, I was hooked. I now don’t even look at a credit card that is not offering a huge sign up bonus. It’s simply the absolute best way to earn cashback and miles. Many people worry about the effect that all this credit card signing up can have on your credit score. I know I was apprehensive, but I can say that my credit score has significantly increased from where it was a year ago. If you’d like to learn more about credit scores and how they work, I’m working on a post on that. Keep in mind that I’m by no means an expert in all things credit cards, but I’ve definitely poured a lot of time into learning about this and there’s a lot of beneficial information. Read on to the next post for more information.